

Deploy The Flow
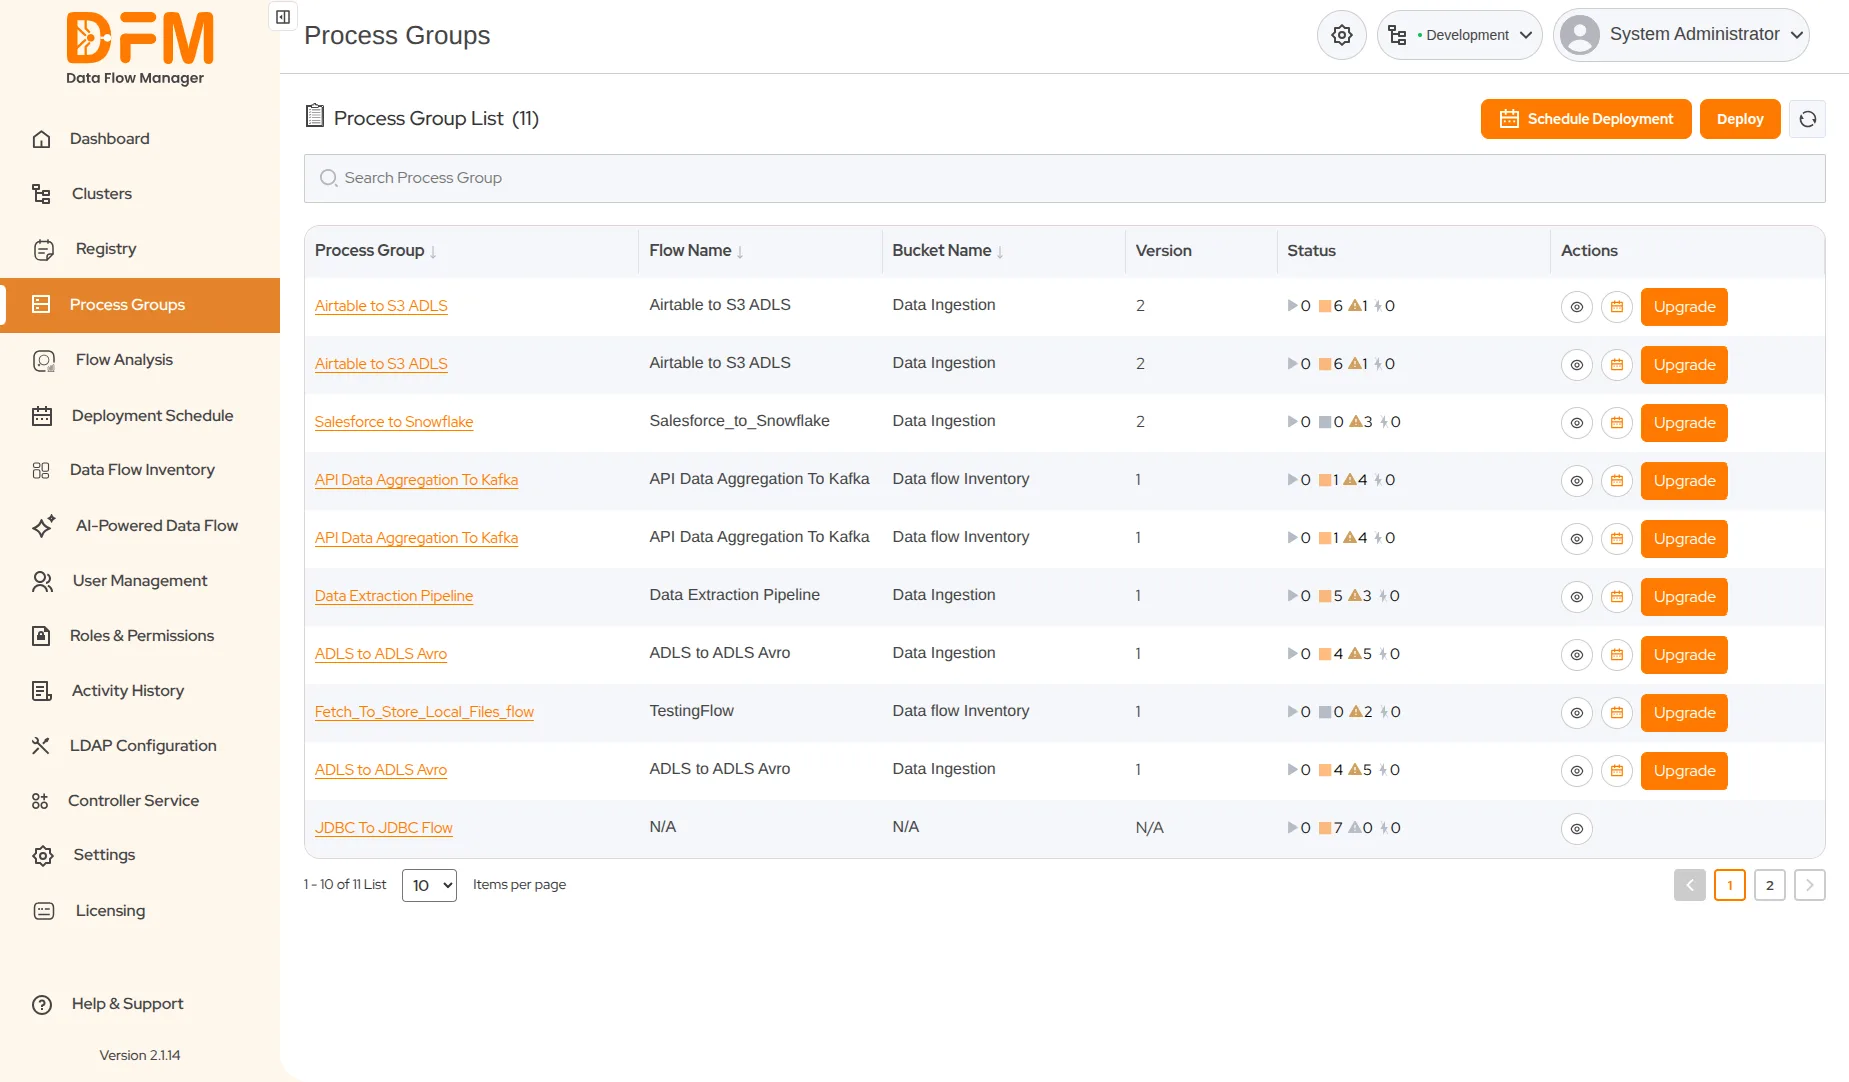
The Process Group module displays all flows available in the currently logged-in cluster. To deploy a flow you recently added to the Registry, follow these steps:
Follow these steps:
- Go to the Process Group module to view all available flows.
- From the top right corner, click on the Deploy button.
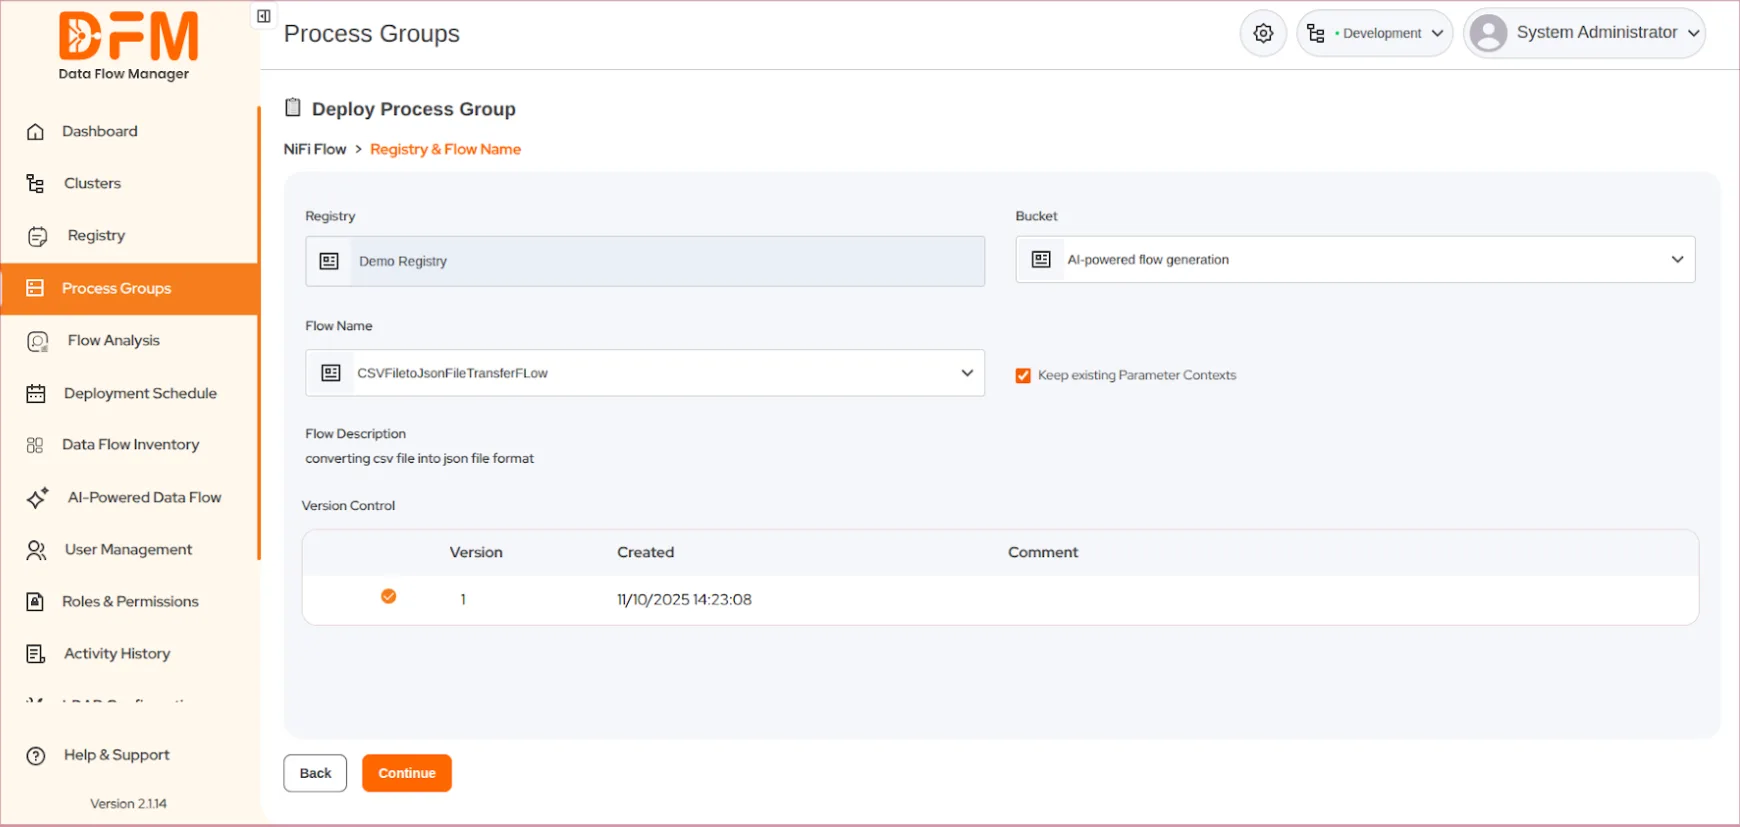
- Choose the Bucket and Flow Name (as saved while adding the flow to the Registry) and select the flow version, then click Continue.
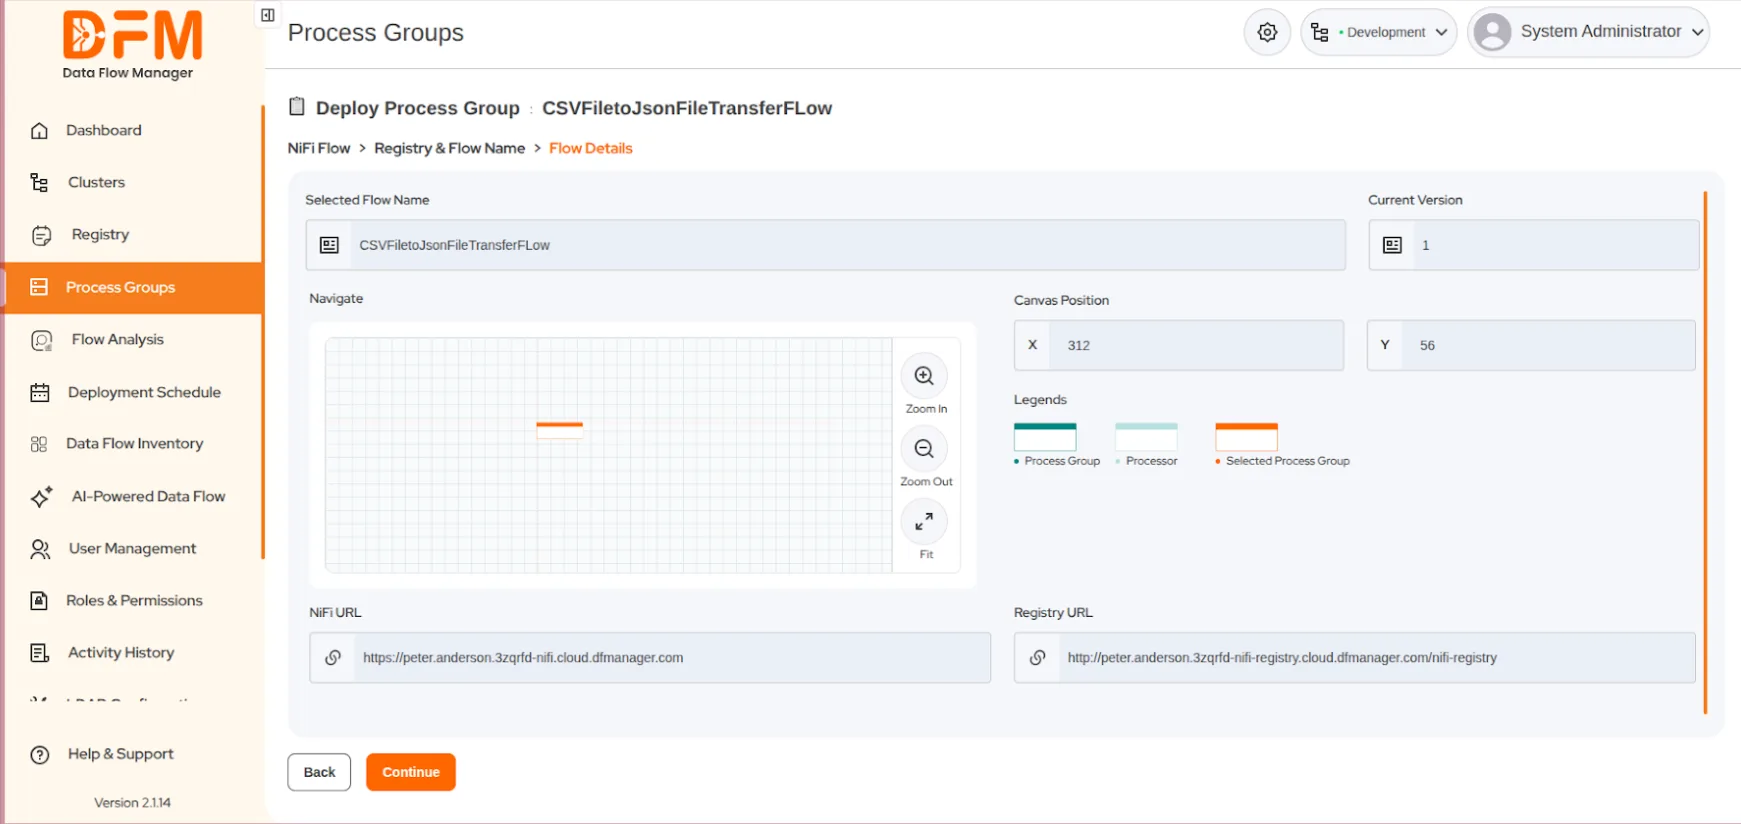
- Set the canvas position where your flow will be displayed on the NiFi UI. Visual indicators to identify your current process group:
- Blue Shade: A process group (flow) that is highlighted with a blue shade indicates that it is currently active or selected.
- Light Shade: A processor with a light shade represents one that is not selected or not actively being edited.
- Orange Shade: A process group highlighted in orange implies that it is being deployed
- Drag your process group left, right, up, or down to set its position and click Continue.
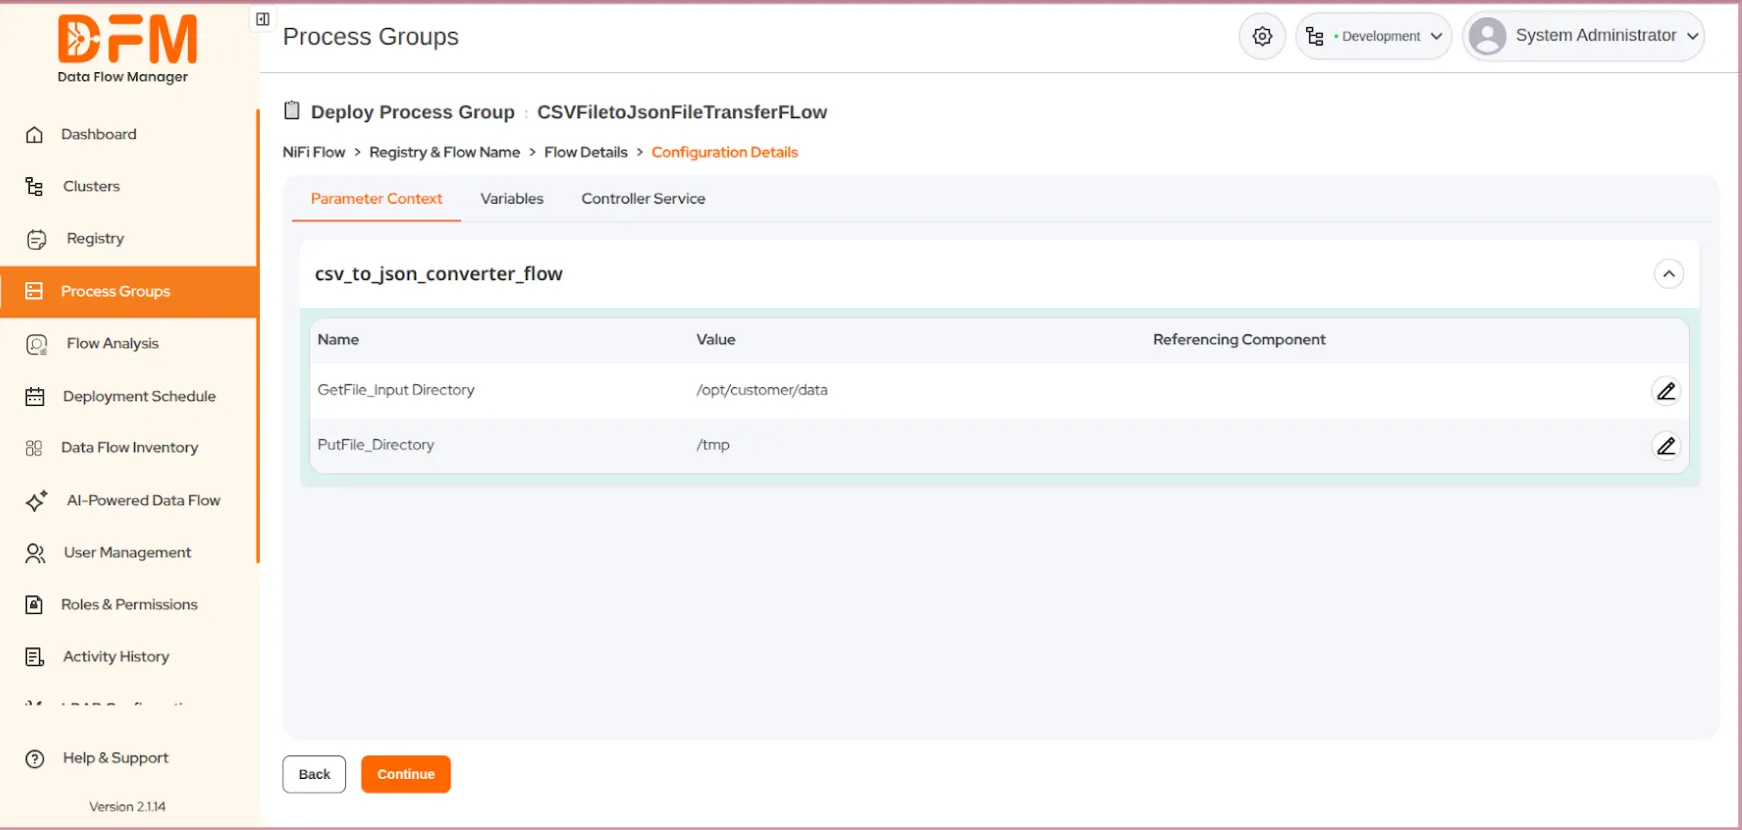
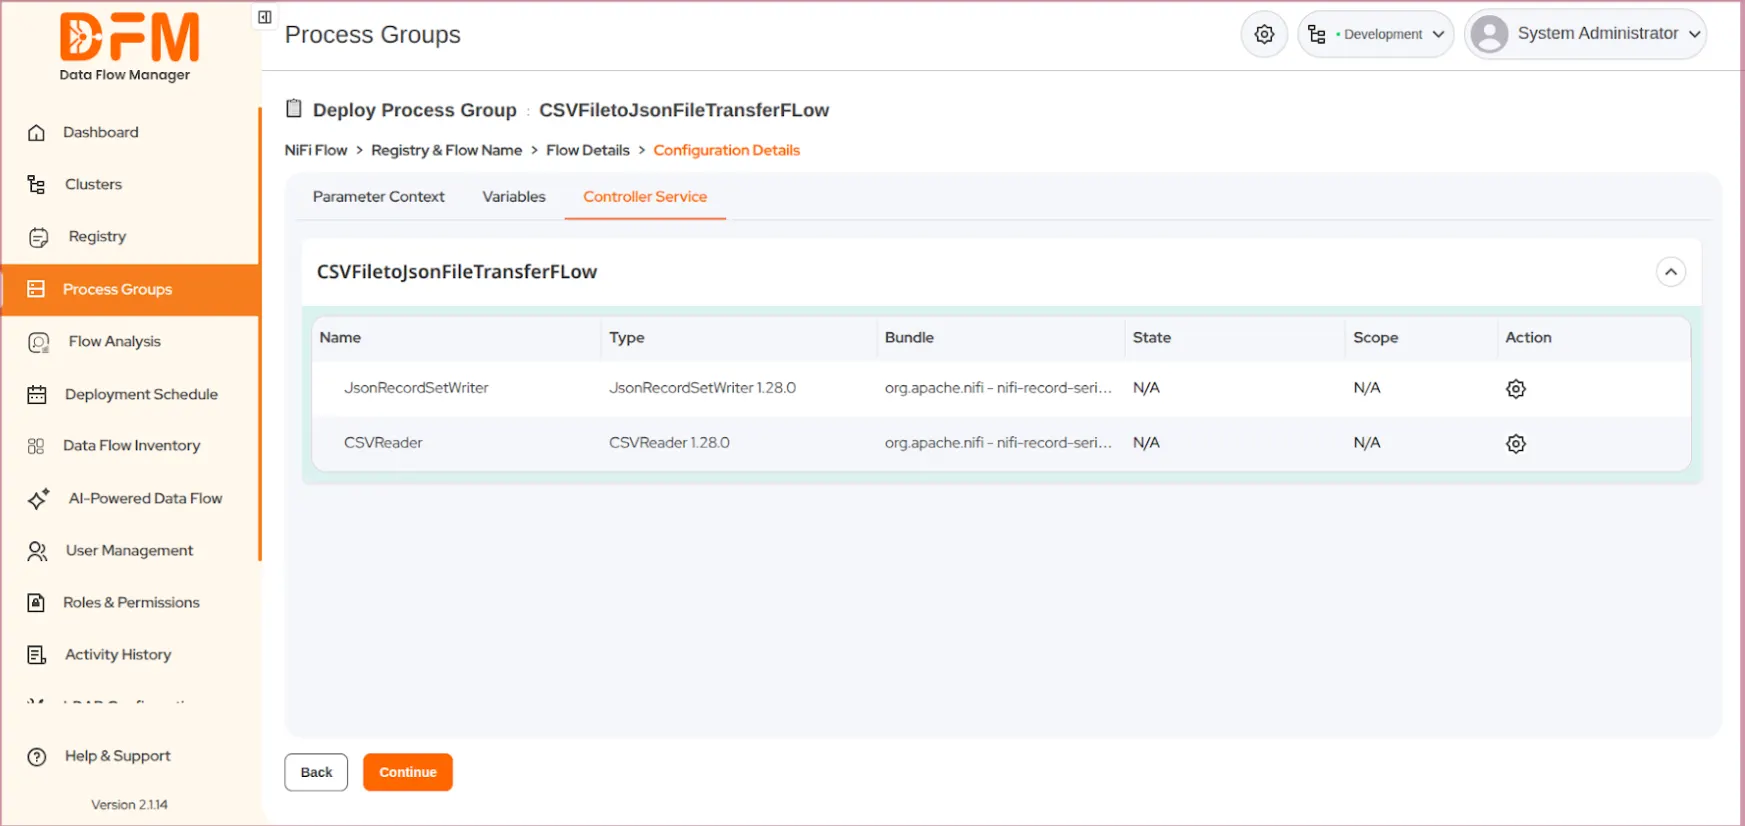
- View all parameter context, variables, and controller services linked to the flow. Edit them with the necessary configurations.
- If needed, you can edit the properties of the controller services through the settings option and continue.
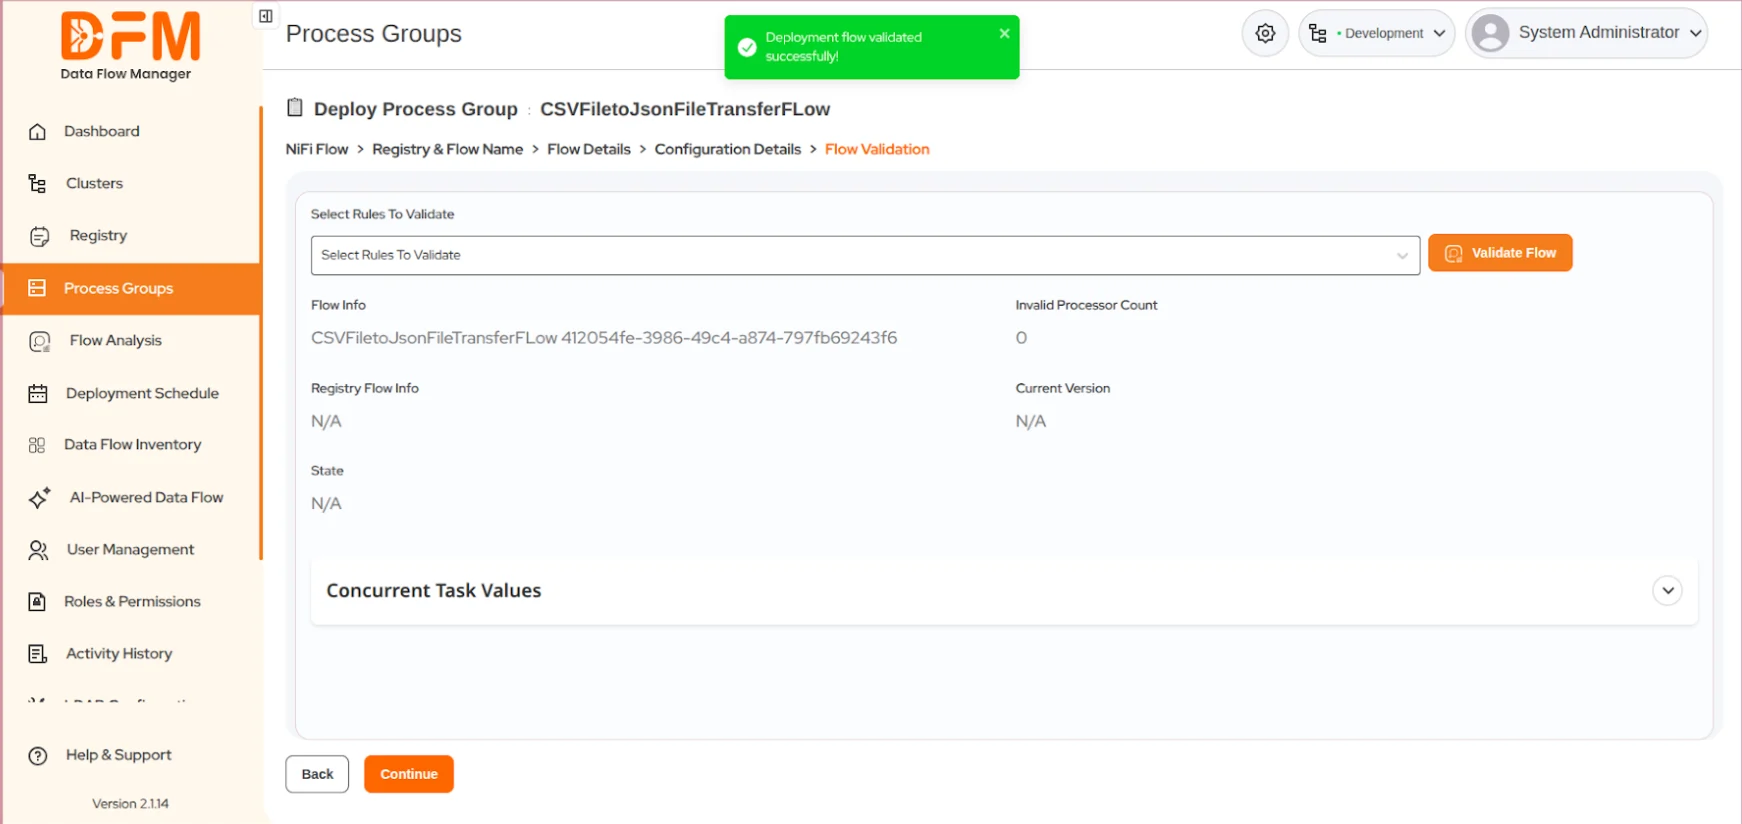
- Select the validation rules from the dropdown and click Validate Flow. This will check the flow for any configuration errors or missing components.
- If everything seems good, click Continue.
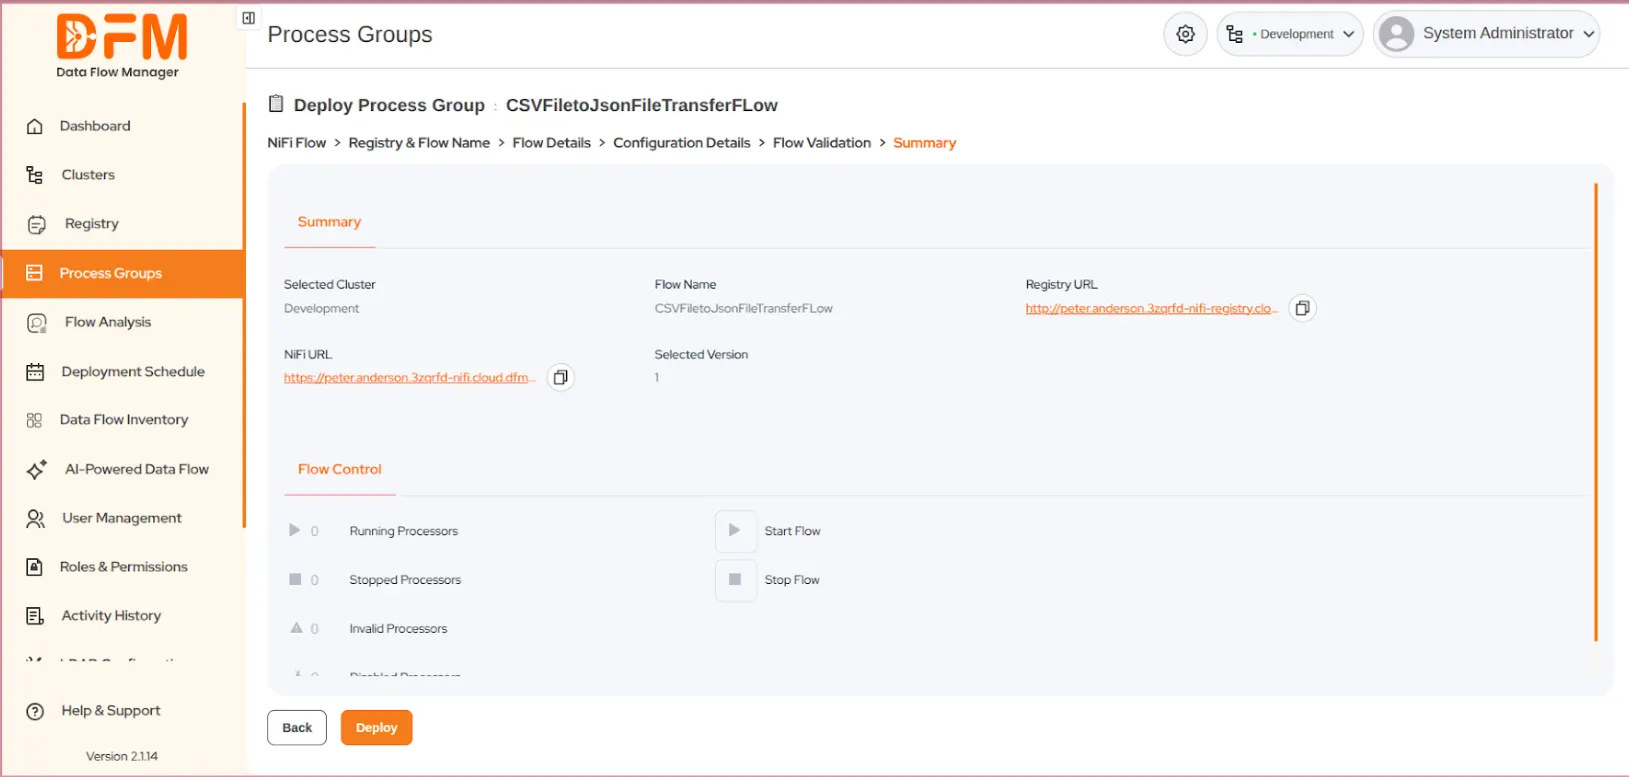
- Finally, you will be redirected to the summary page. Verify the details of the flow. Choose whether you want the flow to start or stop after deployment and click Deploy.
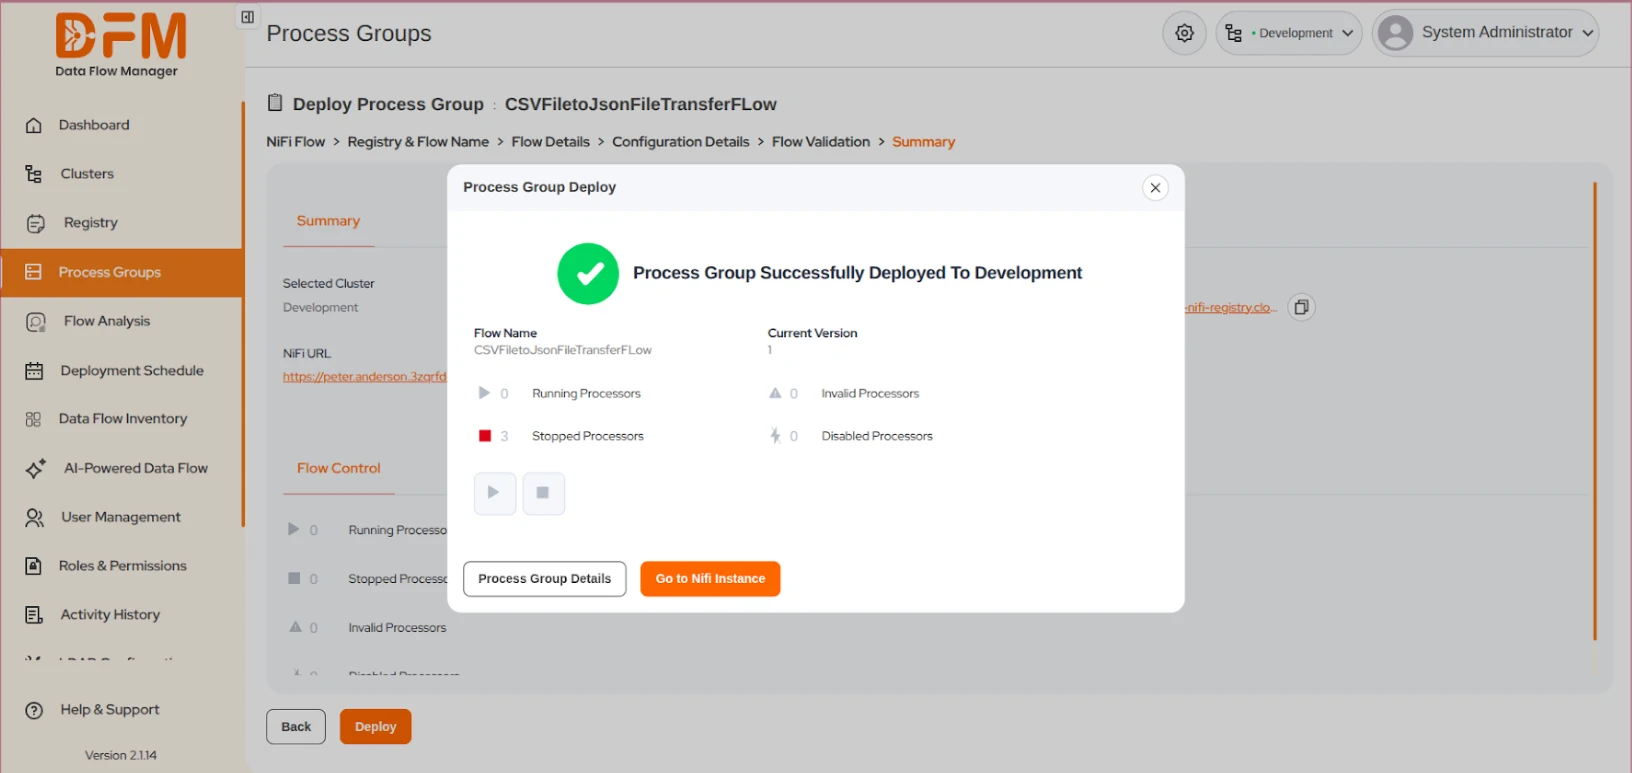
- You’ve successfully deployed your first flow. You get a confirmation message about the successful deployment.
You’ve completed the basic tour! To unlock all features and get the most out of DFM, consider upgrading to a full plan.
Contact our support team [support team email].
