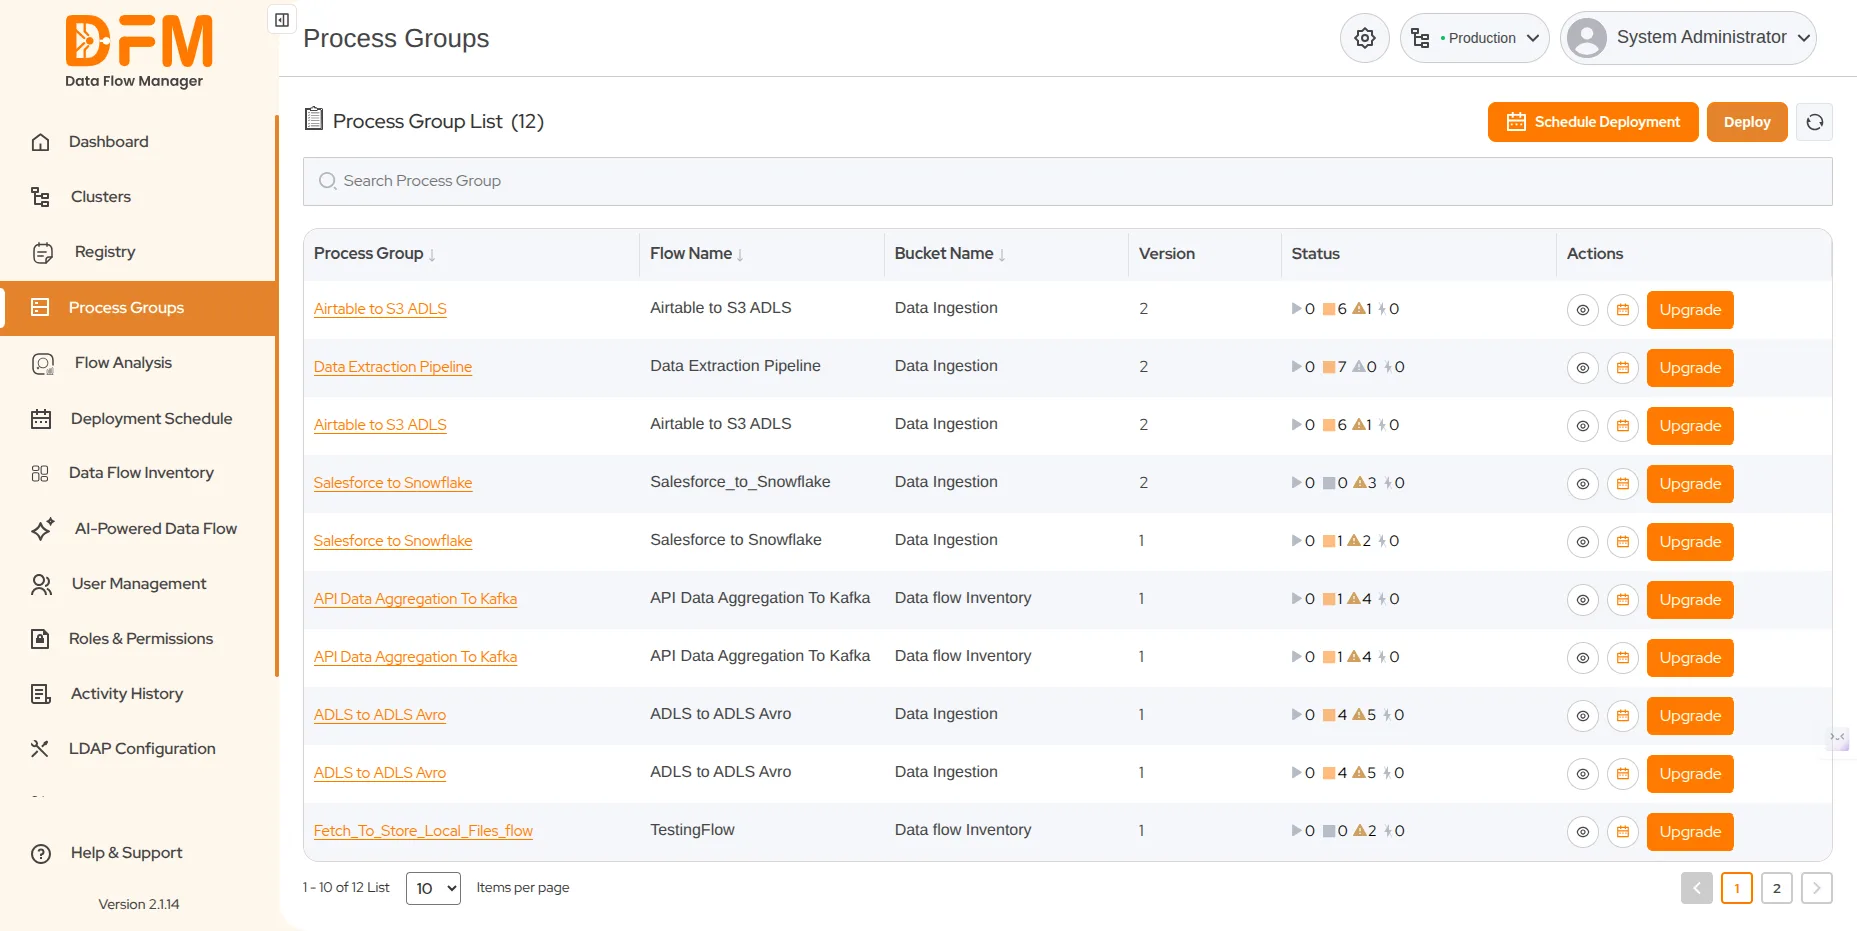
How to deploy a process group?
To deploy a process group:
- Click the Deploy button on the top-right corner.
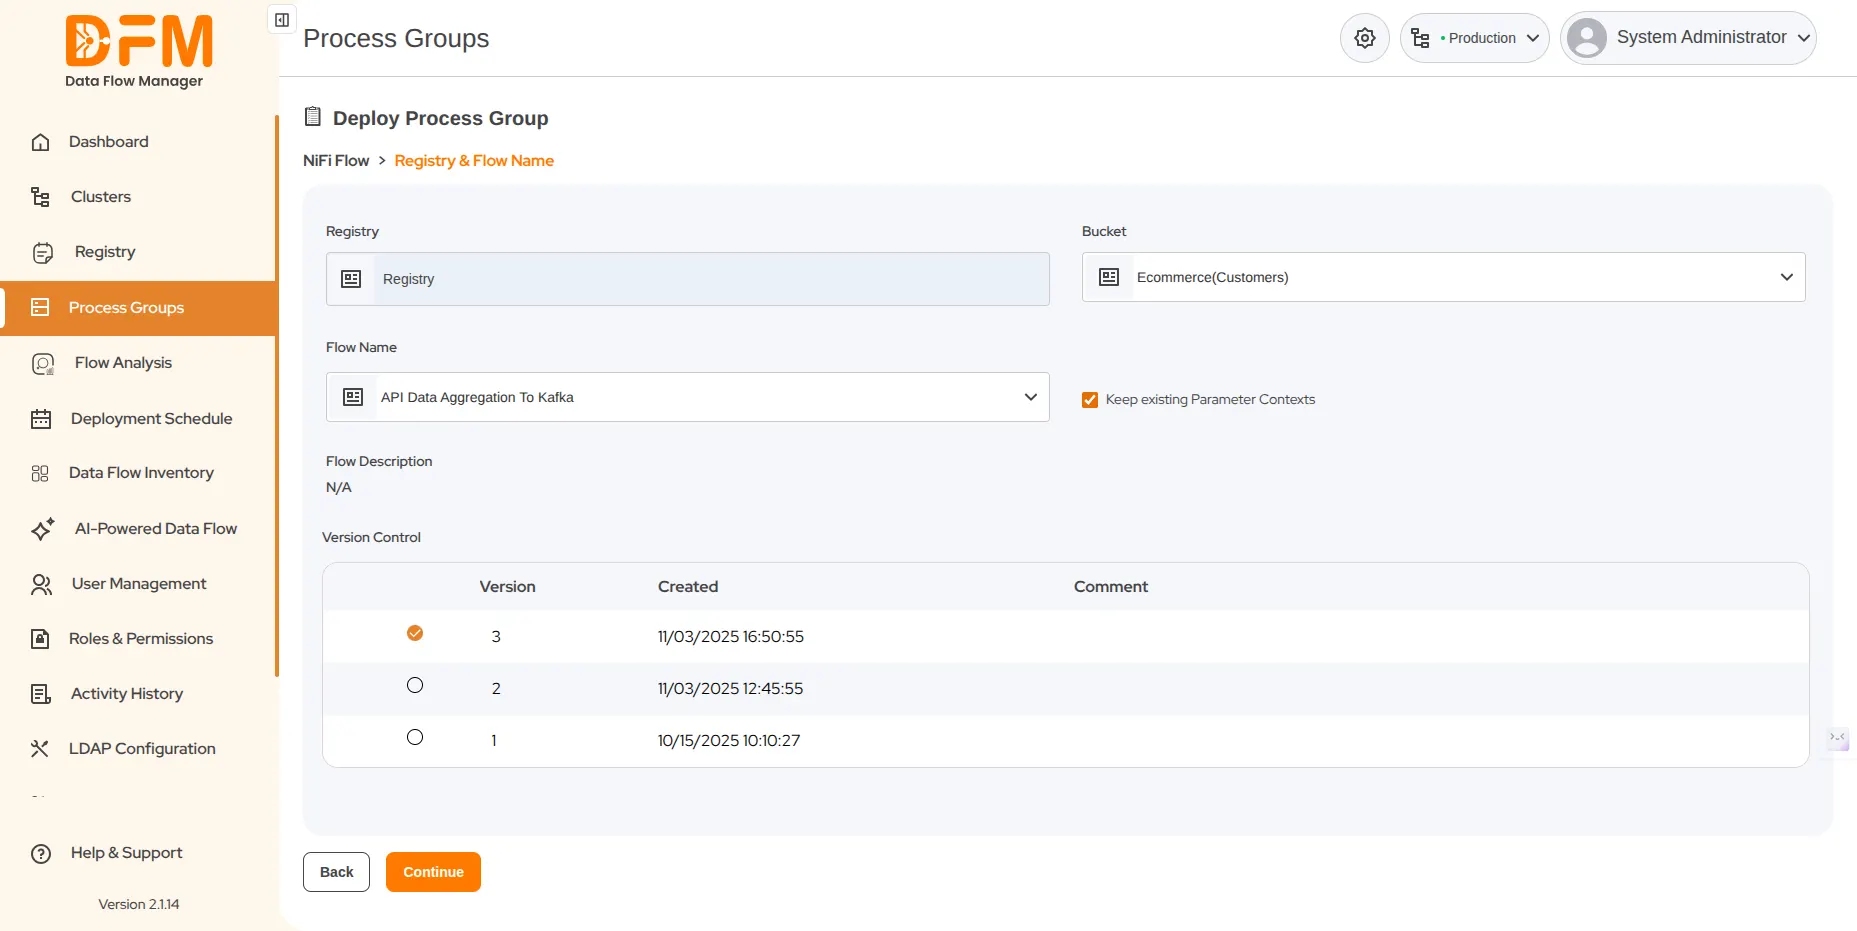
- Select Bucket and Flow Name.
- Mark the checkbox to keep existing parameter contexts. Otherwise, unmark it.
- Select the flow version you want to deploy and click Continue.
- Set the canvas position where your process group will be displayed on the NiFi UI.
- Drag your process group left, right, up, or down to set its position and click Continue.
- Visual indicators to identify your current process group:
- Blue Shade: A processor that is highlighted with a blue shade indicates that it is currently active or selected.
- Light Shade: A processor with a light shade represents one that is not selected or not actively being edited.
- Orange Shade: A process group highlighted in orange implies that it is being deployed.
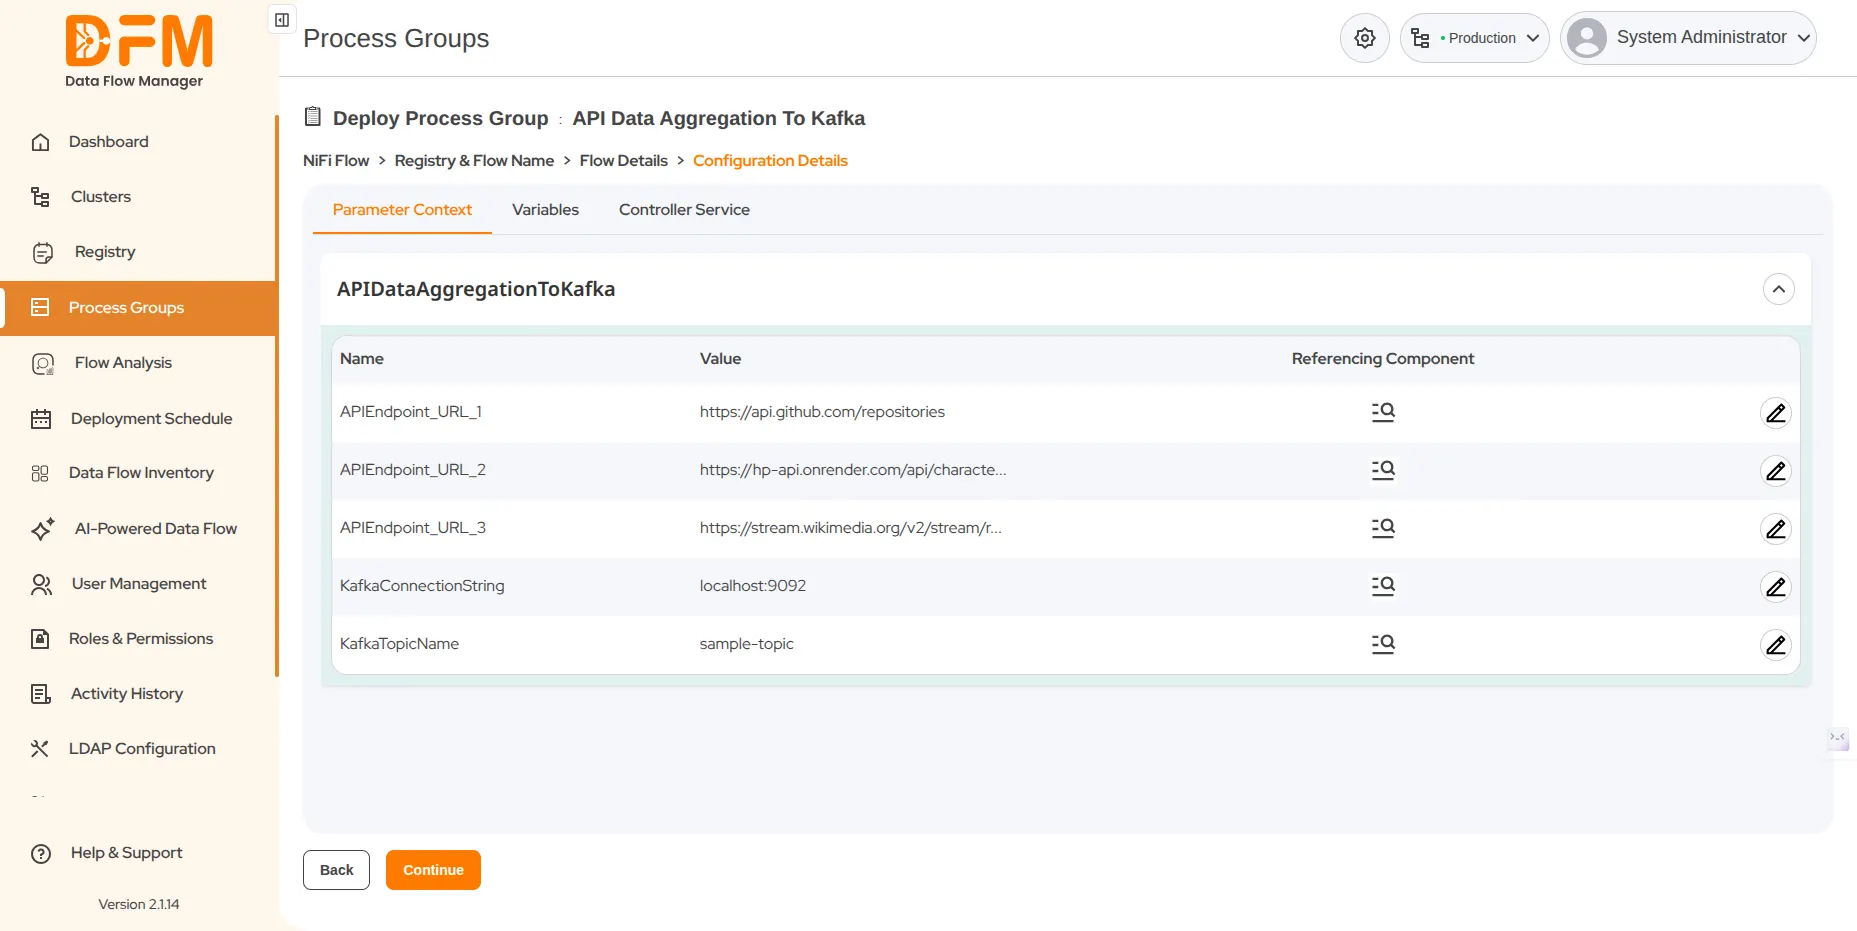
- Edit parameter context or variables with the necessary configurations. Additionally, you can view any inherited parameters by referencing the component.
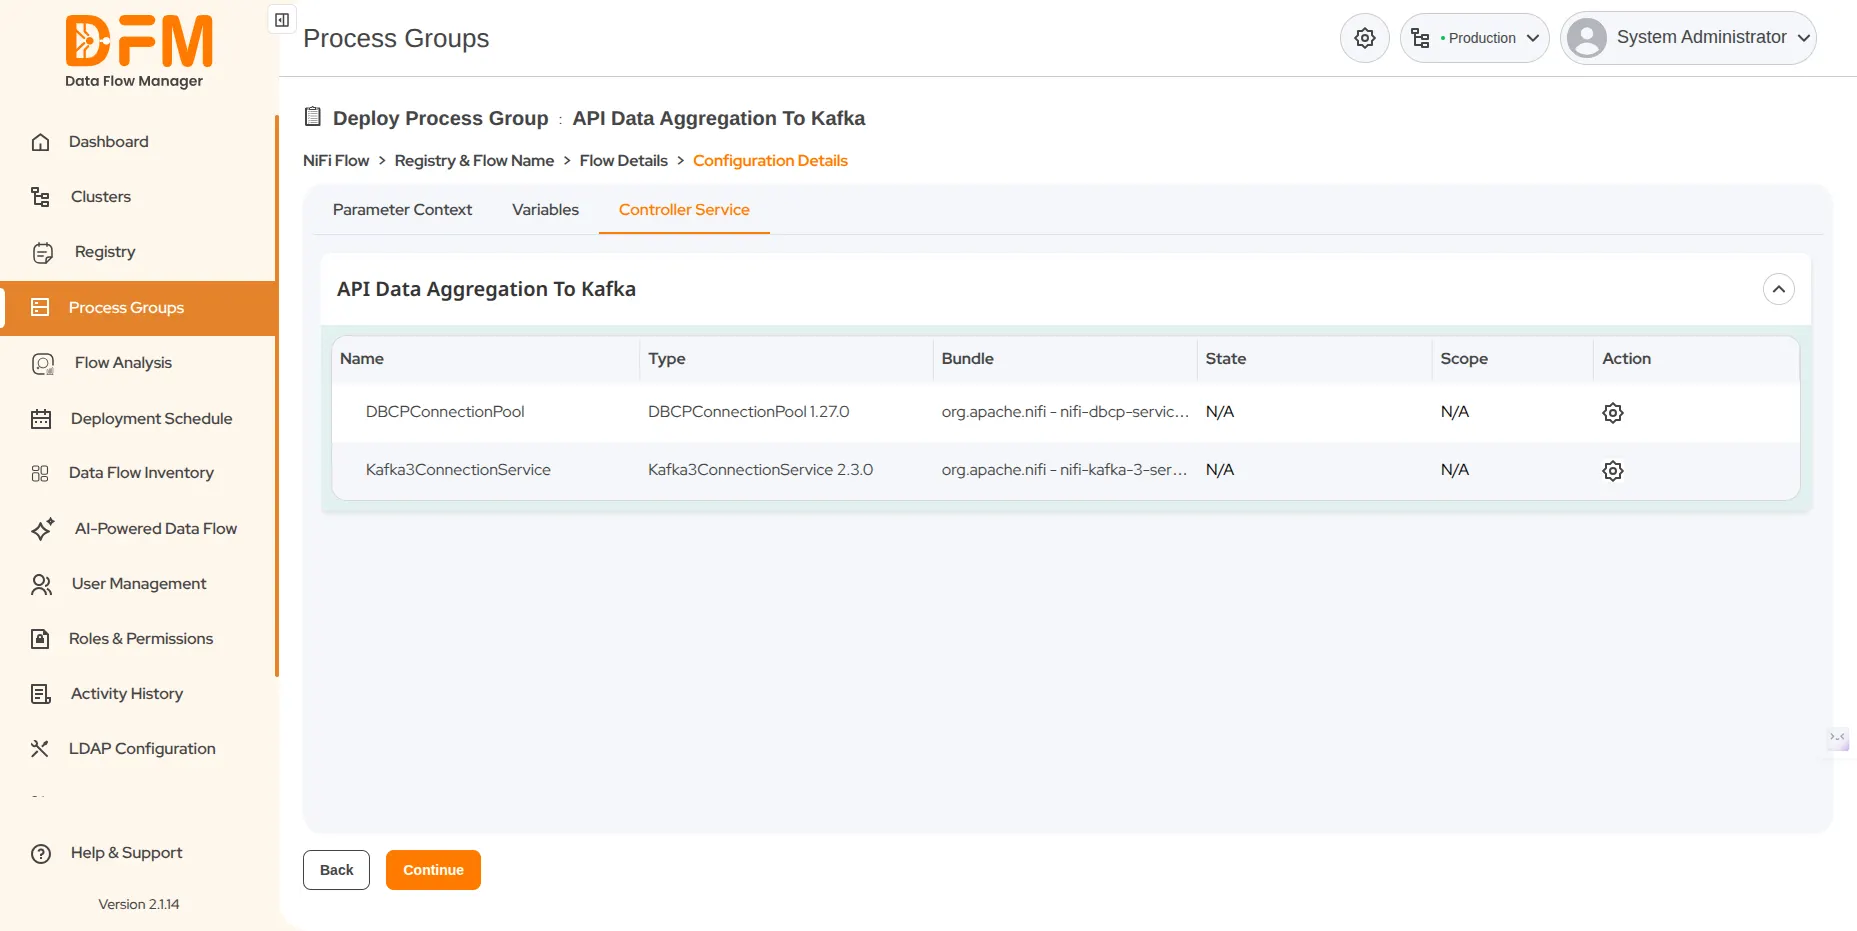
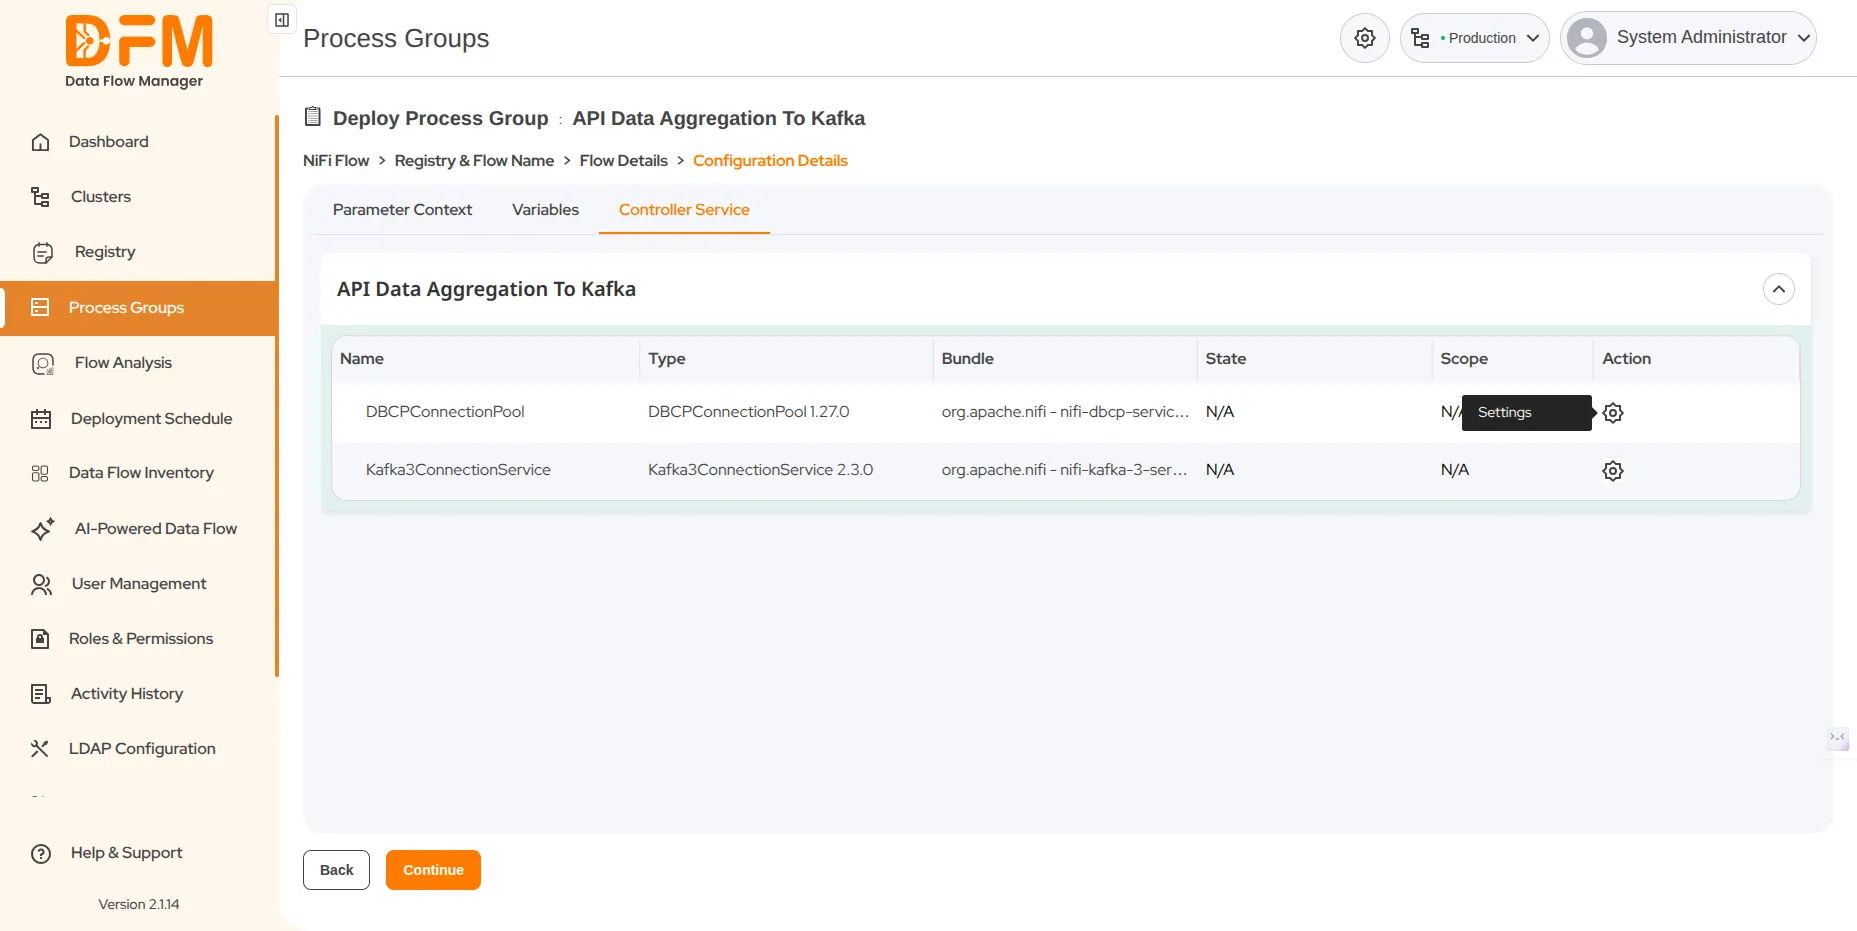
- View all the controller services available within the process group. Configure the required ones.
- If needed, you can edit the properties of the controller services through the settings option and continue.
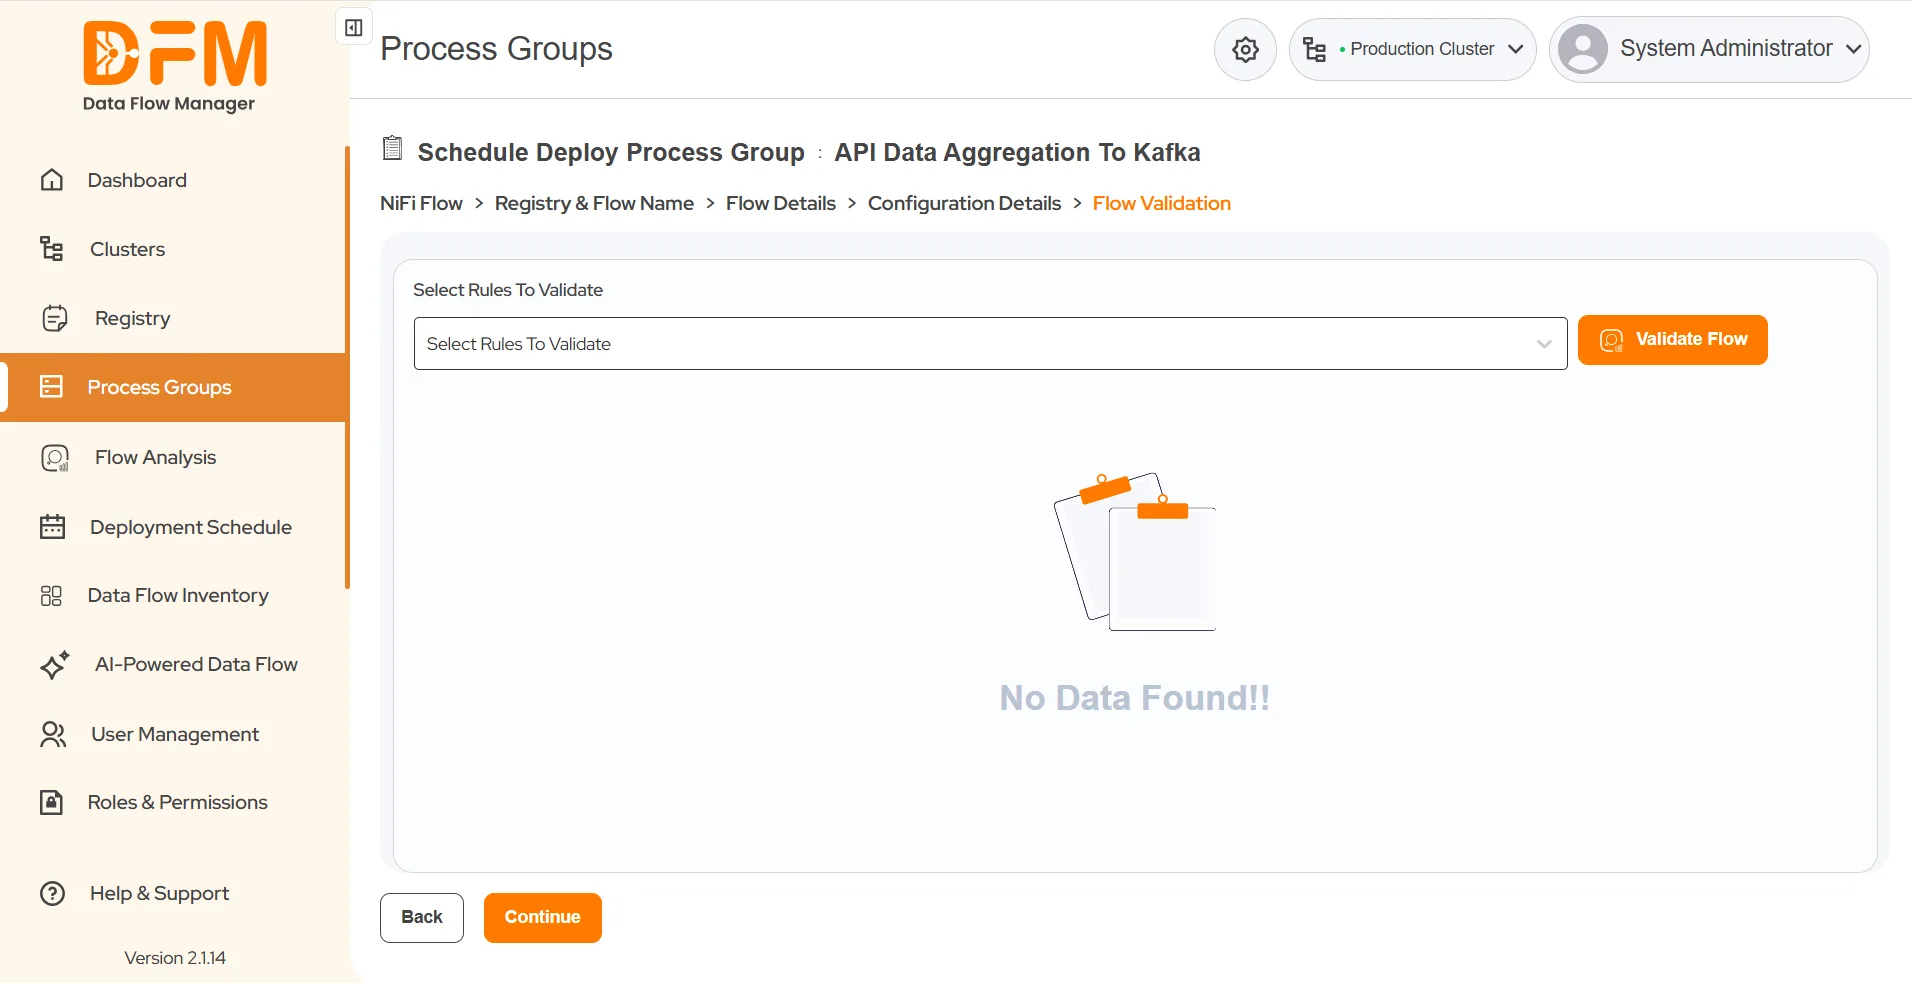
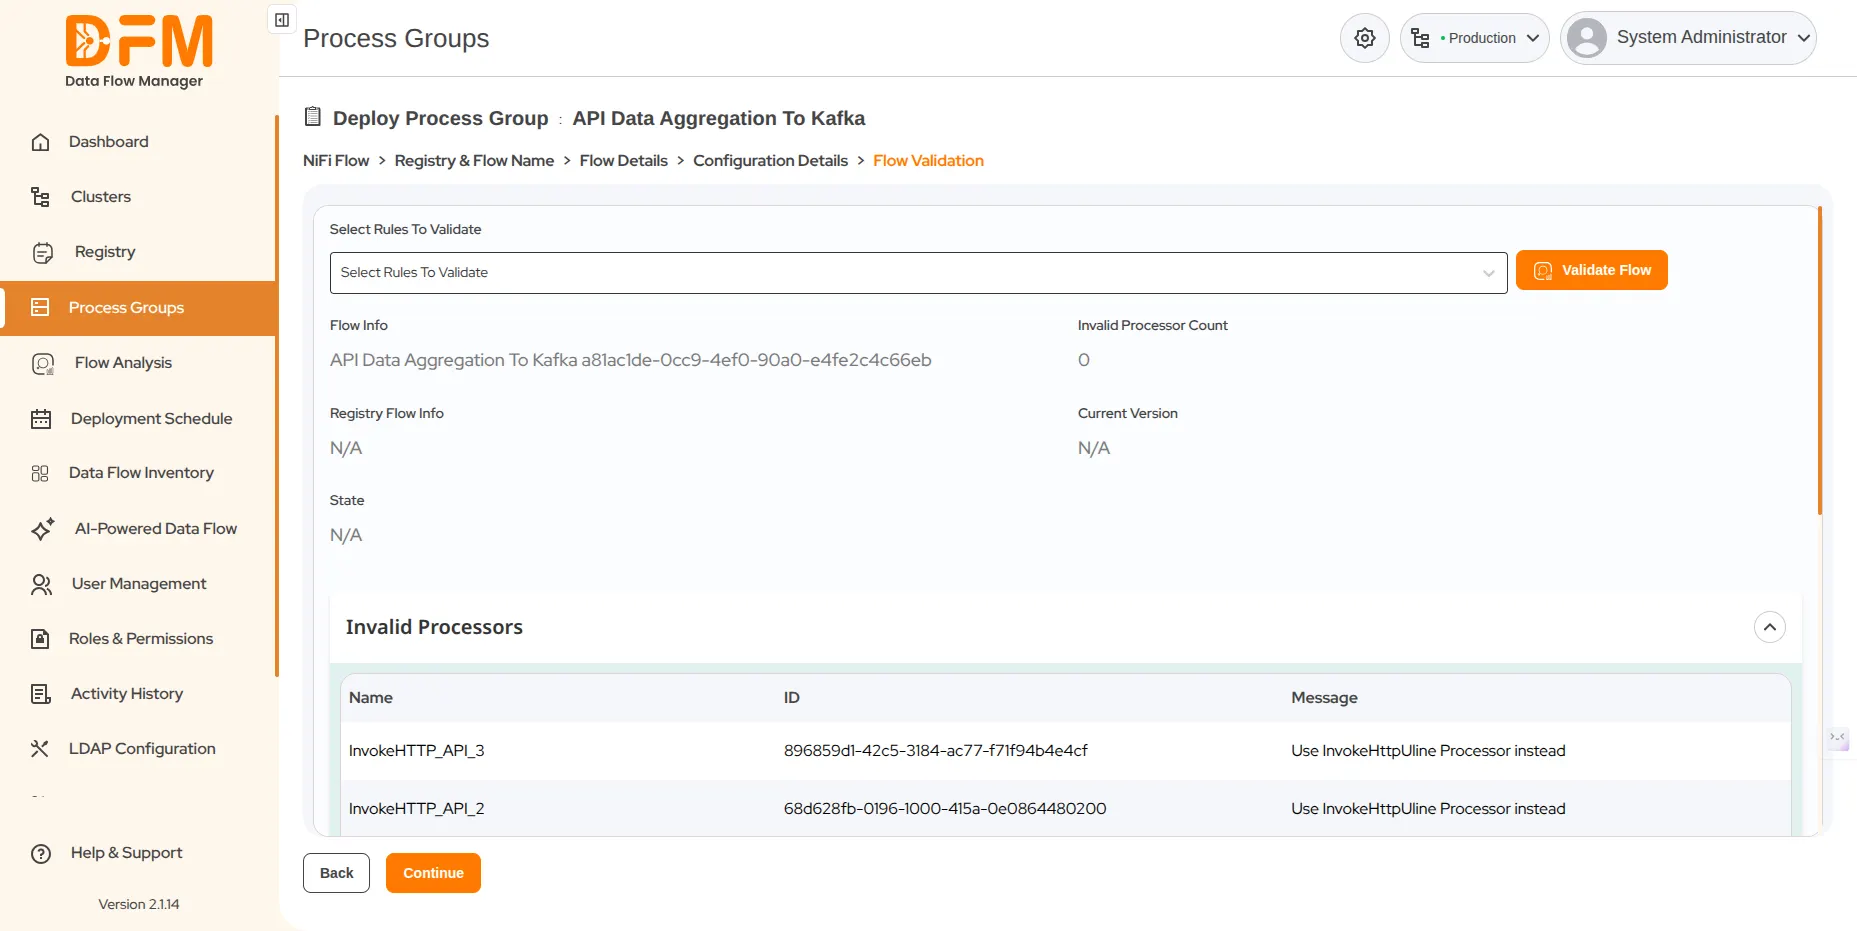
- Validate the flow by selecting rules to validate from the “Select Rules to Validate” dropdown.
- Click on the “Validate Flow” button to initiate validation.
- If you do not select any specific rule from the dropdown, the system will validate all the rules displayed in the dropdown options.
- After clicking on “Validate Flow”, it will display the rules that require correction, along with their name, ID, and message.
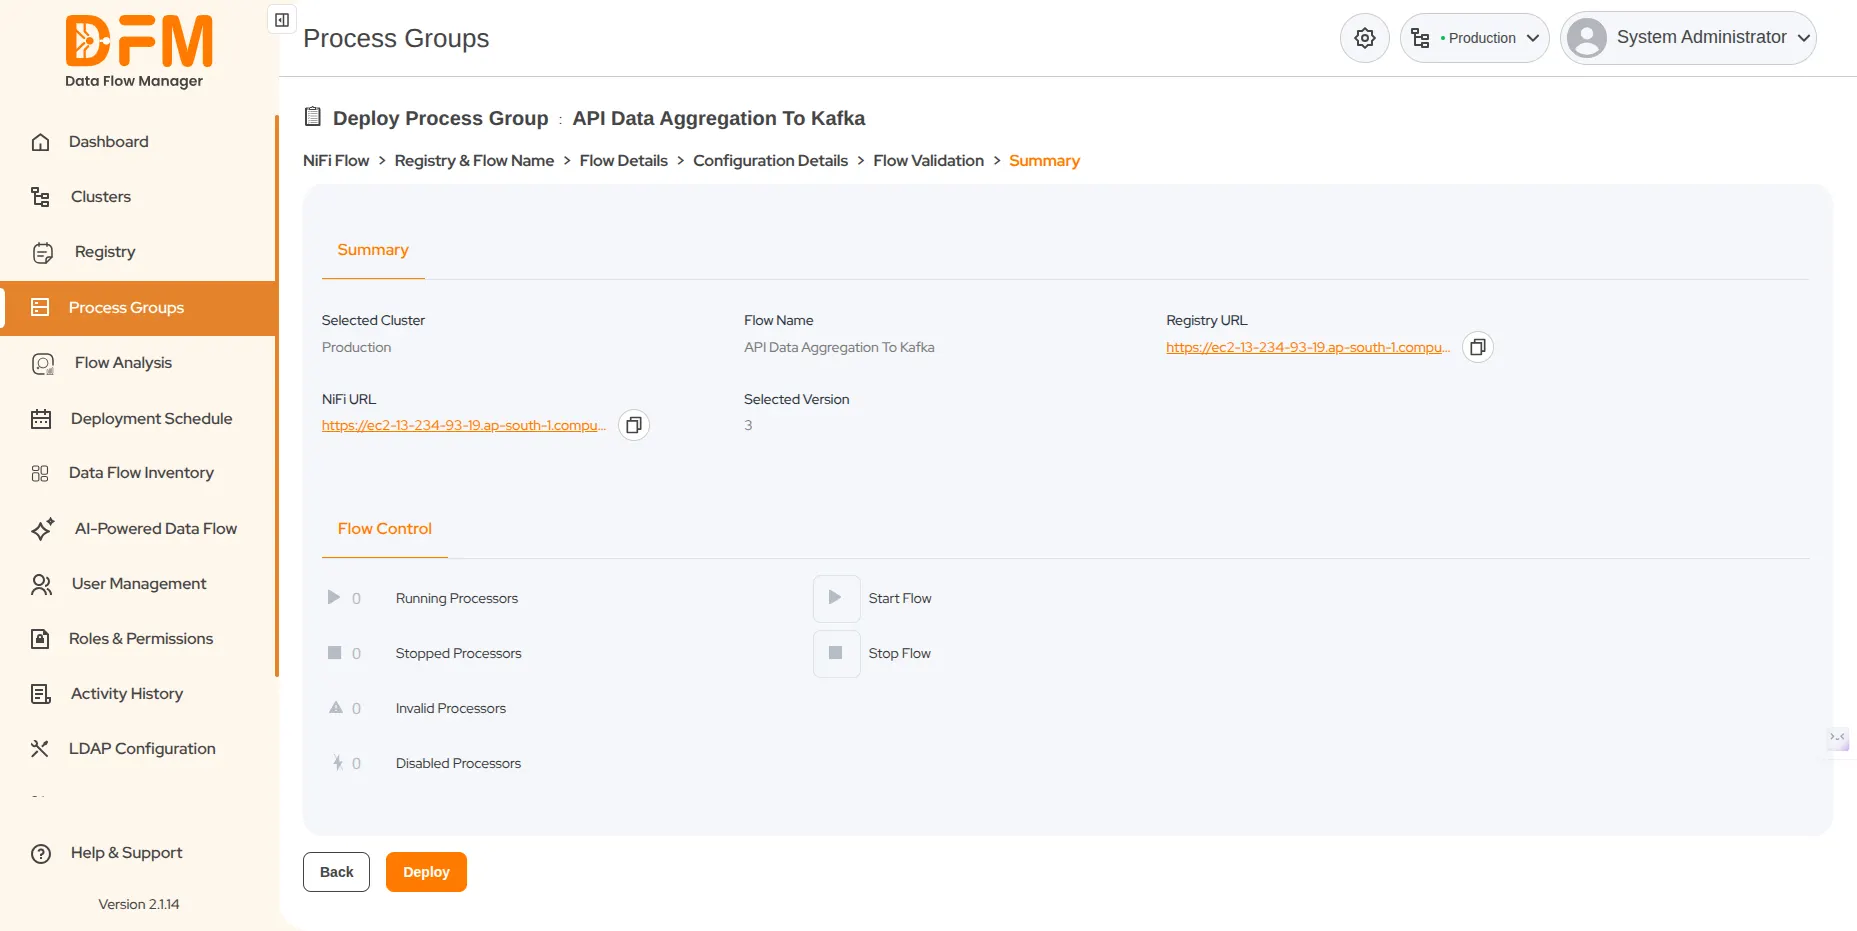
- You will be redirected to the summary page. Verify the details of the process group.
- Ensure that you start the flow and click Deploy.
- After clicking Deploy, you get a confirmation message about the successful deployment of your process group. If there are any errors, the message provides the details, allowing you to take the necessary actions.