How to add a new cluster?
DFM allows for the seamless integration and centralized management of your NiFi clusters. You can add as many clusters as your operations require.
DFM supports three ways to add a cluster:
- Register an Existing Cluster: Add a pre-existing, operational NiFi cluster to DFM for centralized management.
- Create New Cluster via Virtual Machine / Instances: Use DFM to provision and deploy an entirely new VM cluster from scratch.
- Create New Cluster via Kubernetes: Use DFM to provision and deploy an entirely new Kubernetes cluster from scratch.
Registering an Existing Cluster
Select this option to add a pre-existing, operational NiFi cluster to DFM for centralized management. The registration process involves two main phases:
Phase 1: Configure Cluster Details
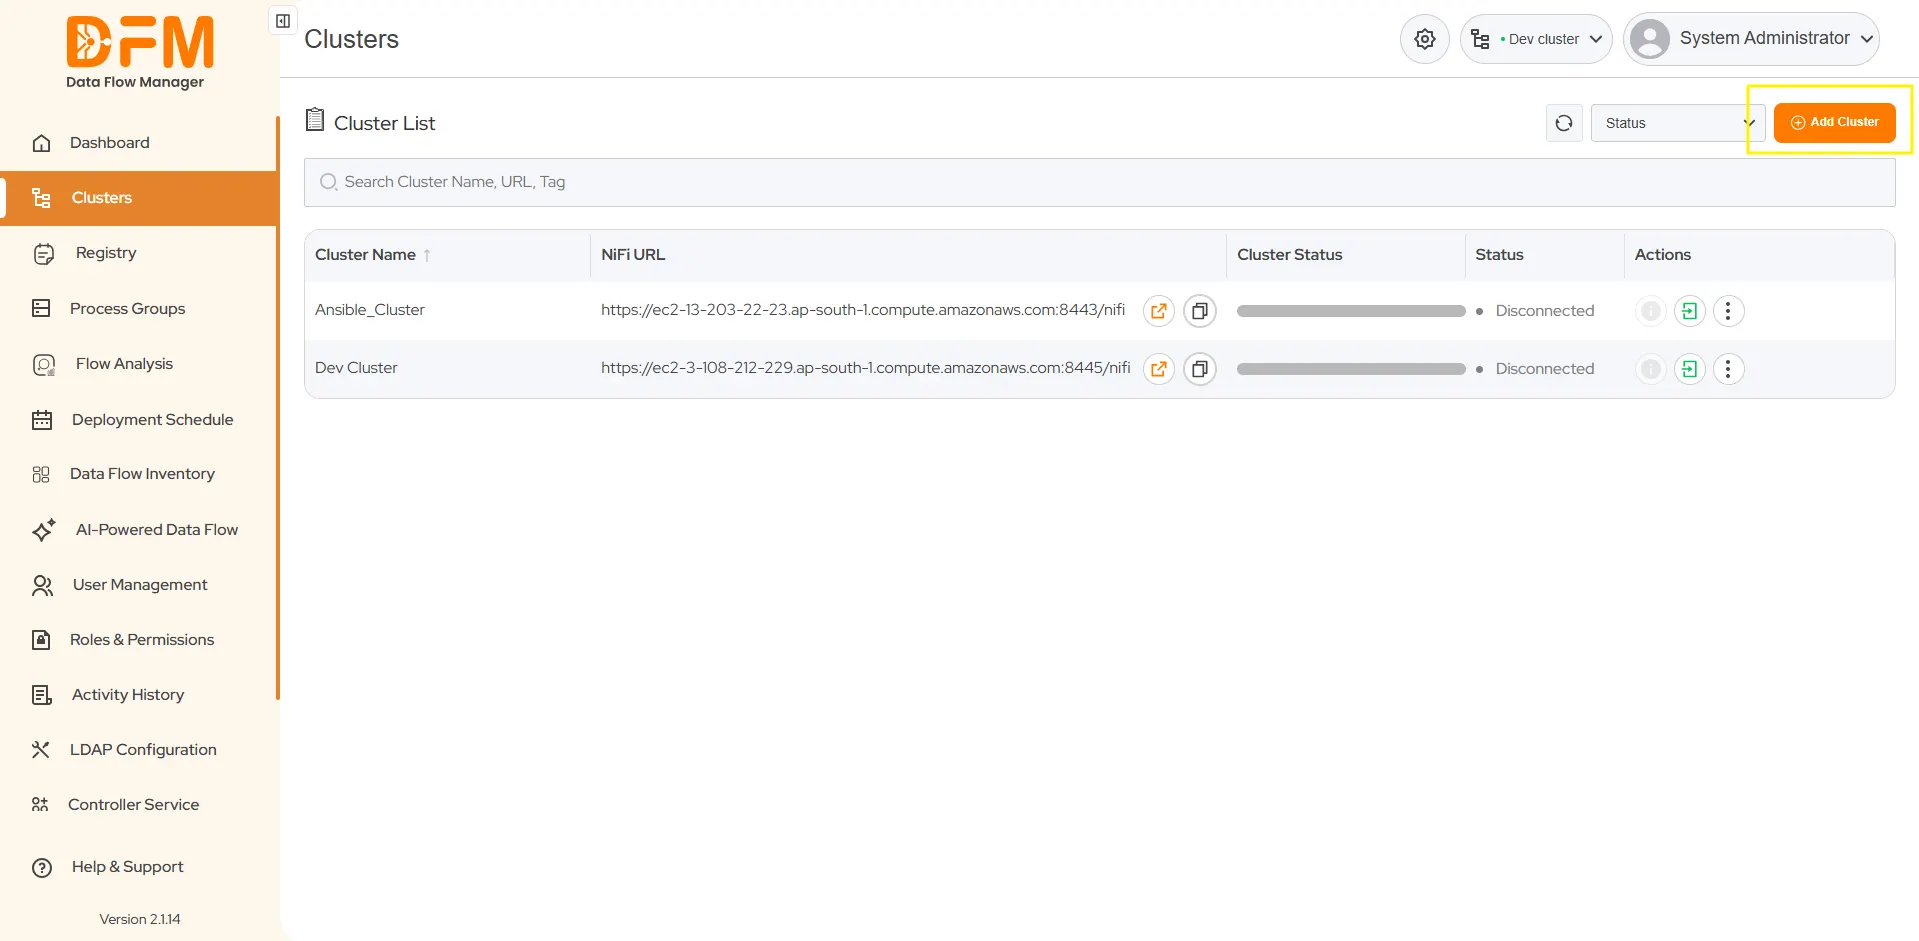
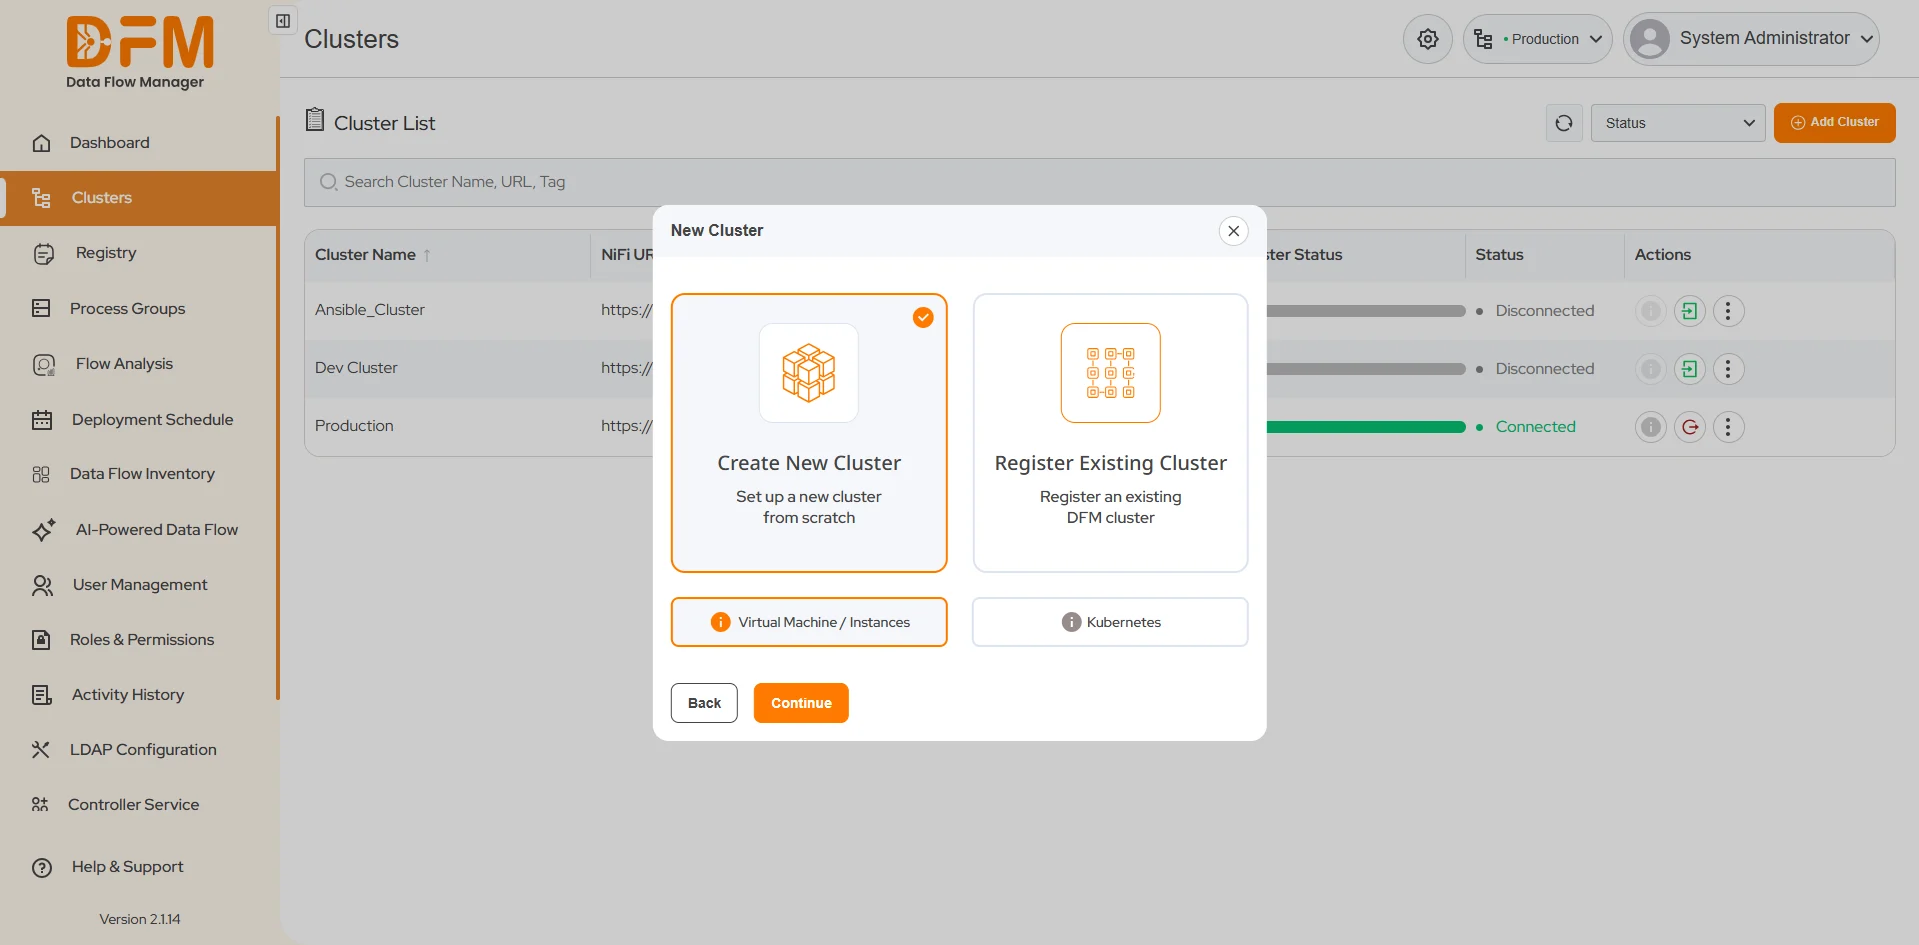
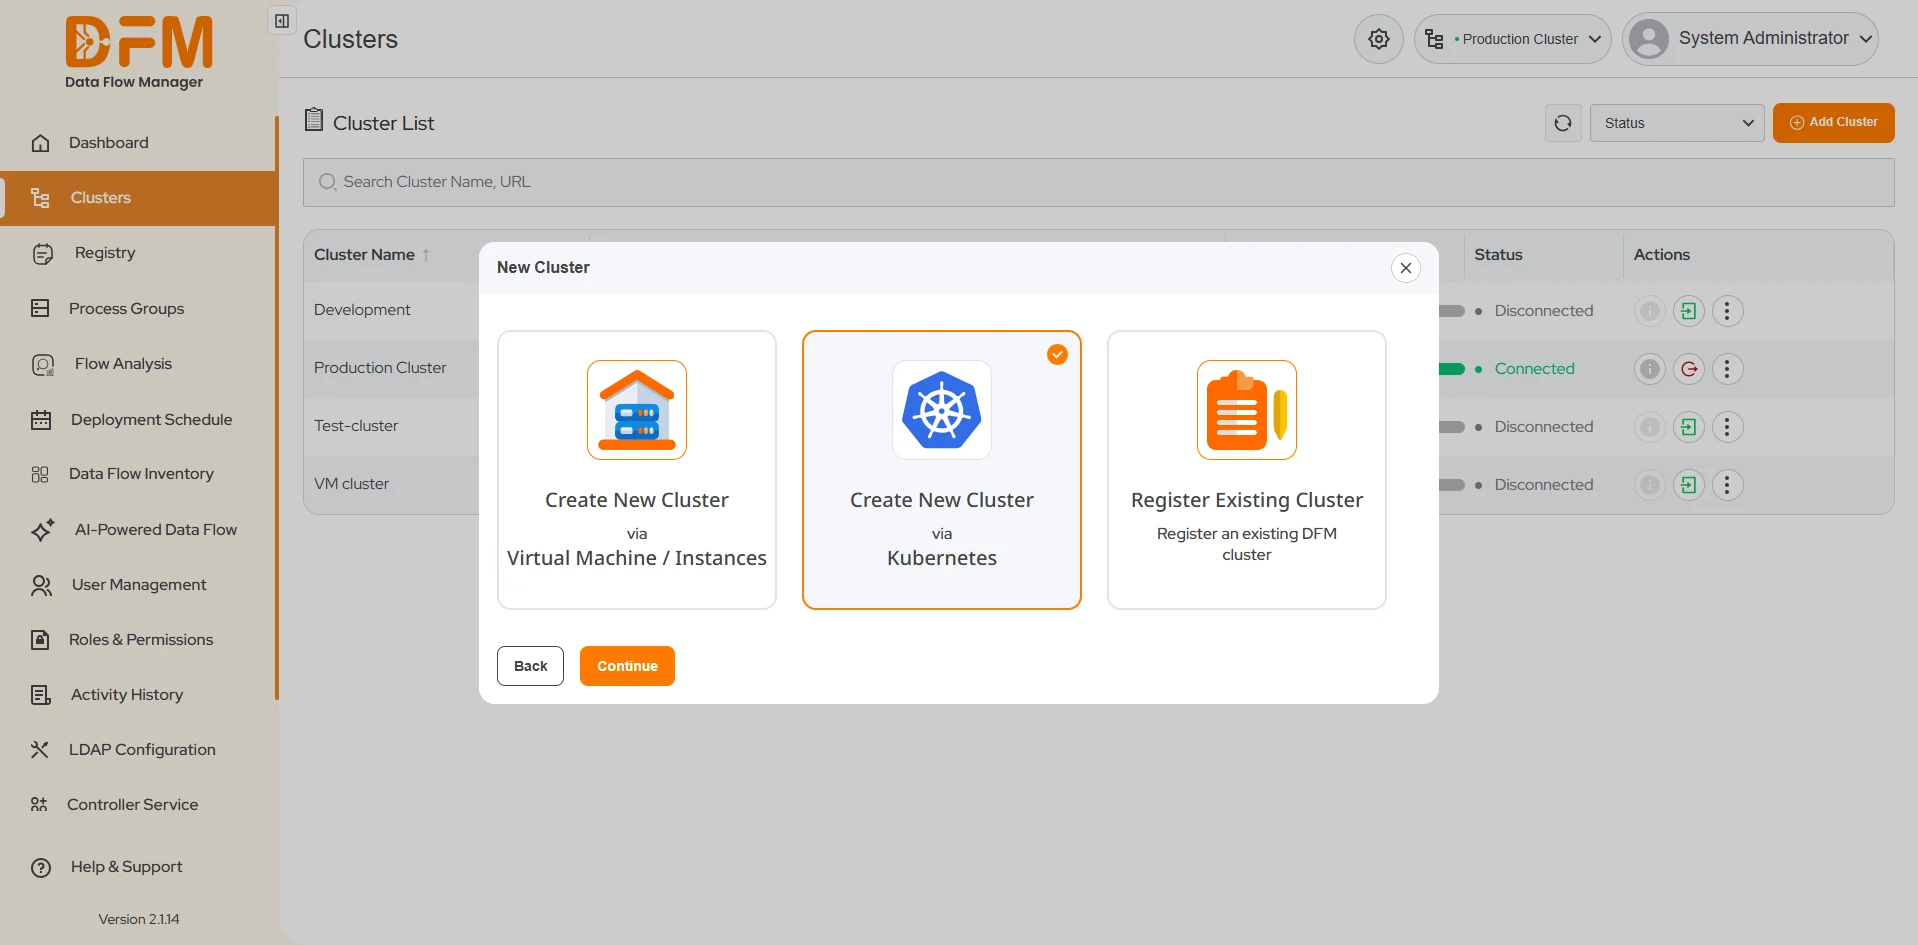
Navigate to the Cluster module from the main menu. In the top-right corner of the page, click the Add Cluster button.
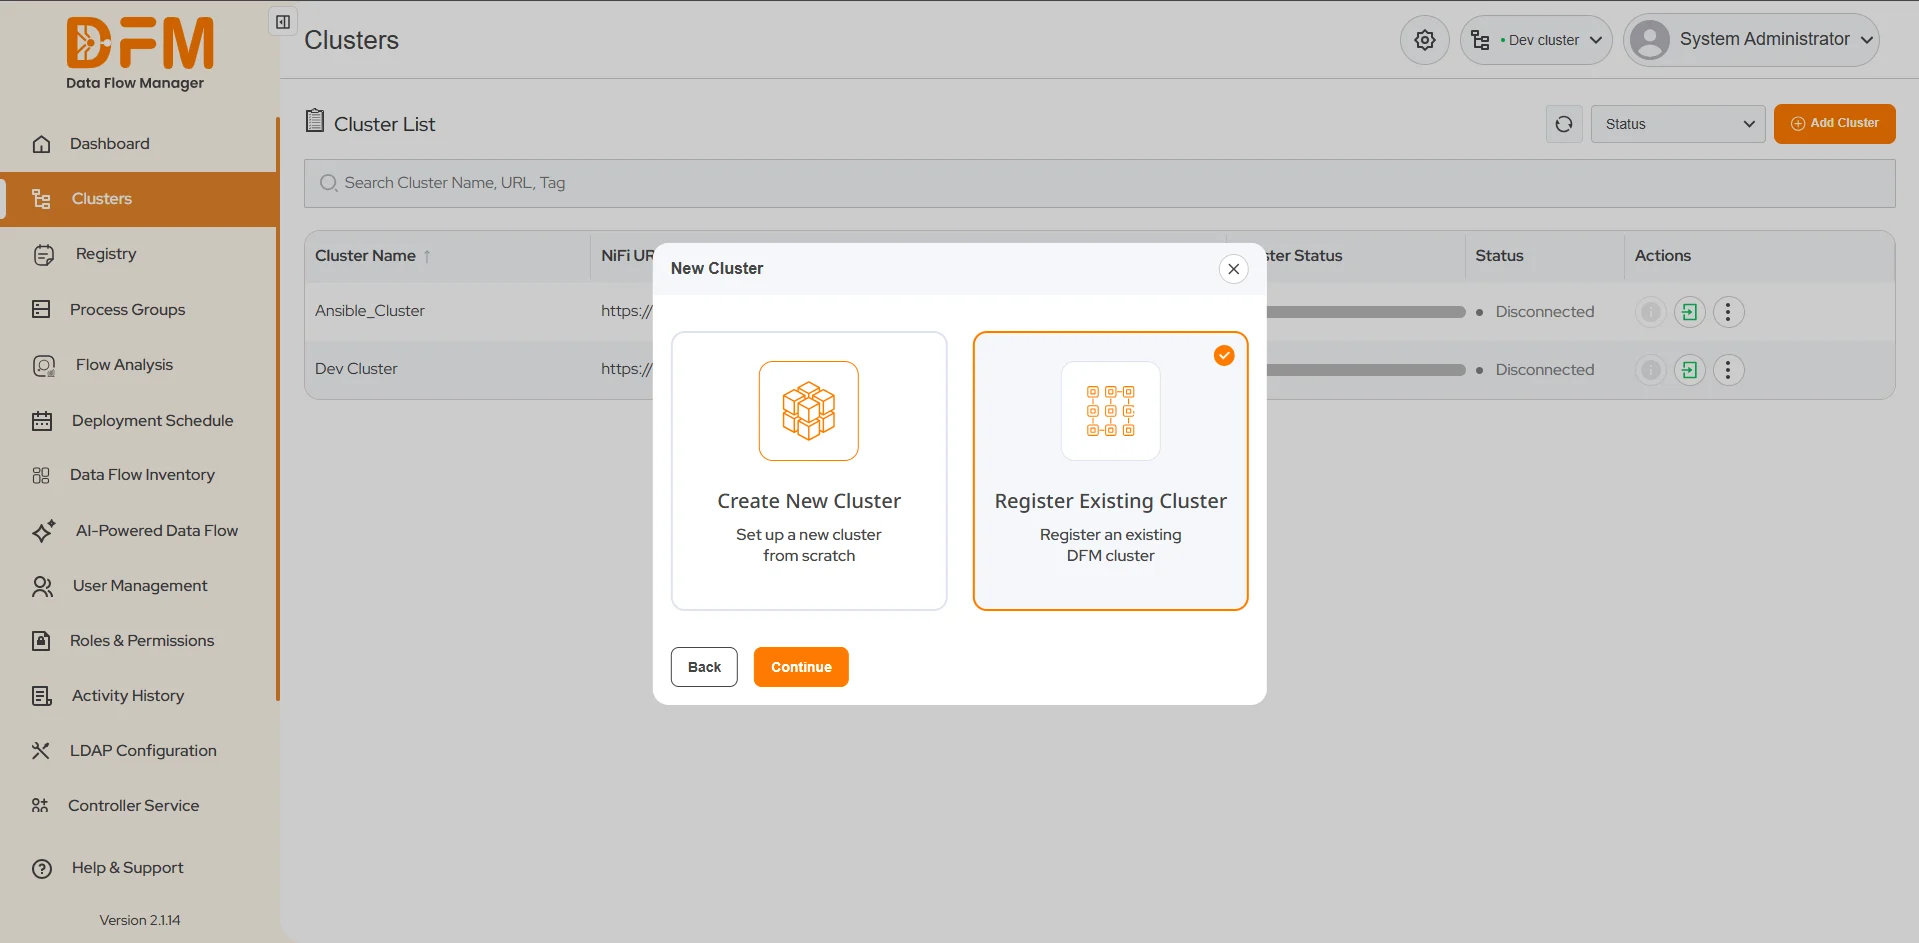
A dialog box will appear with two options:
- Create New Cluster:To set up a brand-new cluster.
- Register Existing Cluster: To register an already existing cluster.
Click Register Existing Cluster to begin the registration process.
First, complete the following fields to define the cluster's connection and operational behavior within DFM:
- Cluster Name: Enter a unique and descriptive name for the cluster.
- NiFi URL: Specify the complete URL for the existing NiFi cluster's REST API.
- Cluster Type: Assign relevant tags to the cluster for categorization and filtering.
- Require Deployment Approval: Select this checkbox if scheduled deployments to this cluster must be manually approved by an authorized user. If unchecked, scheduled deployments will run automatically.
- Enable Cluster Notifications: Select this checkbox to opt-in for alerts, status updates, and other notifications related to this cluster's operations.
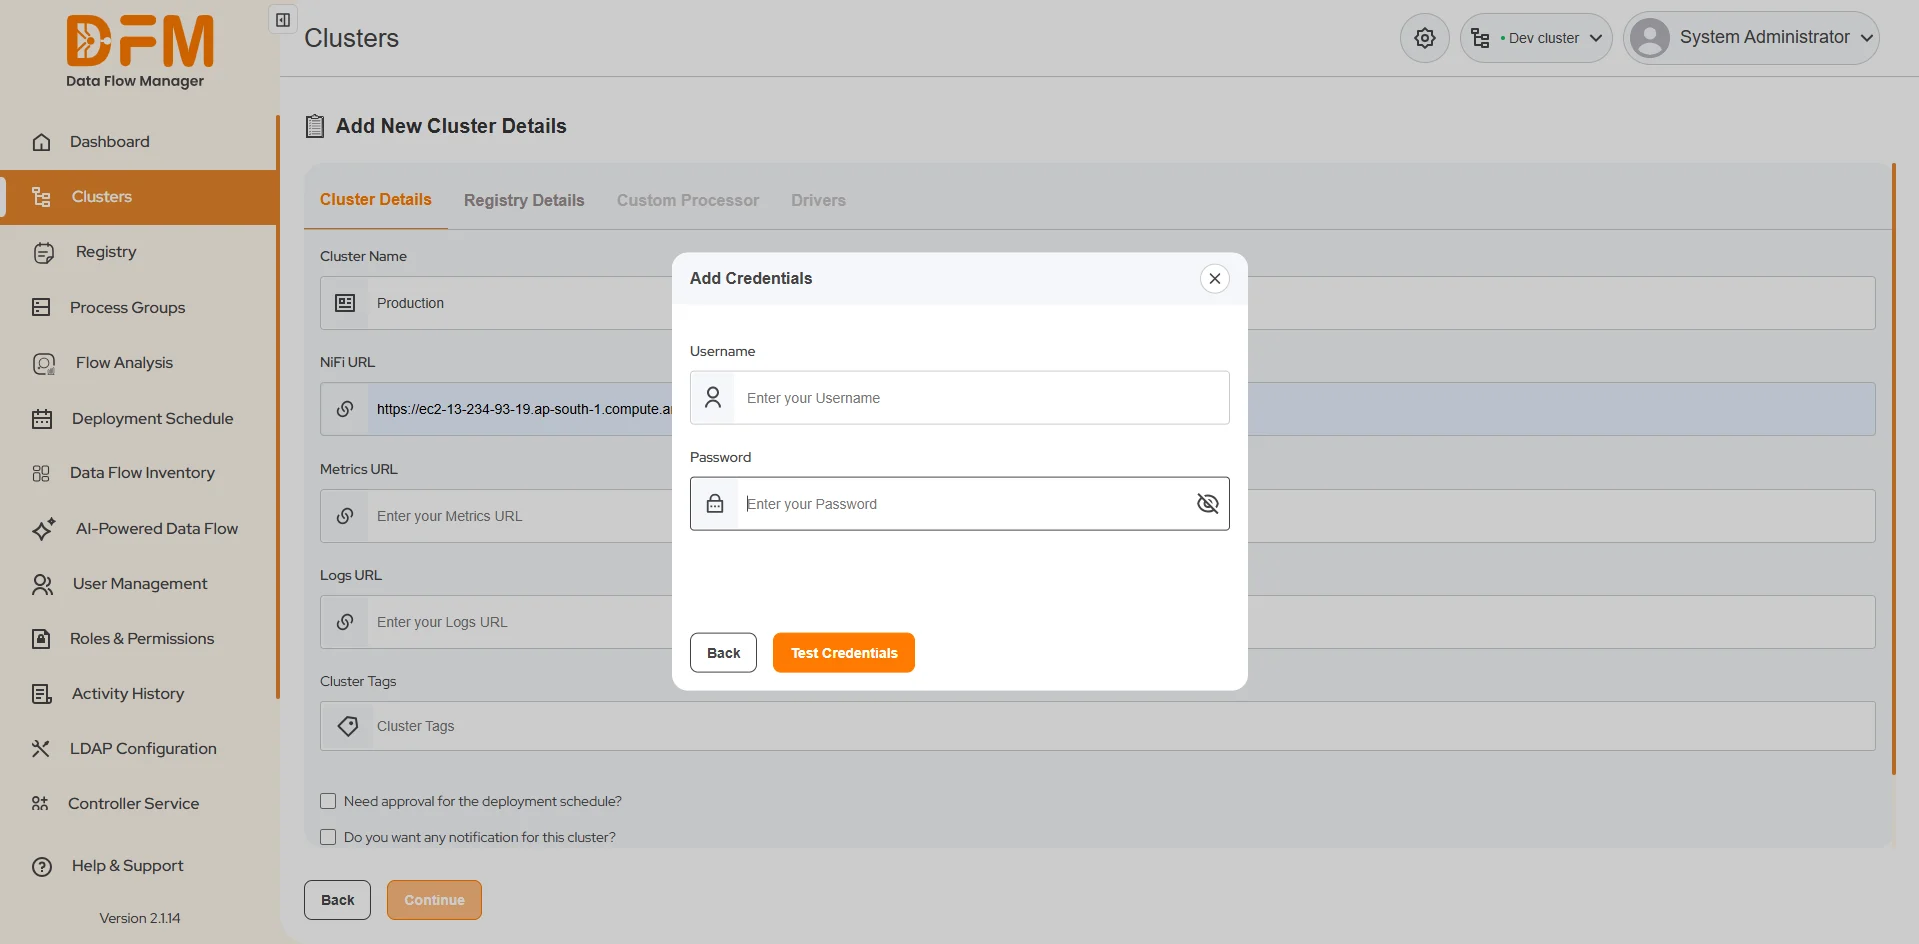
- Security & Connection Validation: Add the necessary certificates or credentials (e.g., client certificates) required for DFM to authenticate with the NiFi cluster.
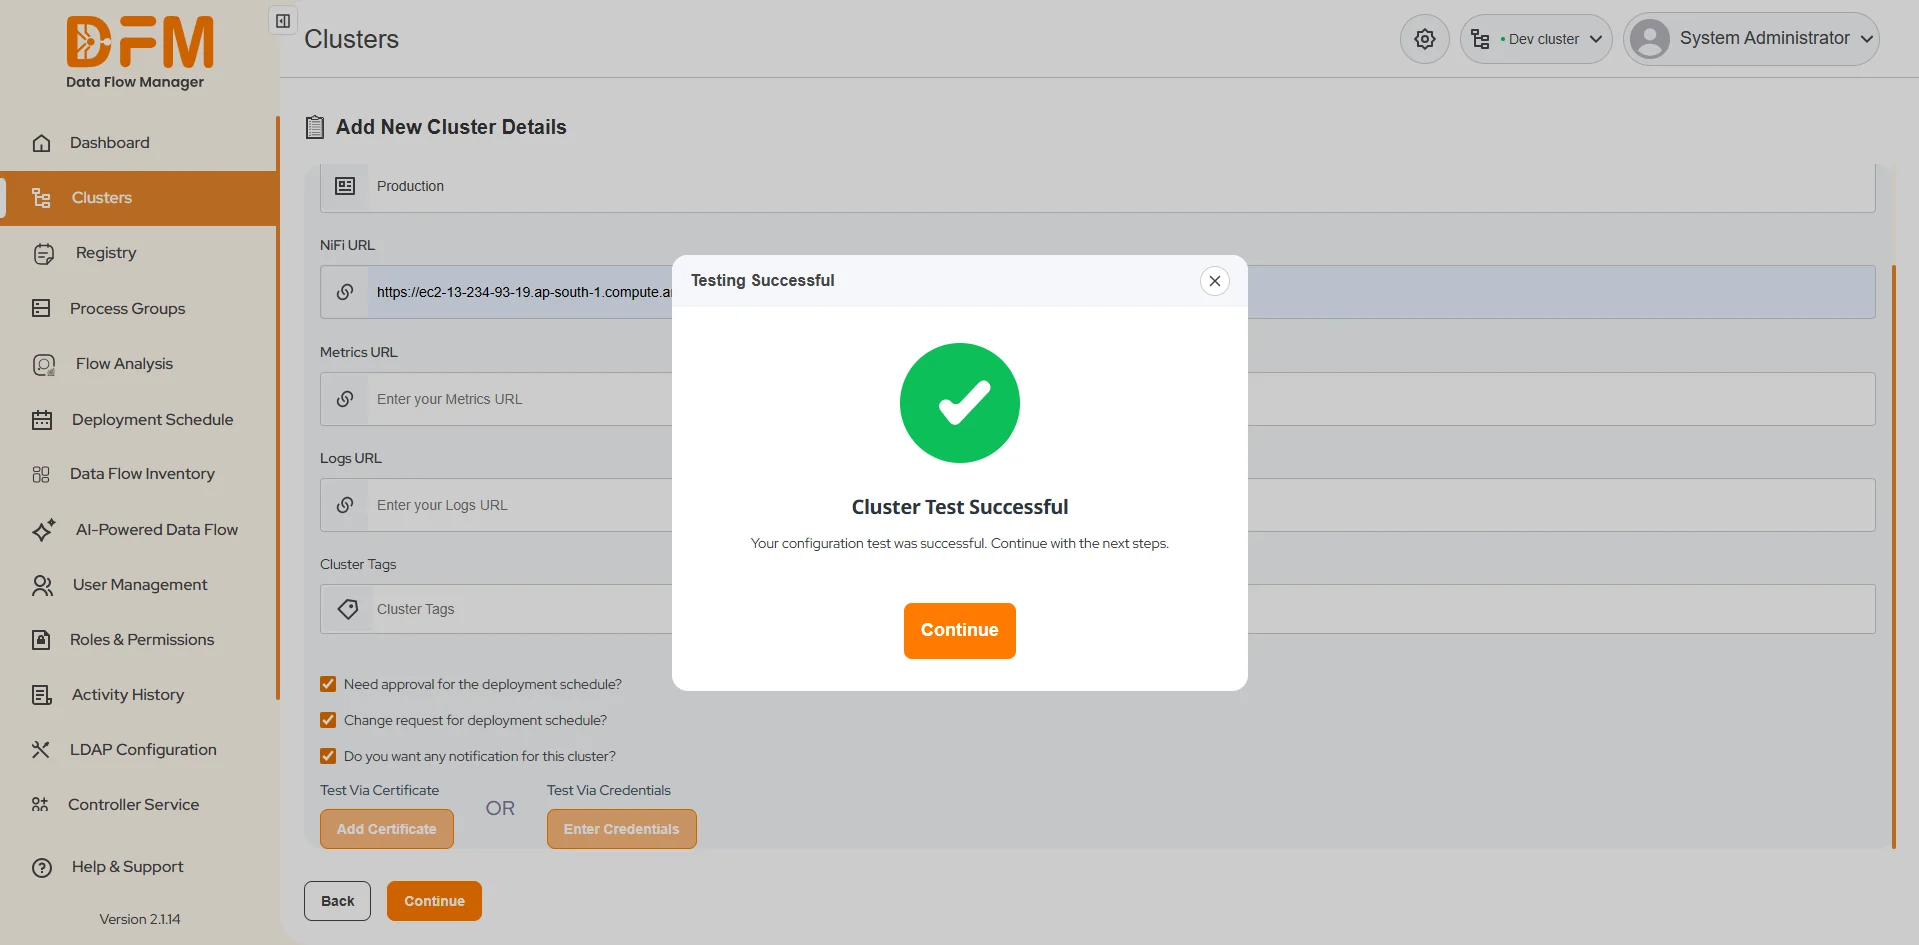
It is highly recommended to use the "Test Connection" feature to validate the credentials and ensure DFM can communicate with the cluster.
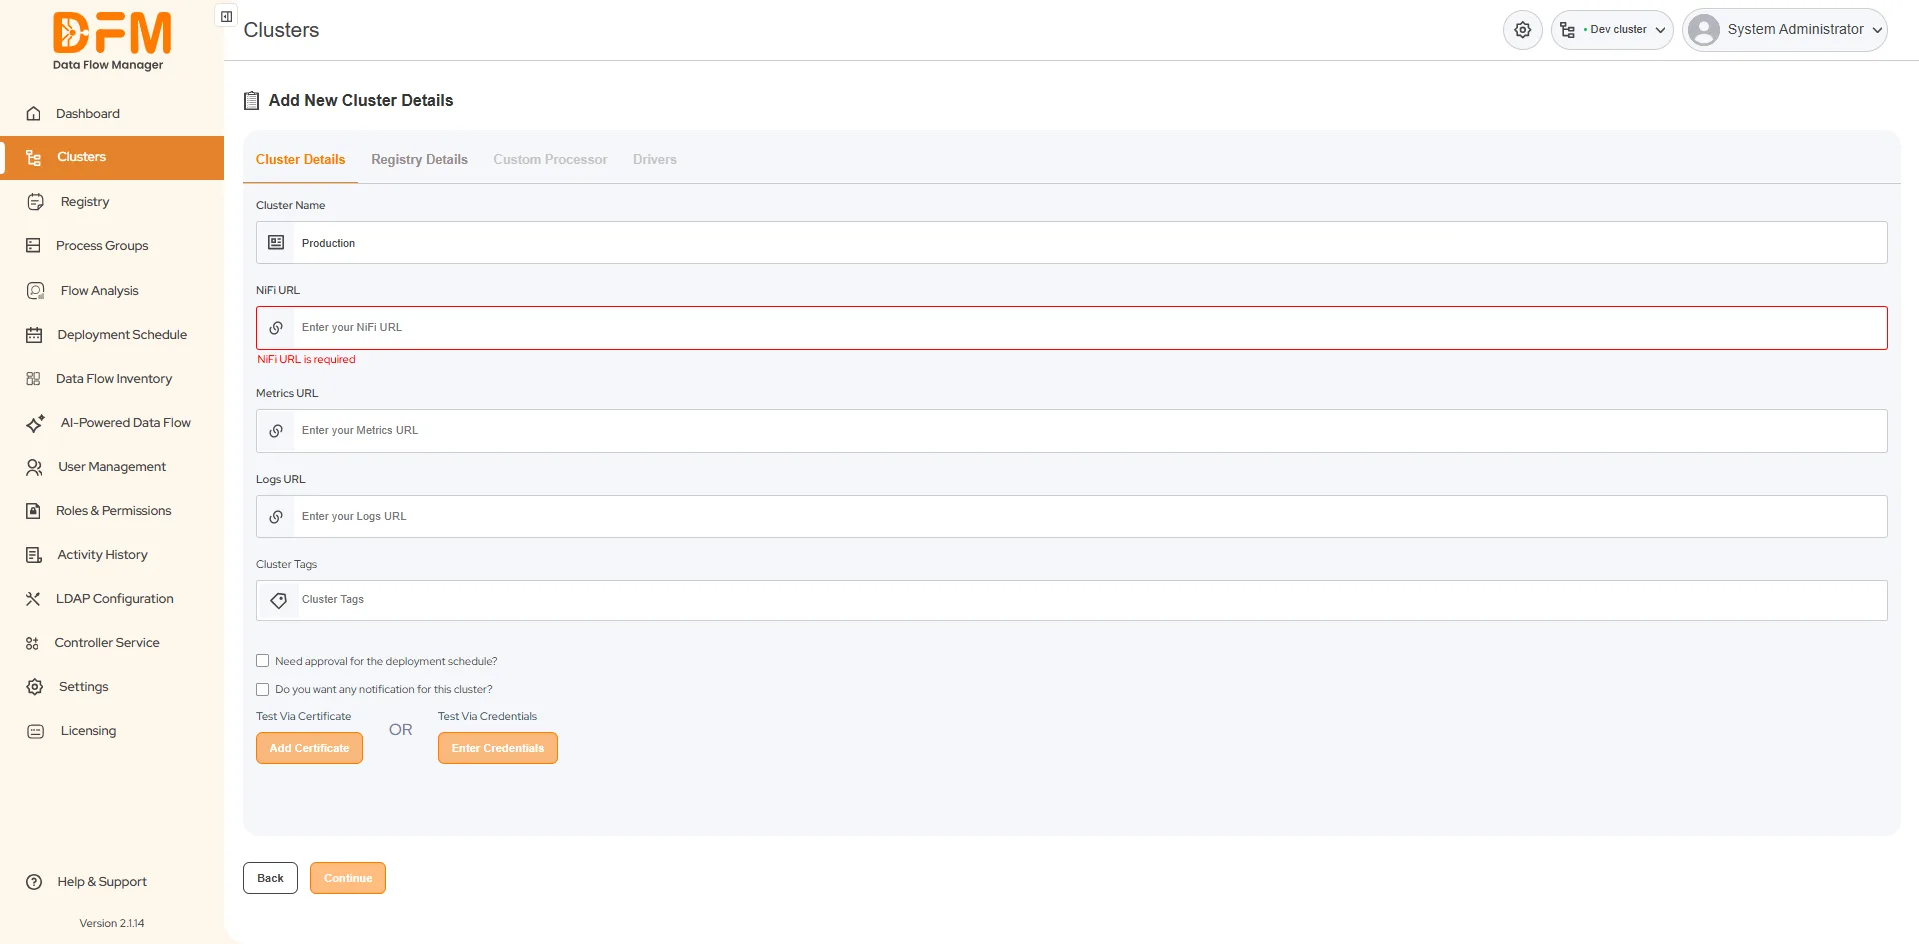
After all details are entered and validated, click Continue to proceed.
Phase 2: Configure Registry Details
Next, you must associate the cluster with a NiFi Registry.
1. You have two options:
- Select Existing Registry:Choose a pre-configured registry from the dropdown list.
- Add New Registry:Define a new registry by providing its URL and configuration details.
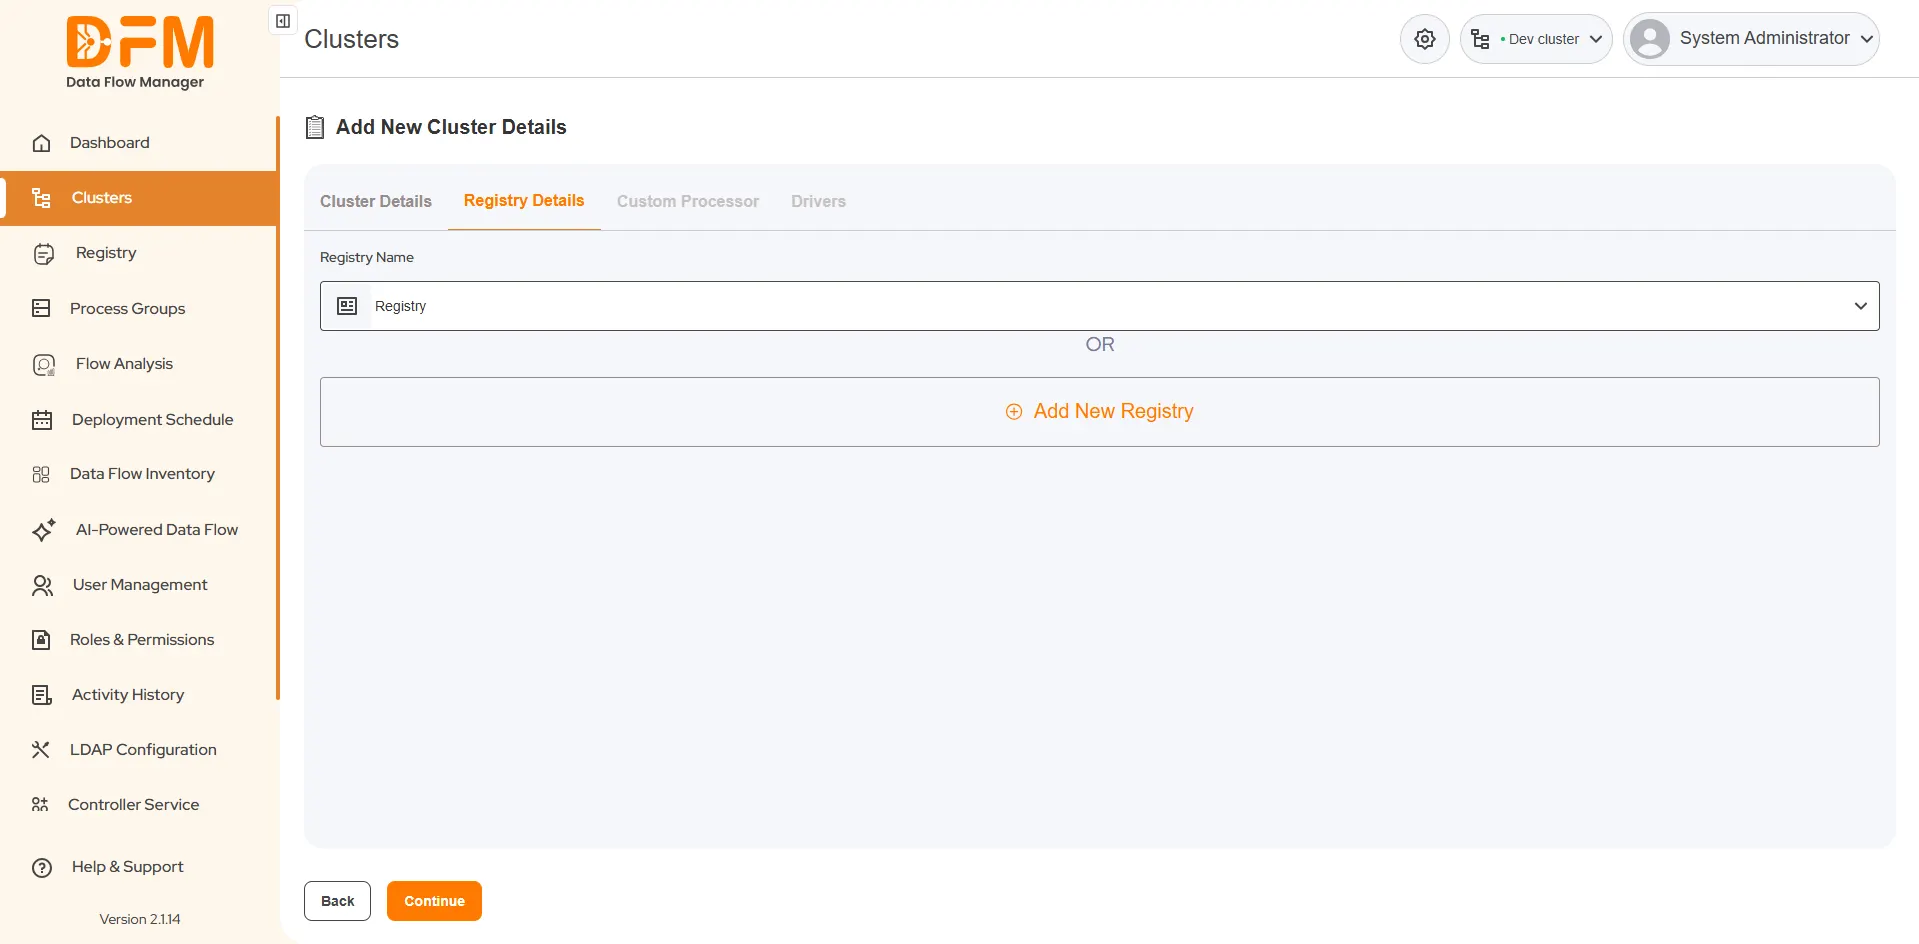
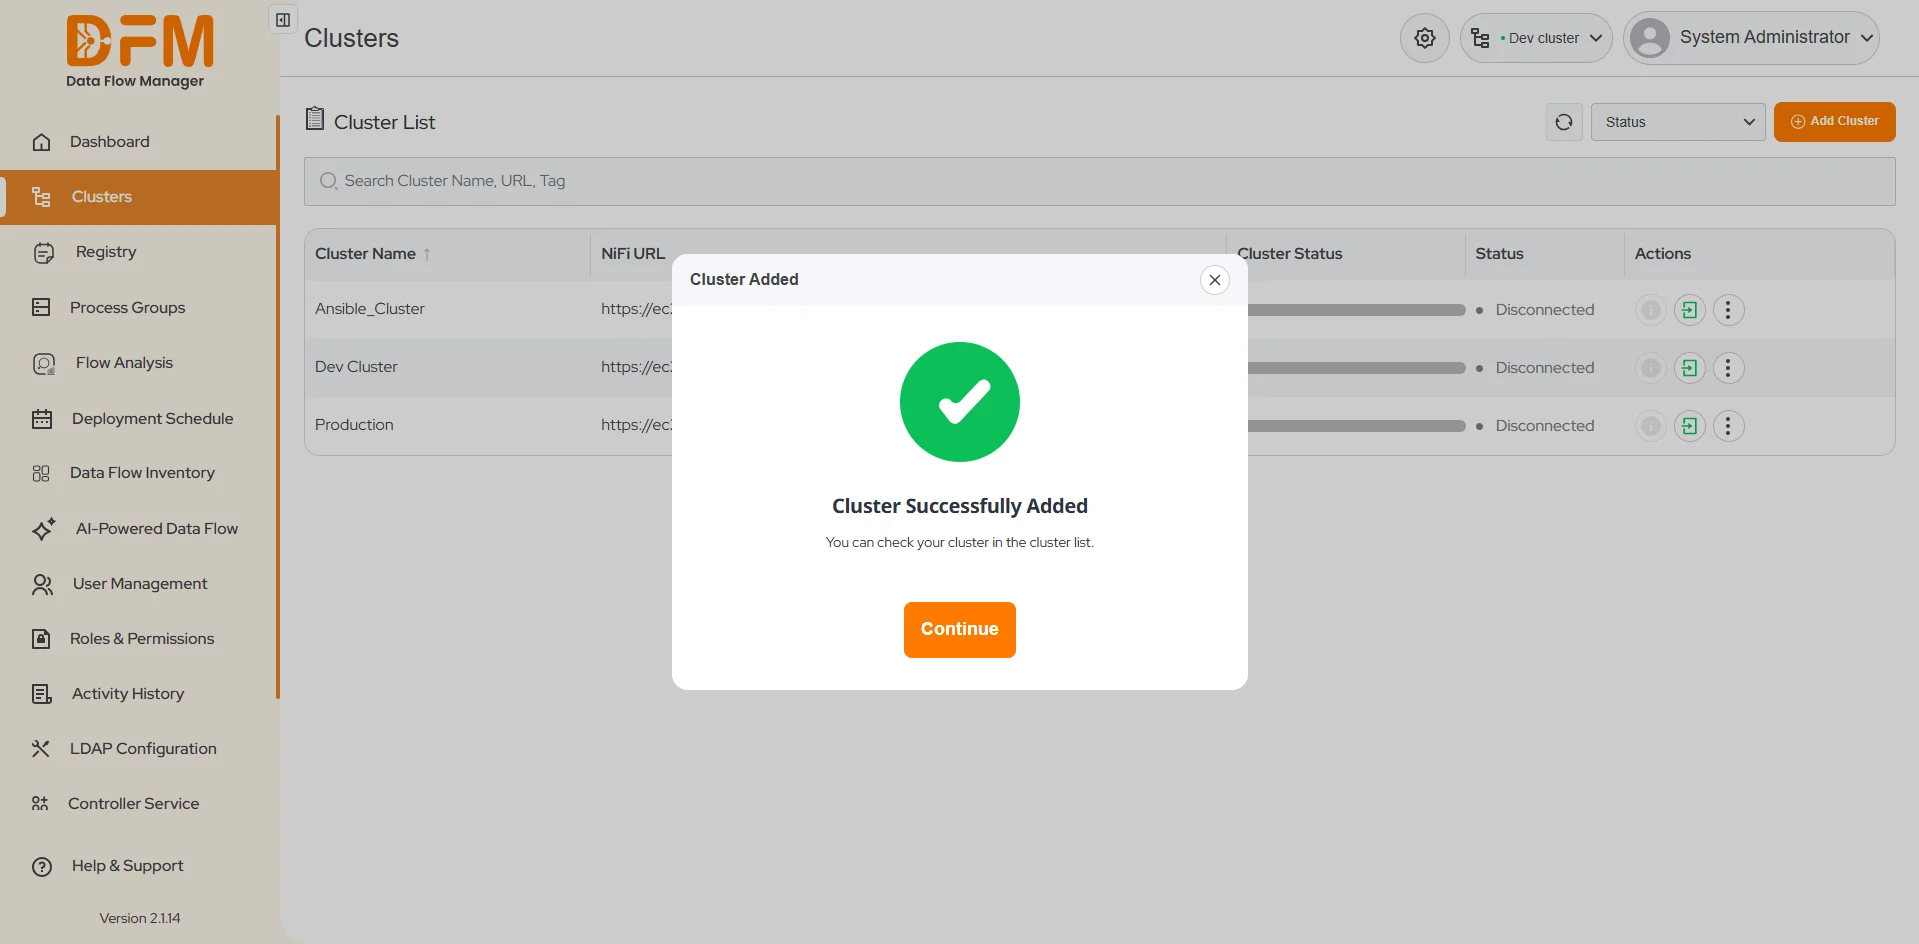
2. Once you have entered the required information, click Save to complete the registration.
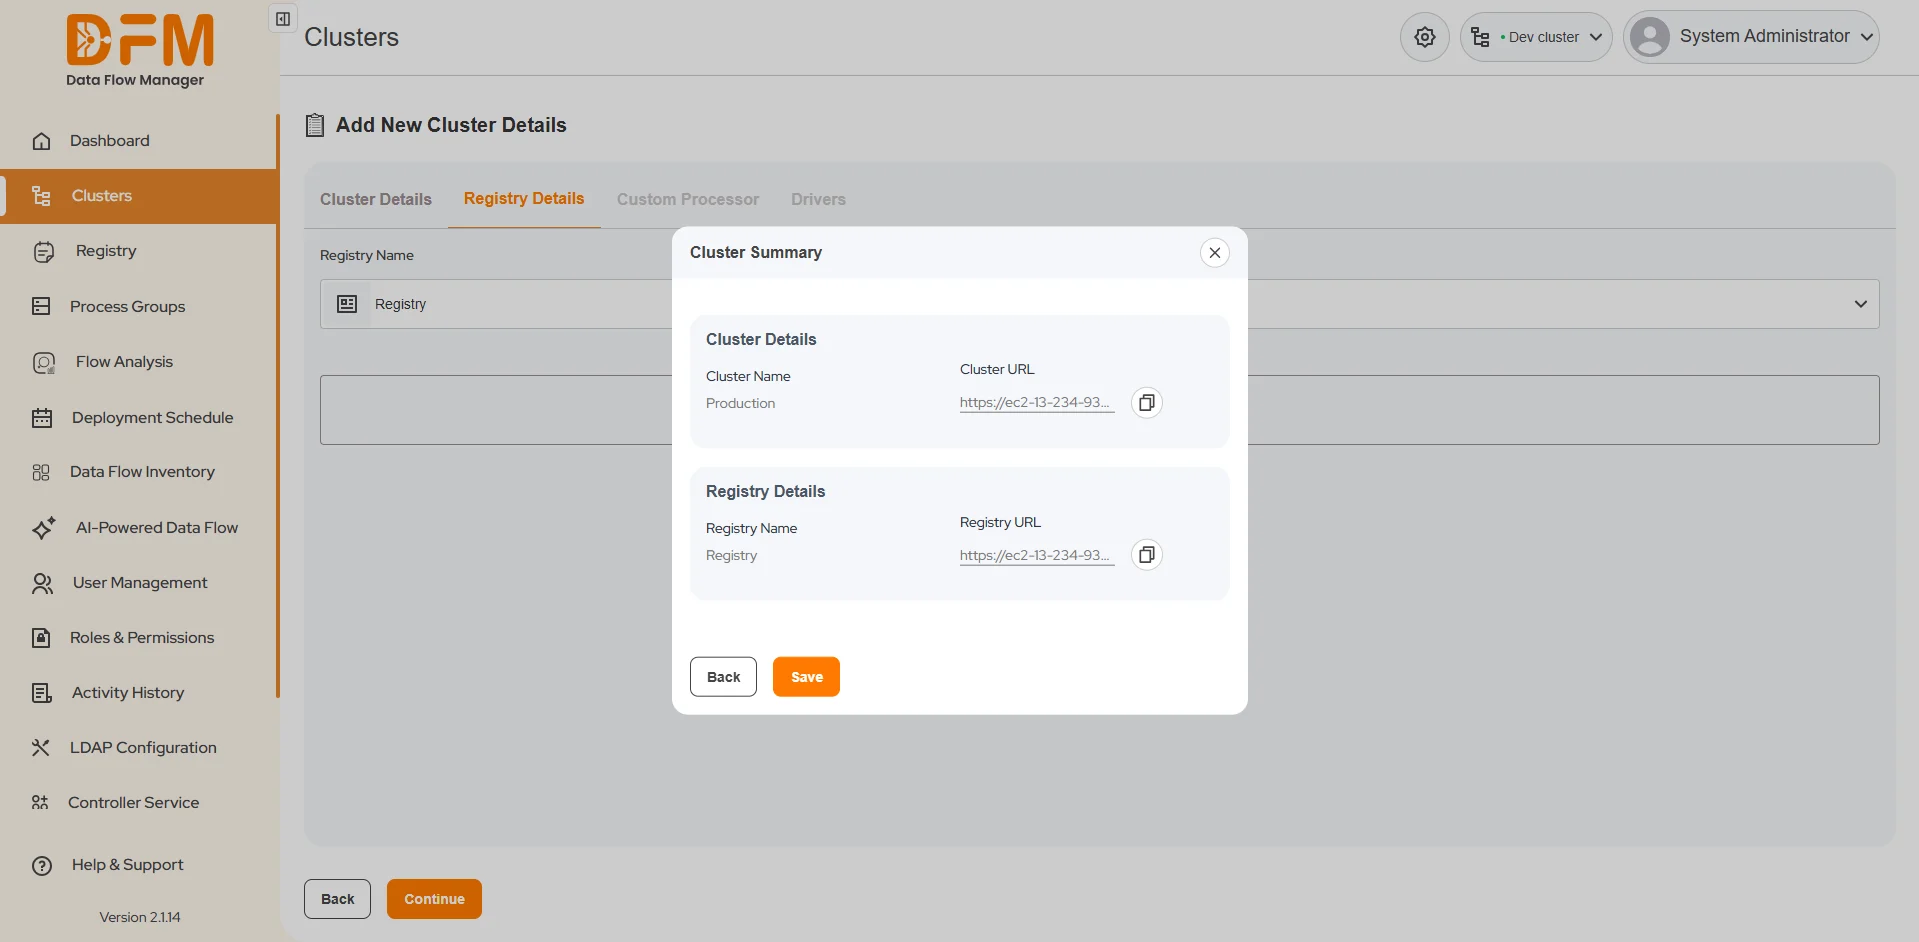
A confirmation dialog will appear upon successful onboarding, and the newly registered cluster will now appear in the DFM cluster list.
Note: Cluster and registry details can be modified at any time after registration. See Section 4 (b), "How to edit the cluster details?" for more information.
Creating a New Cluster
Select this option to use DFM to provision and deploy an entirely new NiFi cluster from scratch.
New Cluster Deployment Options
When creating a new cluster, DFM supports two deployment models to match your infrastructure strategy:
- Virtual Machine / Instances:Deploys the cluster components onto virtual machines or cloud-based instances (e.g., AWS EC2, Azure VM).
- Kubernetes: Deploys the cluster within a Kubernetes environment, leveraging container orchestration for scalability and management.
Create Cluster on Virtual Machine / Instances
Select Virtual Machine / Instances and click Continue to proceed.
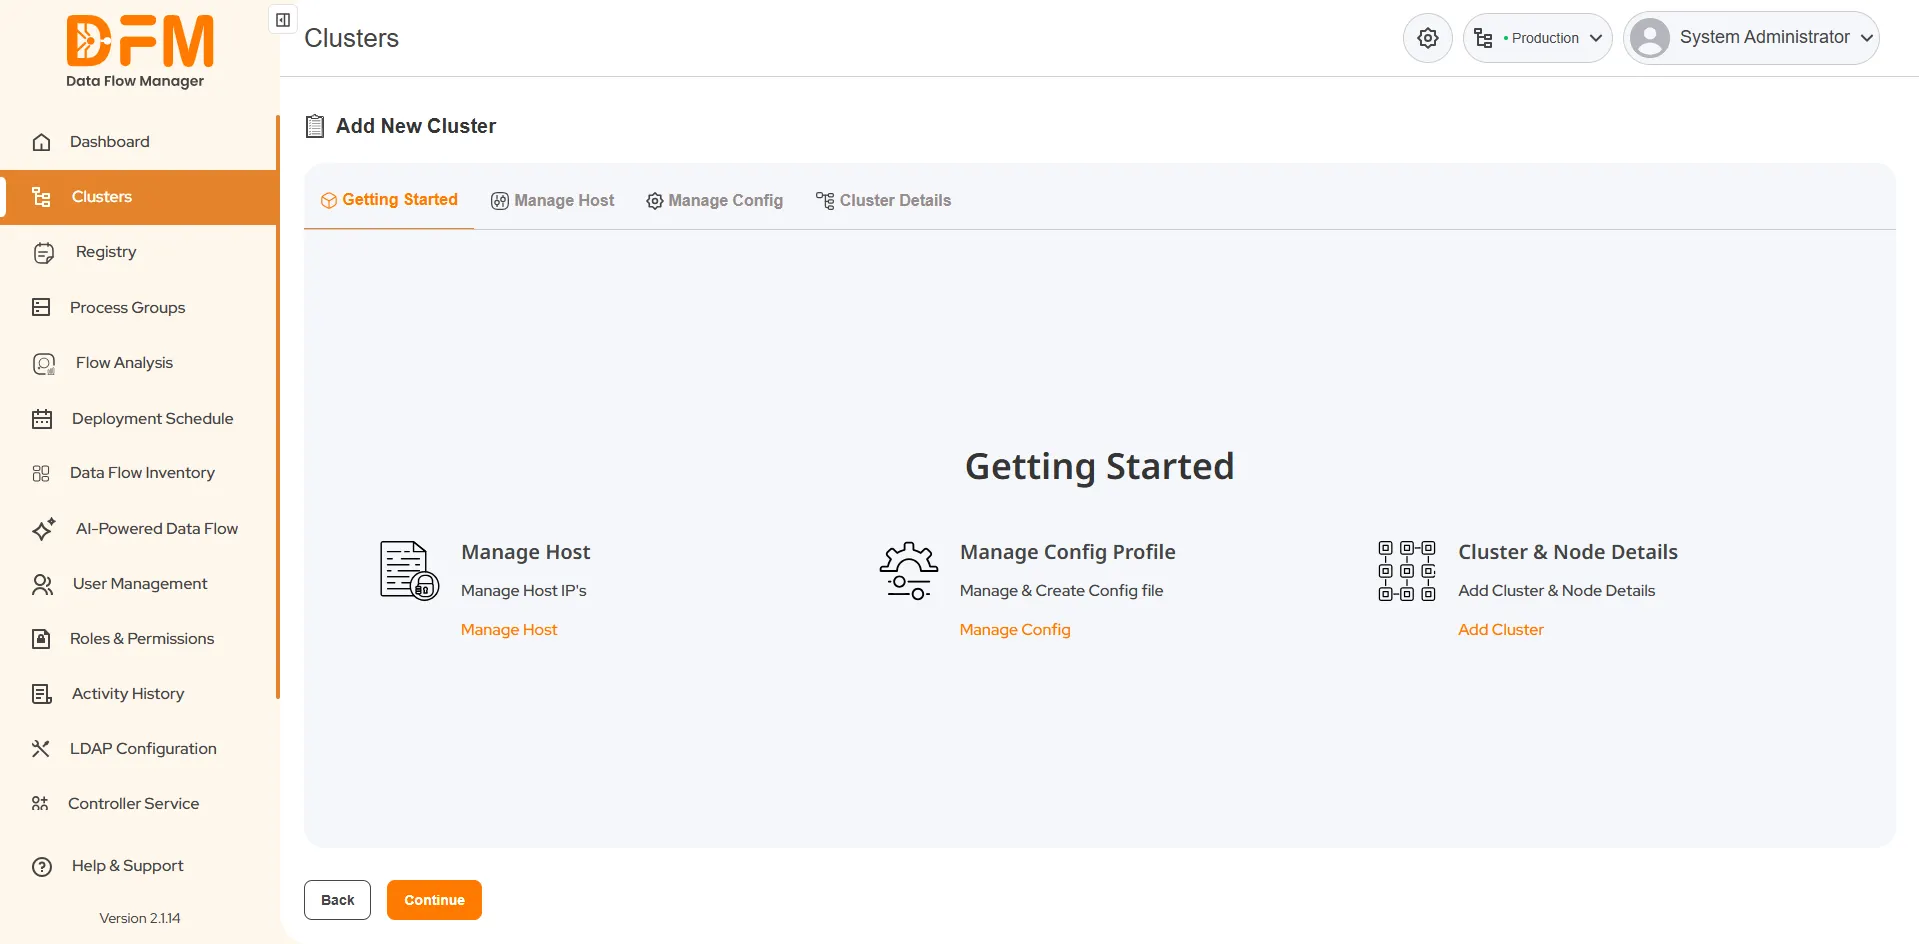
You will be directed to a "Getting Started" page that outlines the three-step process for creating a new VM-based cluster:
- Manage Hosts:Add and configure the host machines (VMs or instances) on which the cluster nodes will run.
- Manage Config: Define configuration parameters, such as ports, directories, and environment settings.
- Cluster Details: Provide cluster-level information, such as the cluster name, version, and node details.
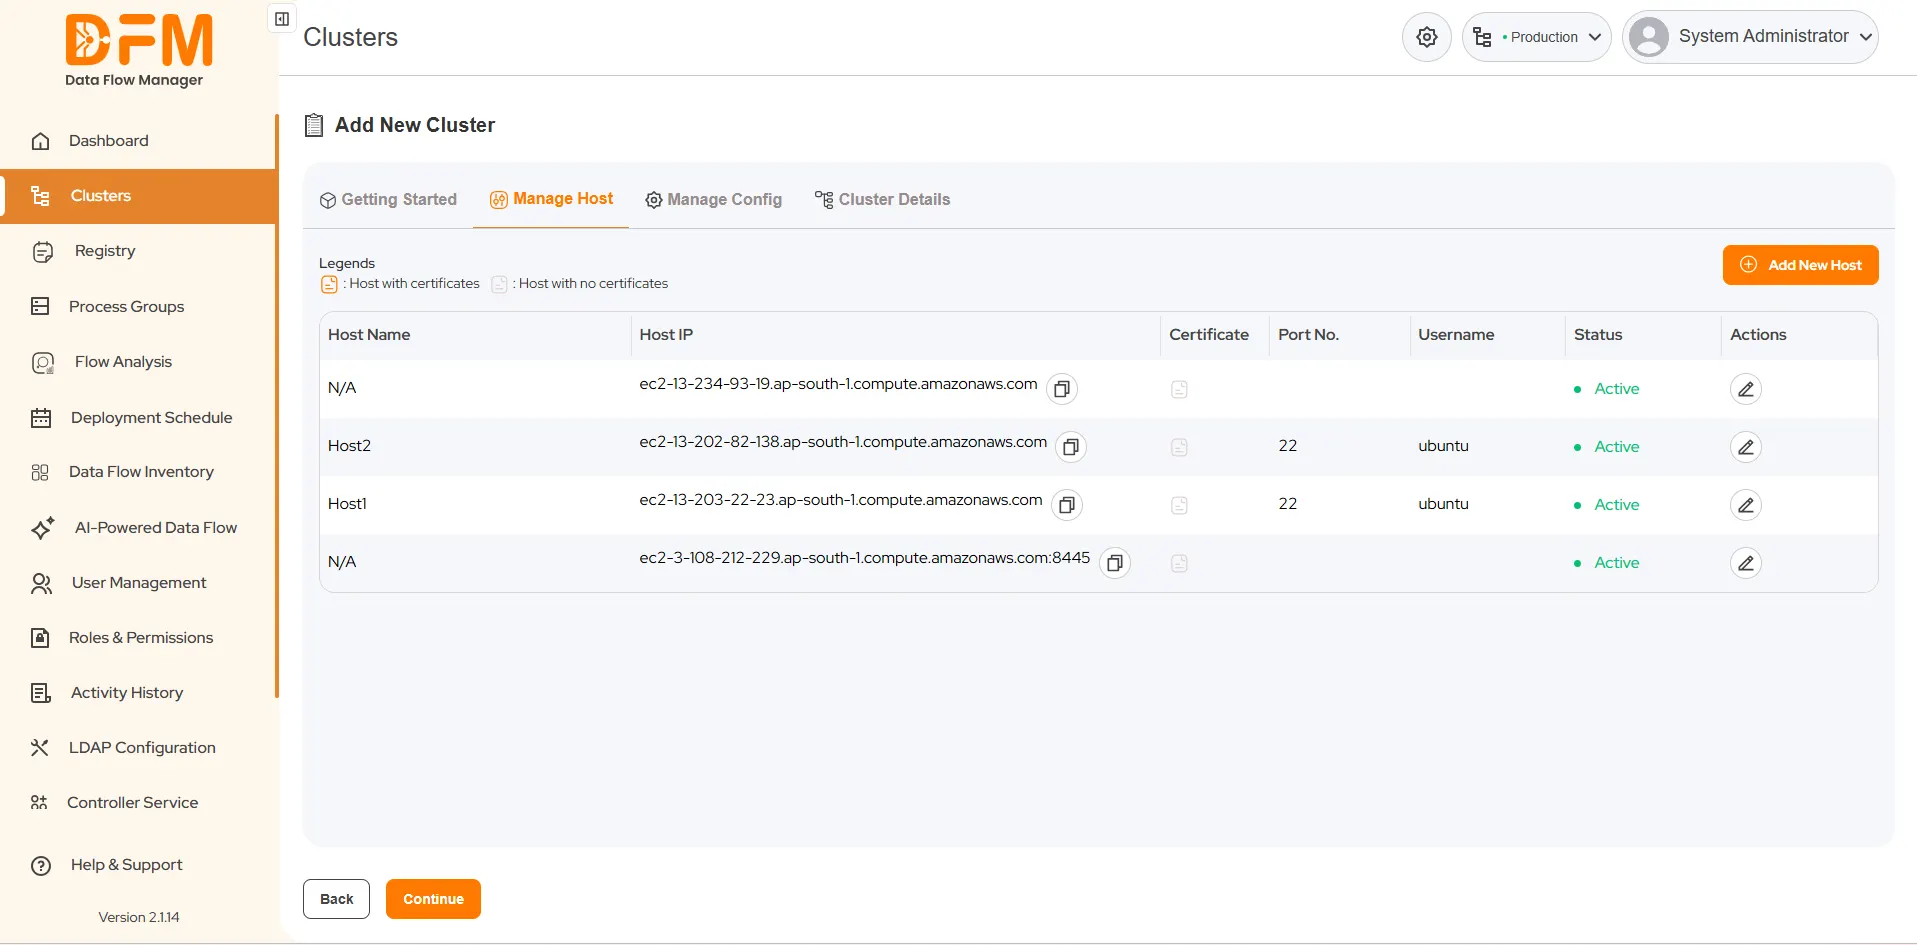
Step 1: Manage Hosts
In this step, you will add and configure the hosts that will power your cluster.
- Navigate to the Manage Hosts Tab: This tab displays a list of all available hosts from your connected virtual machines or instances.
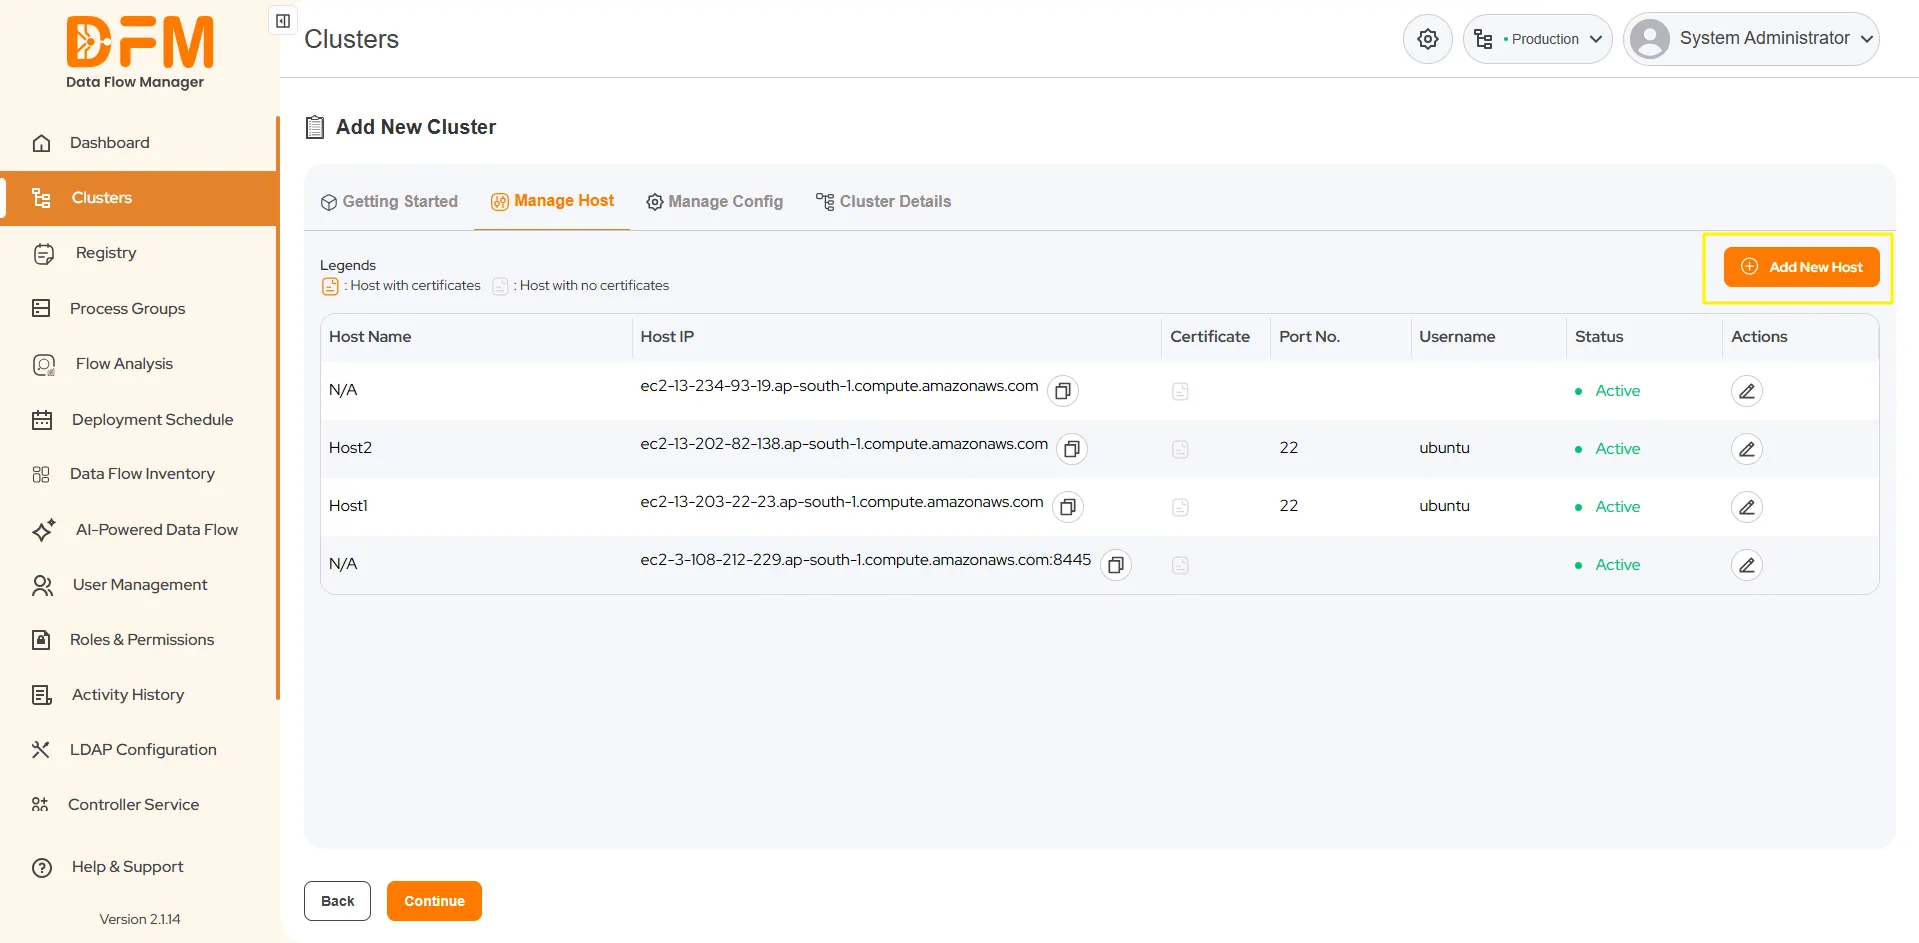
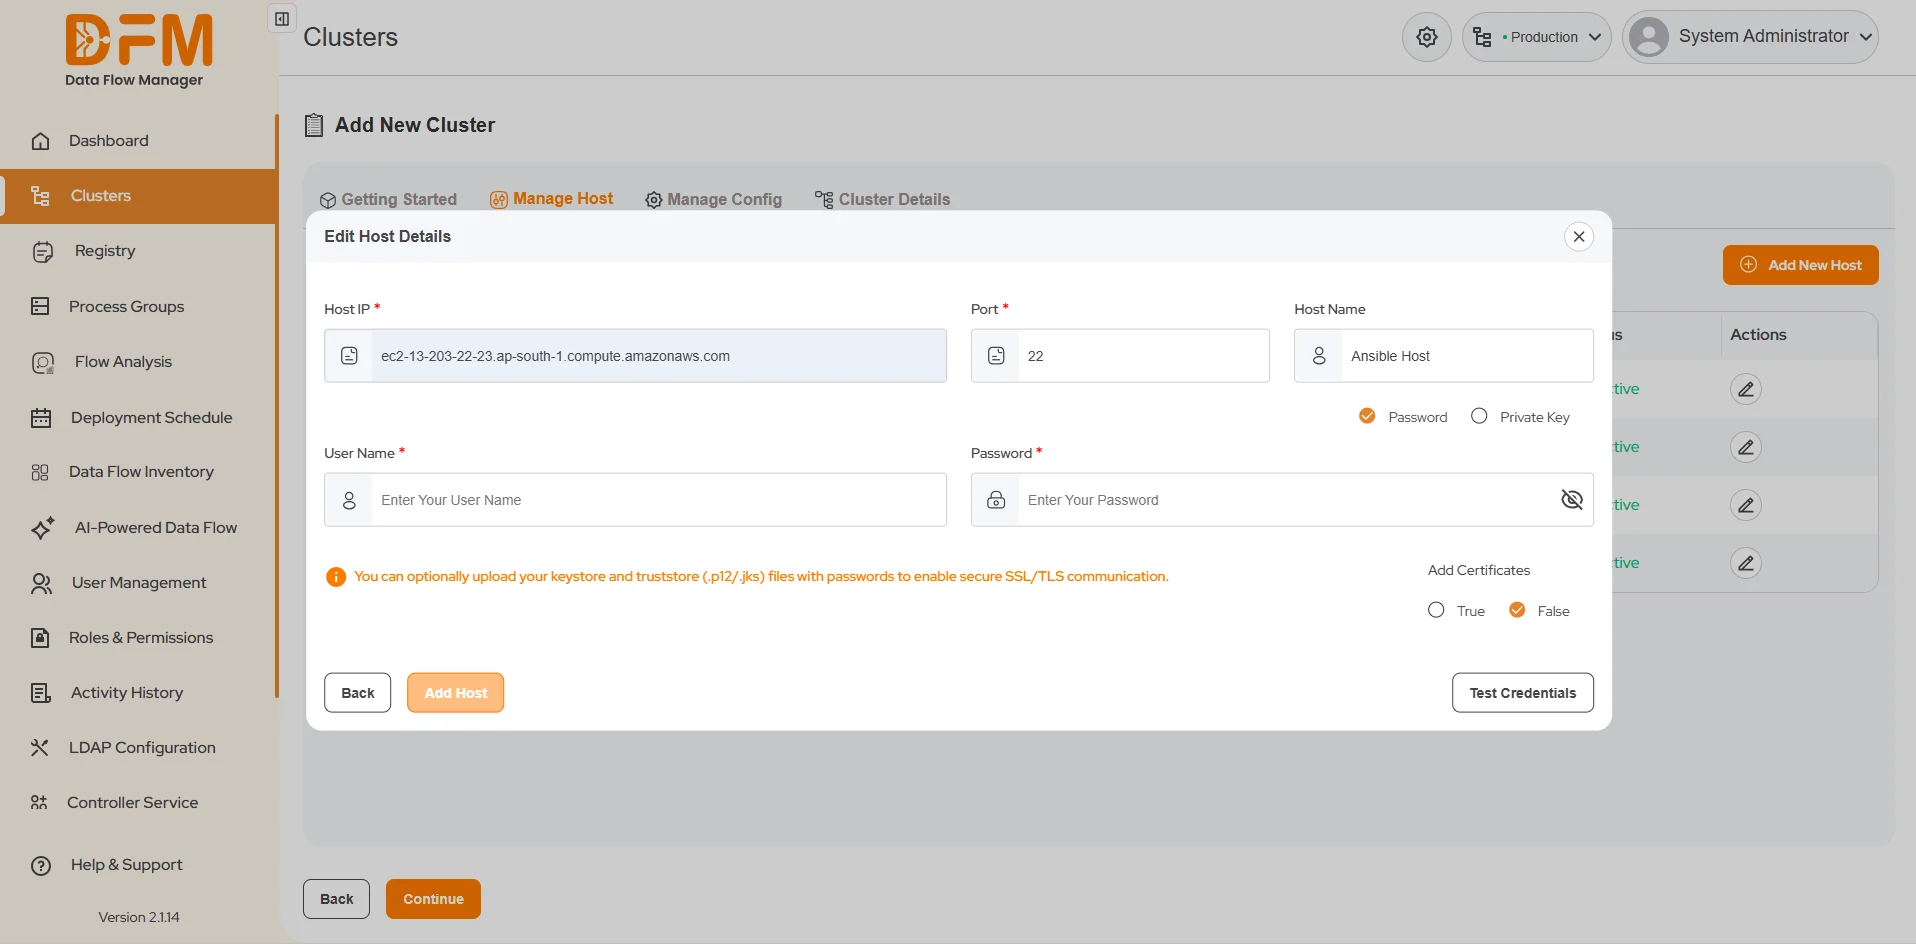
- Add a New Host:
- Click the Add New Host button in the top-right corner.
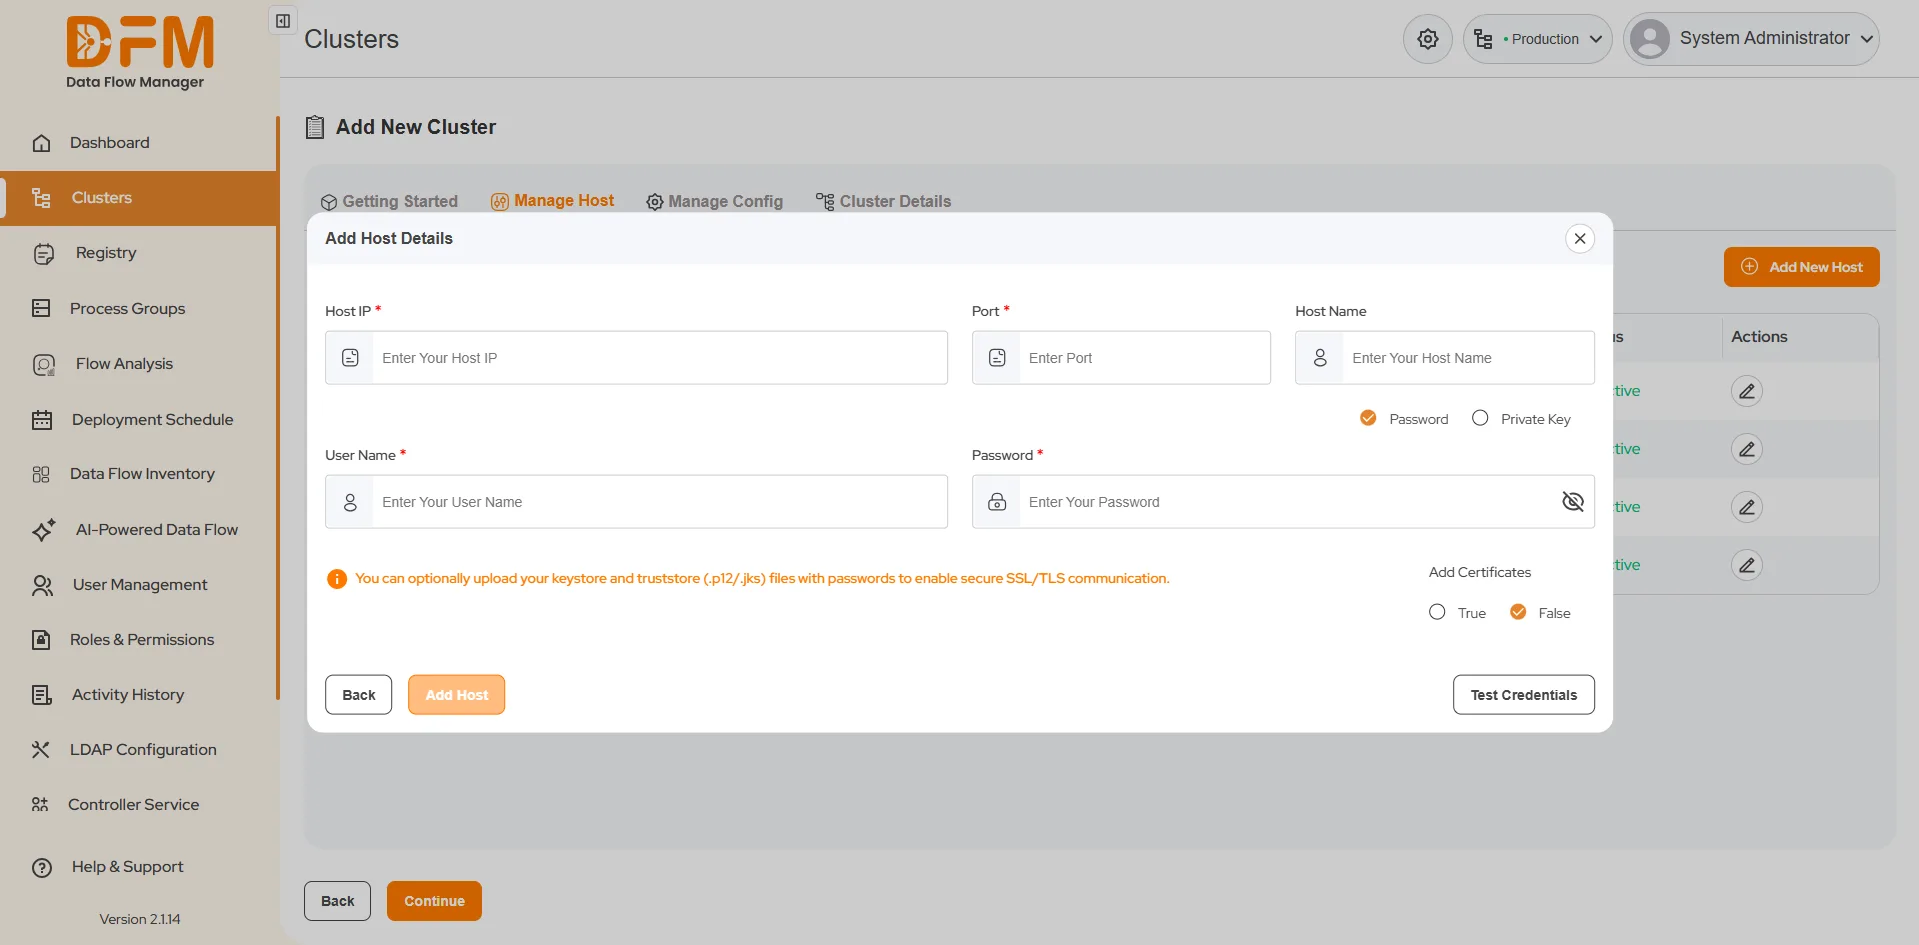
- A pop-up window will appear. Enter the following host details:
- Host IP: The IP address or URL of the instance.
- Port Number: The port used for communication (e.g., SSH port 22).
- Host Name: A user-defined, friendly name for the host.


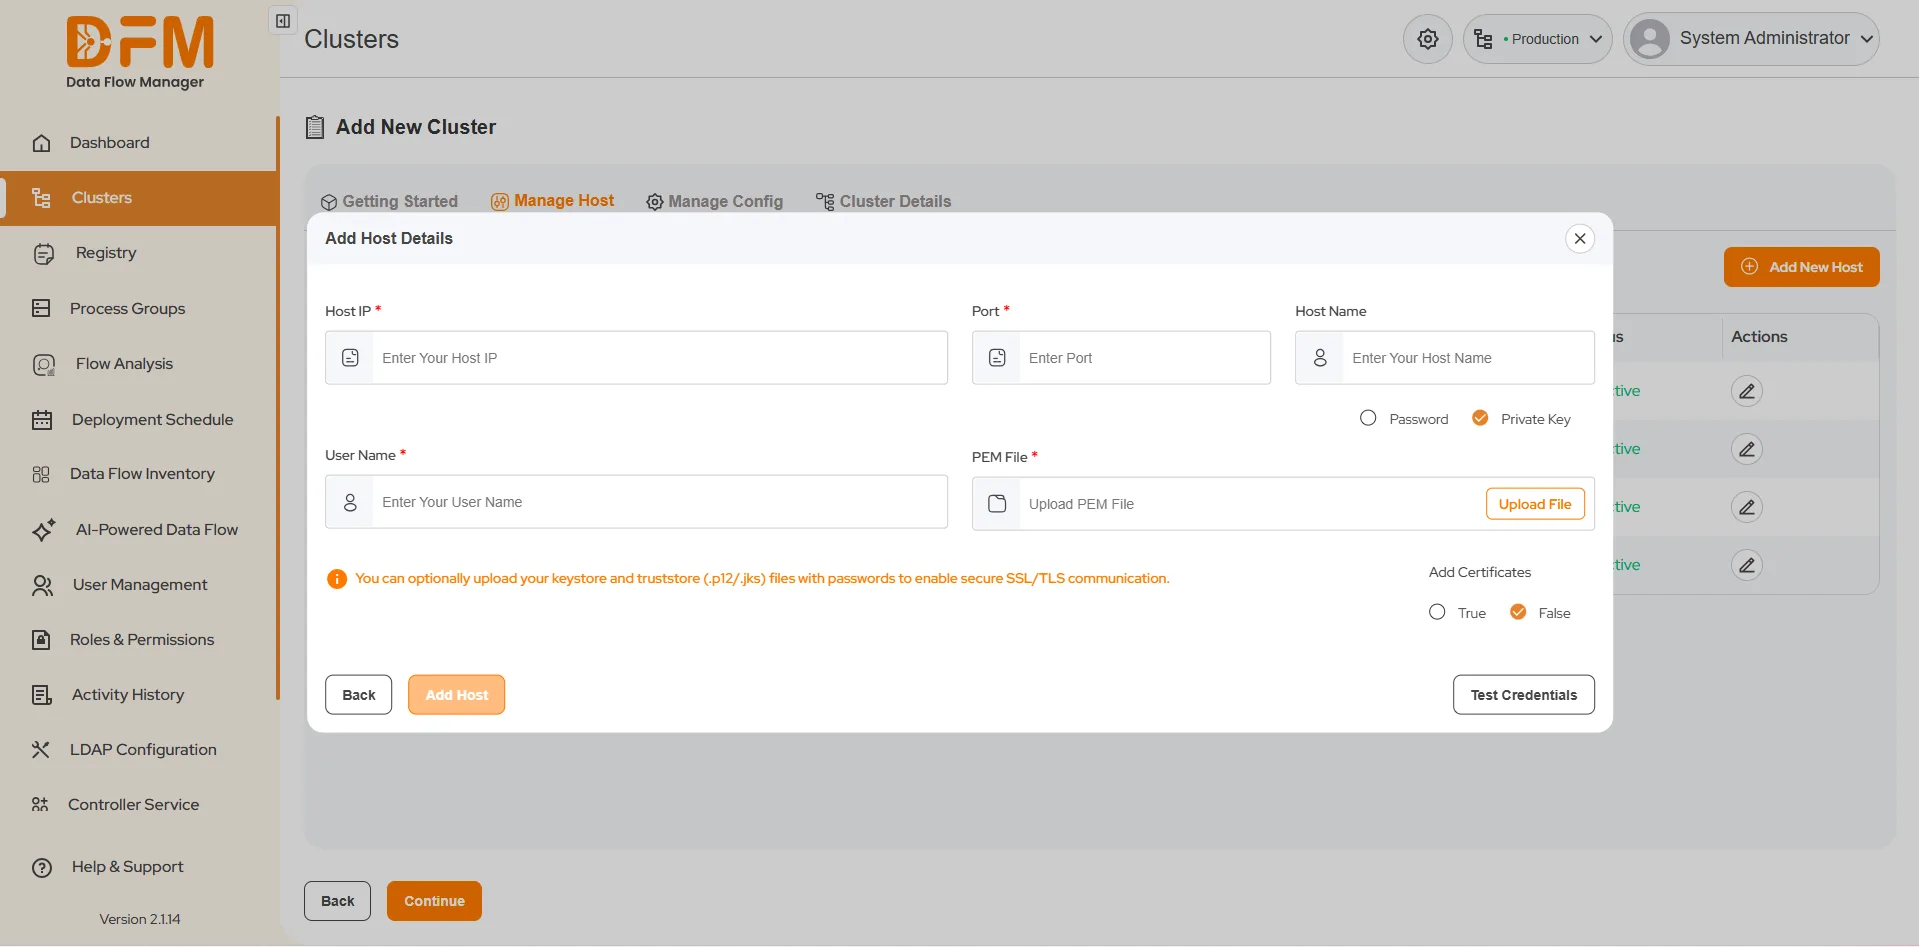
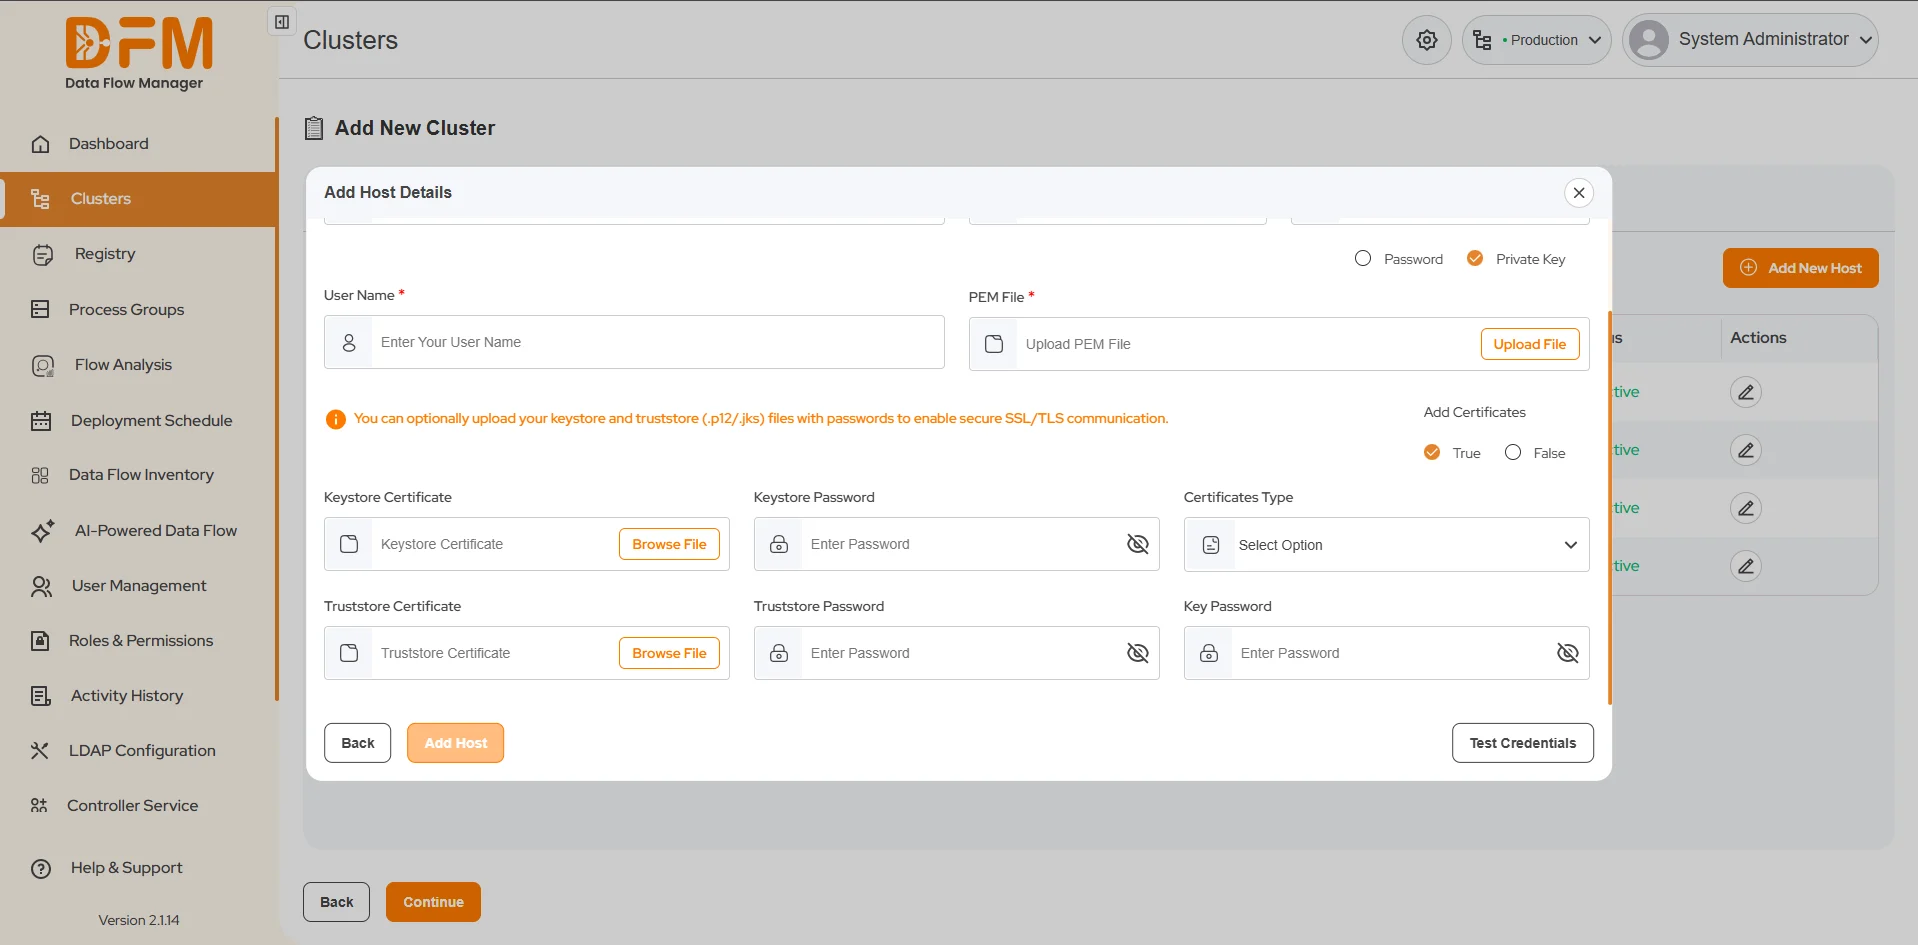
- Authenticate the Host:
Select an authentication method:
- Password Authentication:Enter the Username and Password for the host.
- Private Key Authentication: Enter the Username and upload the PEM file for private key verification.

- Add Certificates (Optional):
- For enhanced security, you can add SSL certificates. Enable this by setting Add Certificate to True.
- Provide the following details:
- Keystore Certificate: Upload the certificate, enter the Keystore Password, and select the Certificate Type.
- Truststore Certificate: Upload the certificate and provide the Truststore Password and Key Password.

- Test and Save the Host:
- Click Test Credentials to validate the authentication settings and ensure DFM can connect to the host.
- If the test is successful, click Add Host. The new host will appear in the list.
- Manage Existing Hosts:
- To Edit a Host: Click the Edit icon next to the host. You can update its details and must re-authenticate (using Password or Private Key) and Test Credentials before saving.
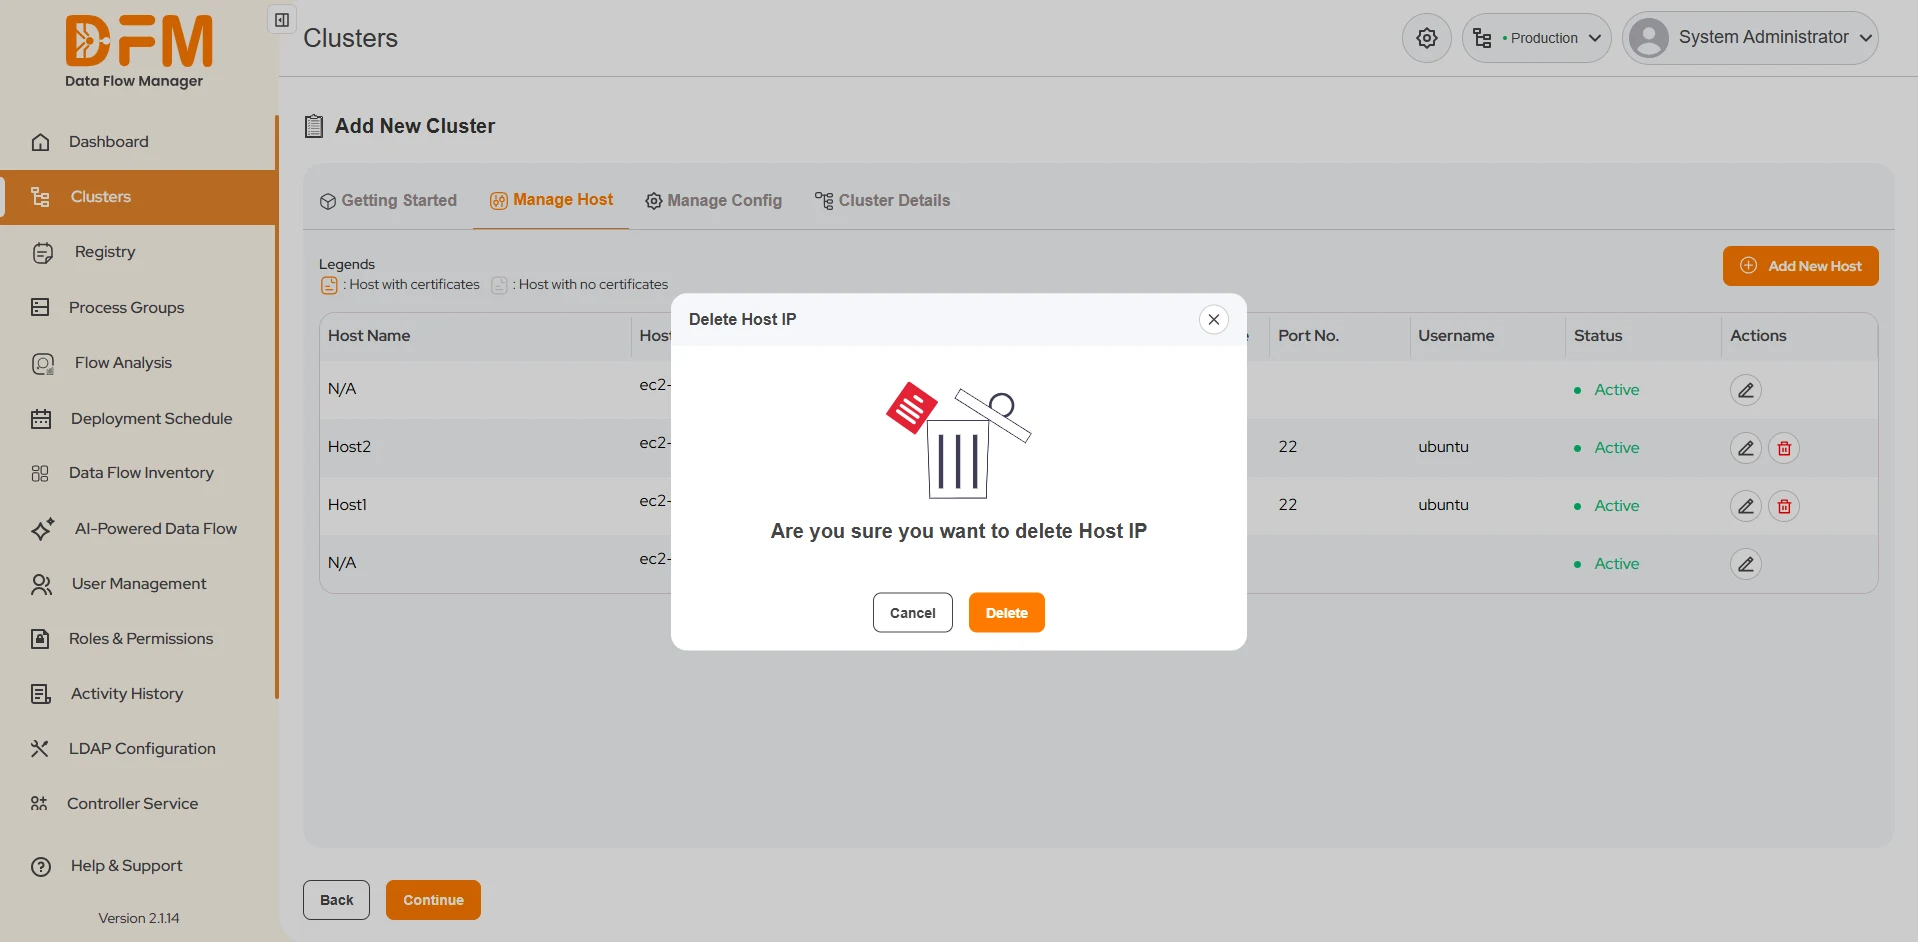
- To Delete a Host:
- Click the Delete icon. Hosts that are not assigned to an active cluster can be removed.
- Confirm the deletion when prompted.


Step 2: Manage Config
Once hosts are added, you must define the NiFi configuration for the cluster.
1. Navigate to the Manage Config Tab: This section displays a list of all existing configurations.
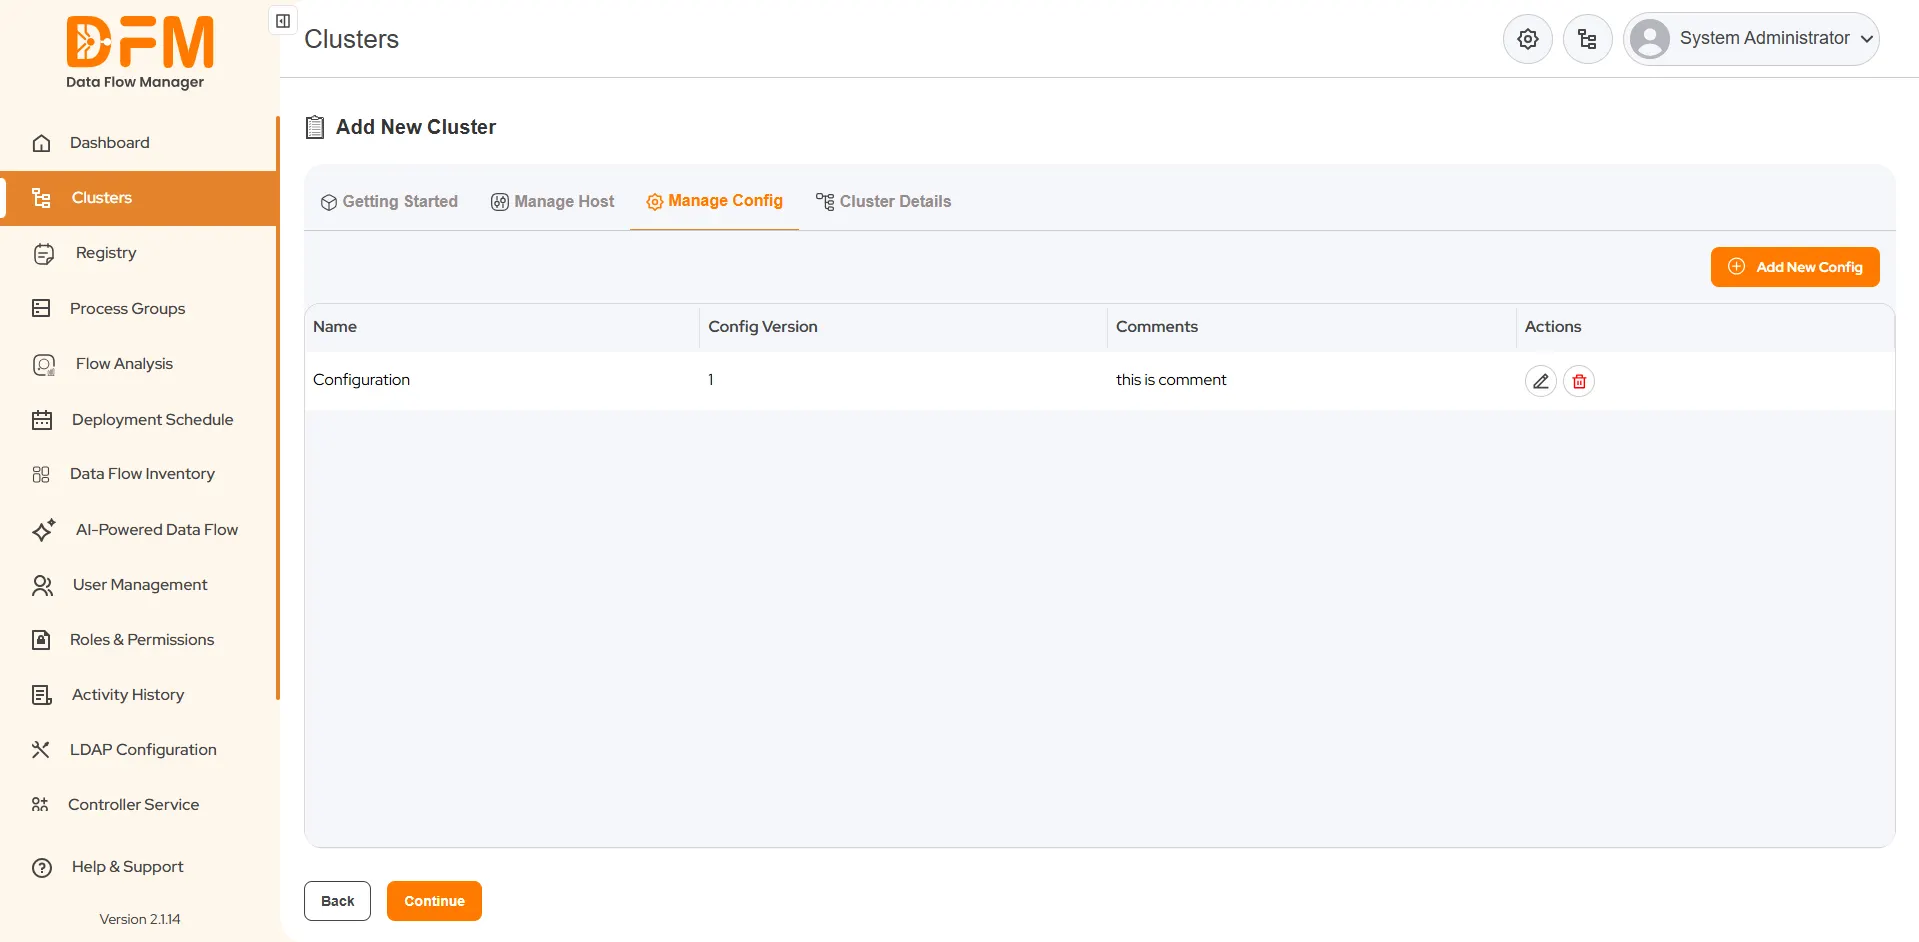
2. Add a New Configuration:
- Click the Add New Config button.
- Enter the following initial details:
- NiFi Version: Select the NiFi version for this configuration..
- Configuration Name: Enter a unique name for this configuration profile.
- Comments: Add any relevant notes for reference.


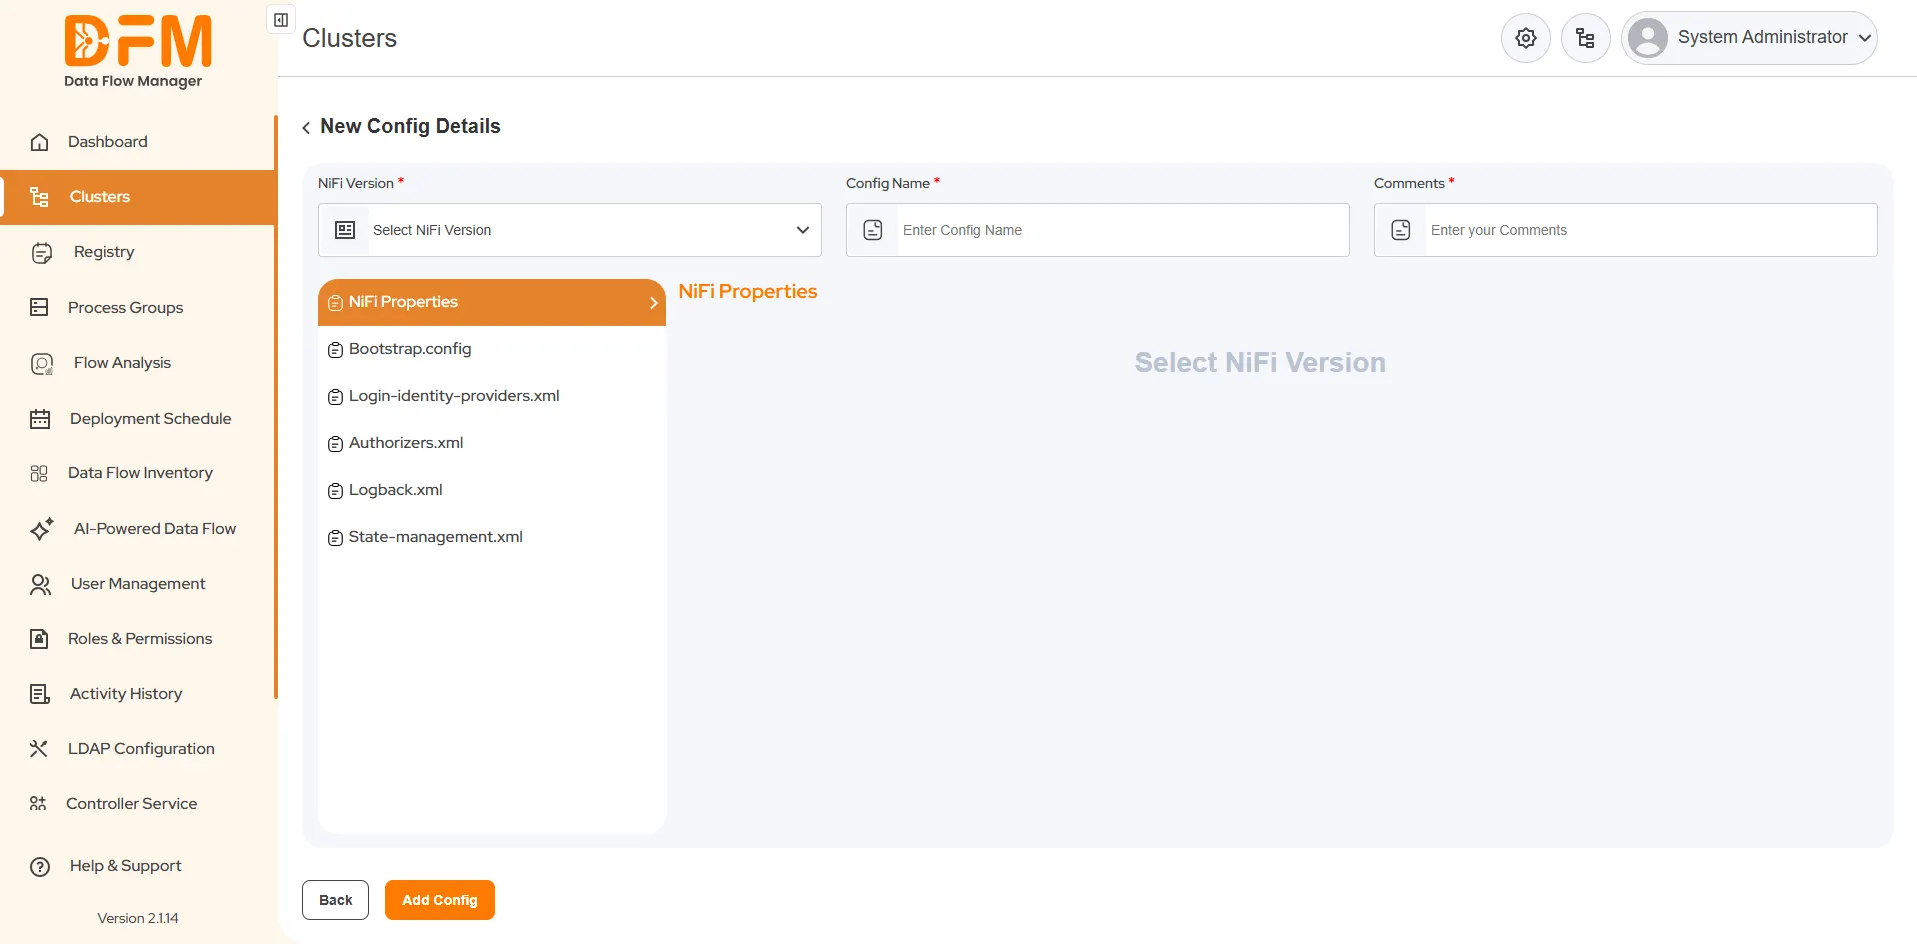
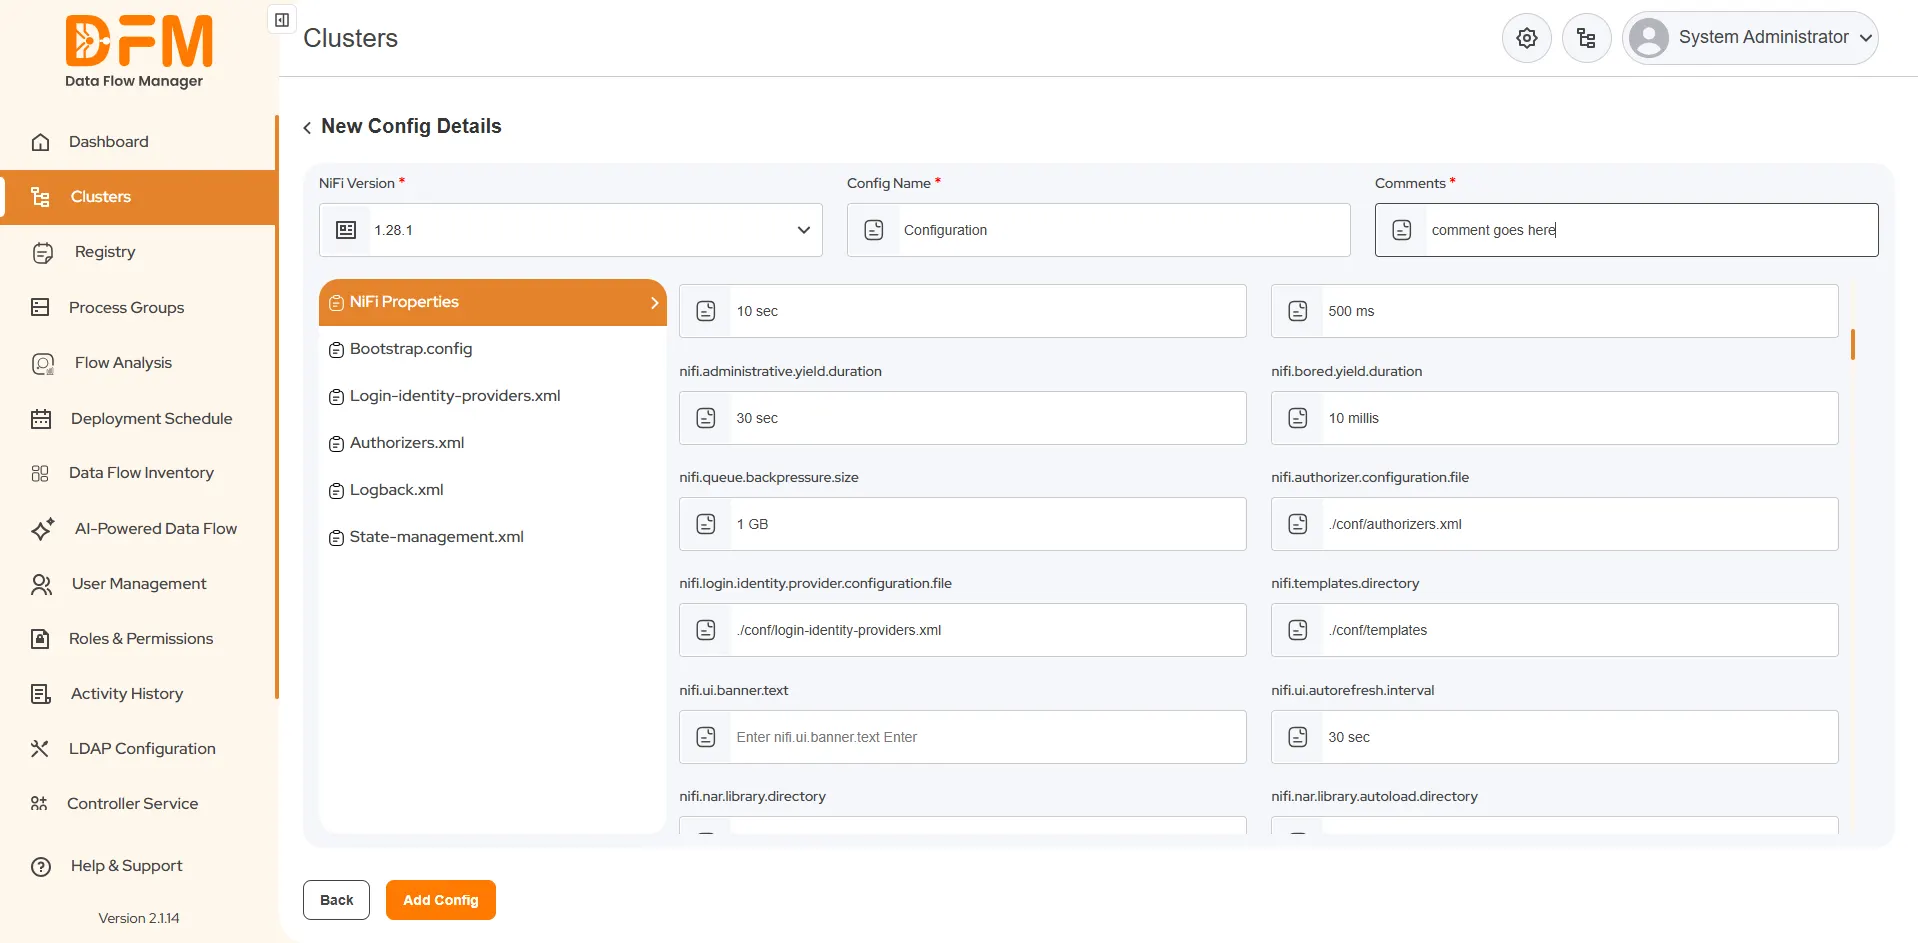
3. Define Configuration Parameters:
- After providing the basic details, you can define parameters for core NiFi configuration files, including:
- nifi.properties
- bootstrap.conf
- login-identity-providers.xml
- authorizers.xml
- logback.xml
- state-management.xml
- Fill in the required fields under each file according to your cluster's setup and security requirements.
4. Save the Configuration:
- Click Add Config to save the new configuration. It will now be available in the configuration list.
5. Manage Existing Configurations:
- To Edit/Delete: Similar to hosts, you can click the Edit or Delete icons to manage configurations. A configuration cannot be deleted if it is currently in use by a cluster.
Step 3: Add Cluster Details
This is the final step where you assemble the cluster.
1. Navigate to the Cluster Details Tab.
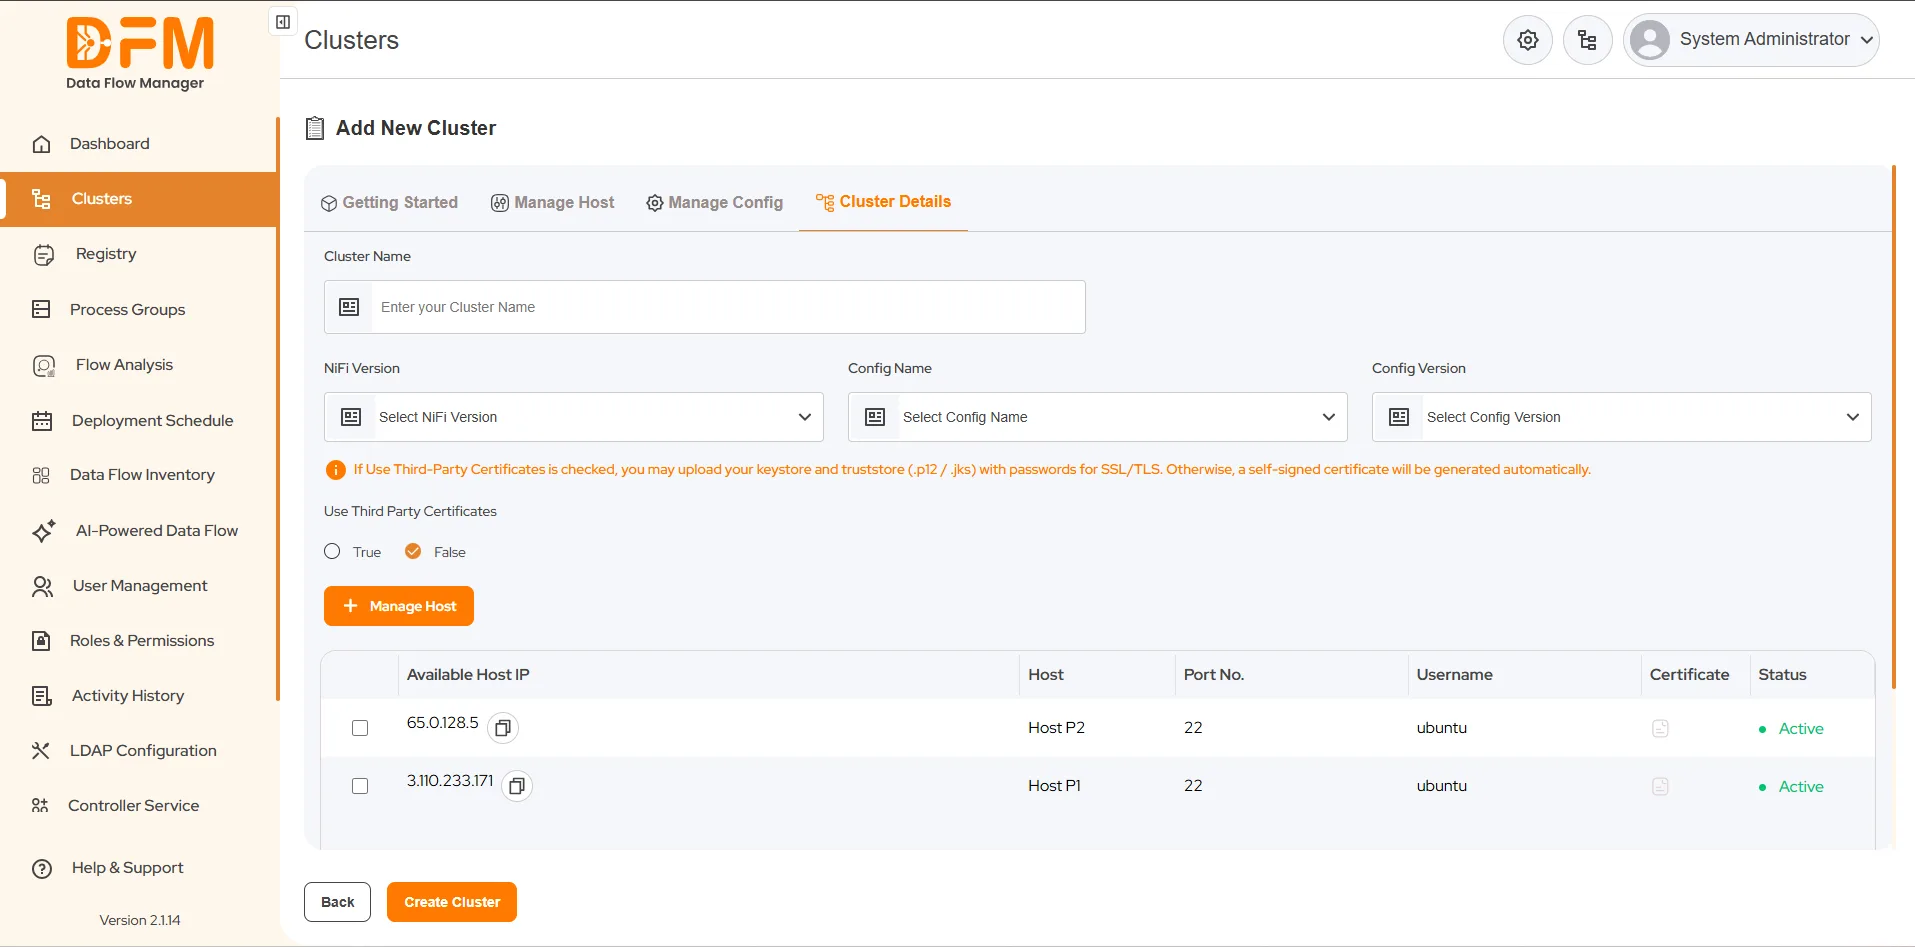
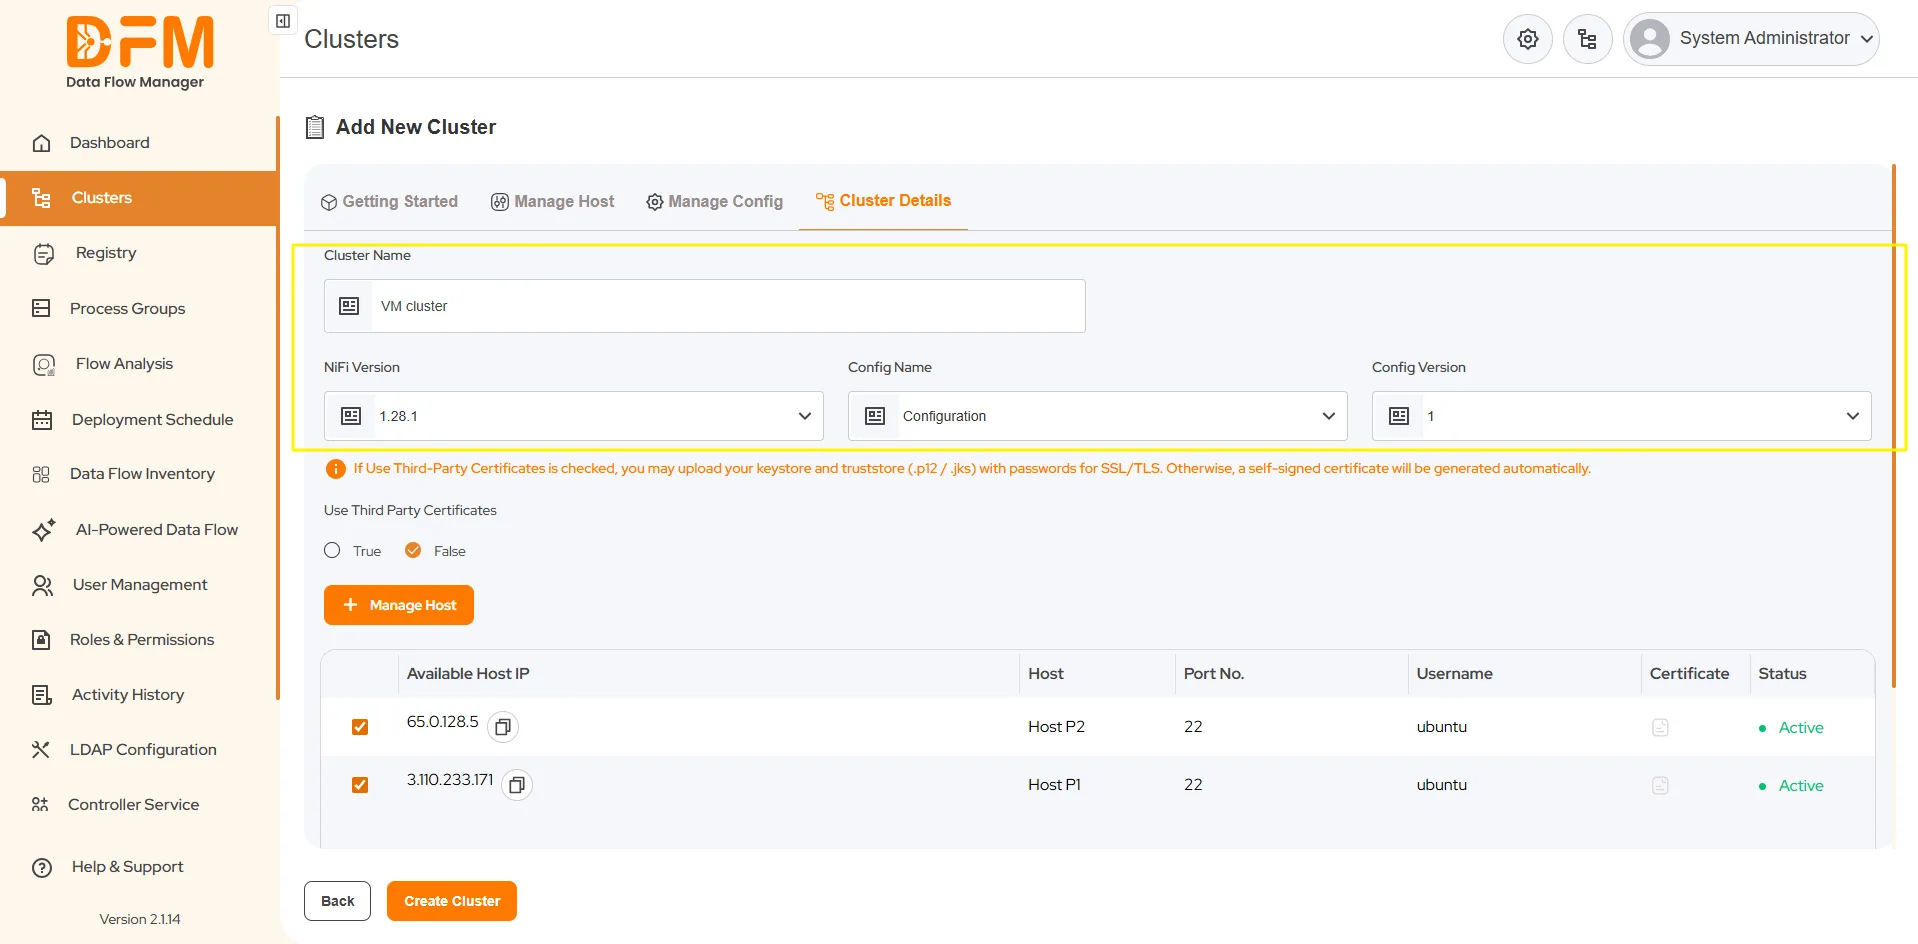
2. Enter Cluster Information:
- Cluster Name: Enter a unique name for your new cluster.
- NiFi Version: Select the desired NiFi version. The system will automatically filter the configuration options to show only those compatible with this version.
- Configuration Name: Choose the configuration profile you created in Step 2.
- Configuration Version: Select the corresponding version of that configuration.
3. Certificate Settings:
- If you added custom certificates during the "Manage Hosts" step, set Use Third-Party Certification to True.
- If you are not using custom certificates, leave this value as False.
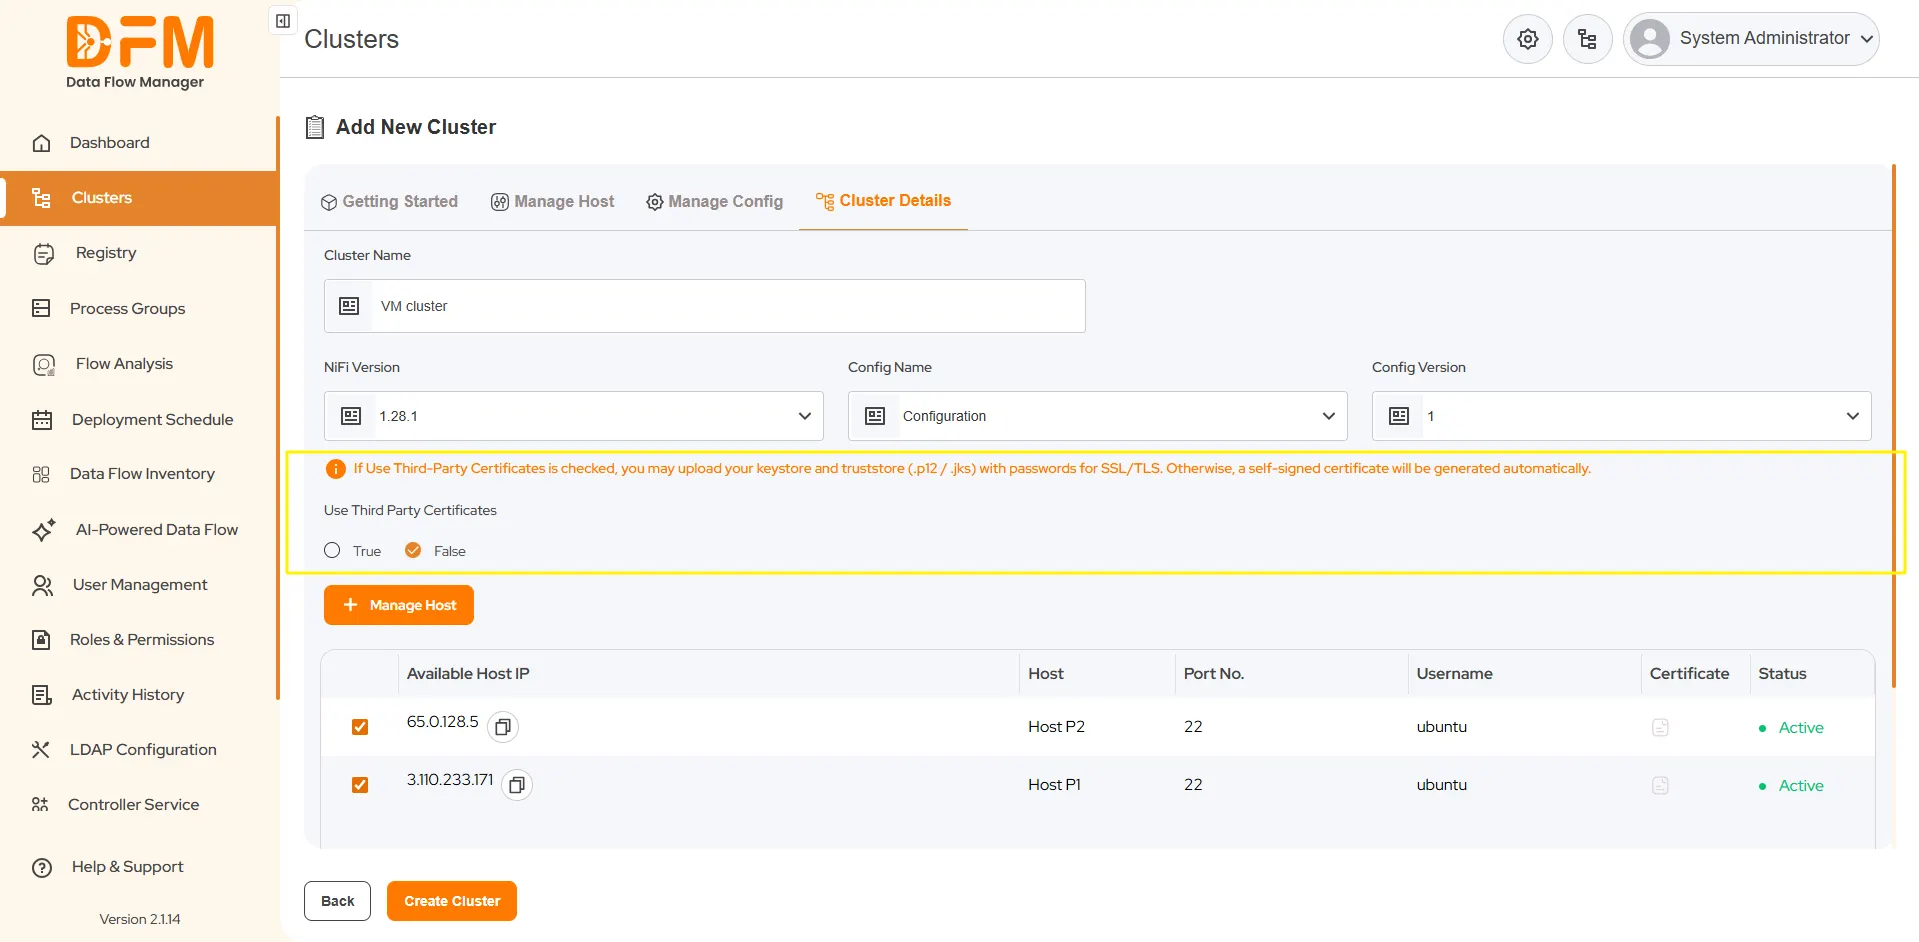
4. Assign Hosts to the Cluster:
- From the "Available Hosts" list, select the hosts you want to include in this cluster.
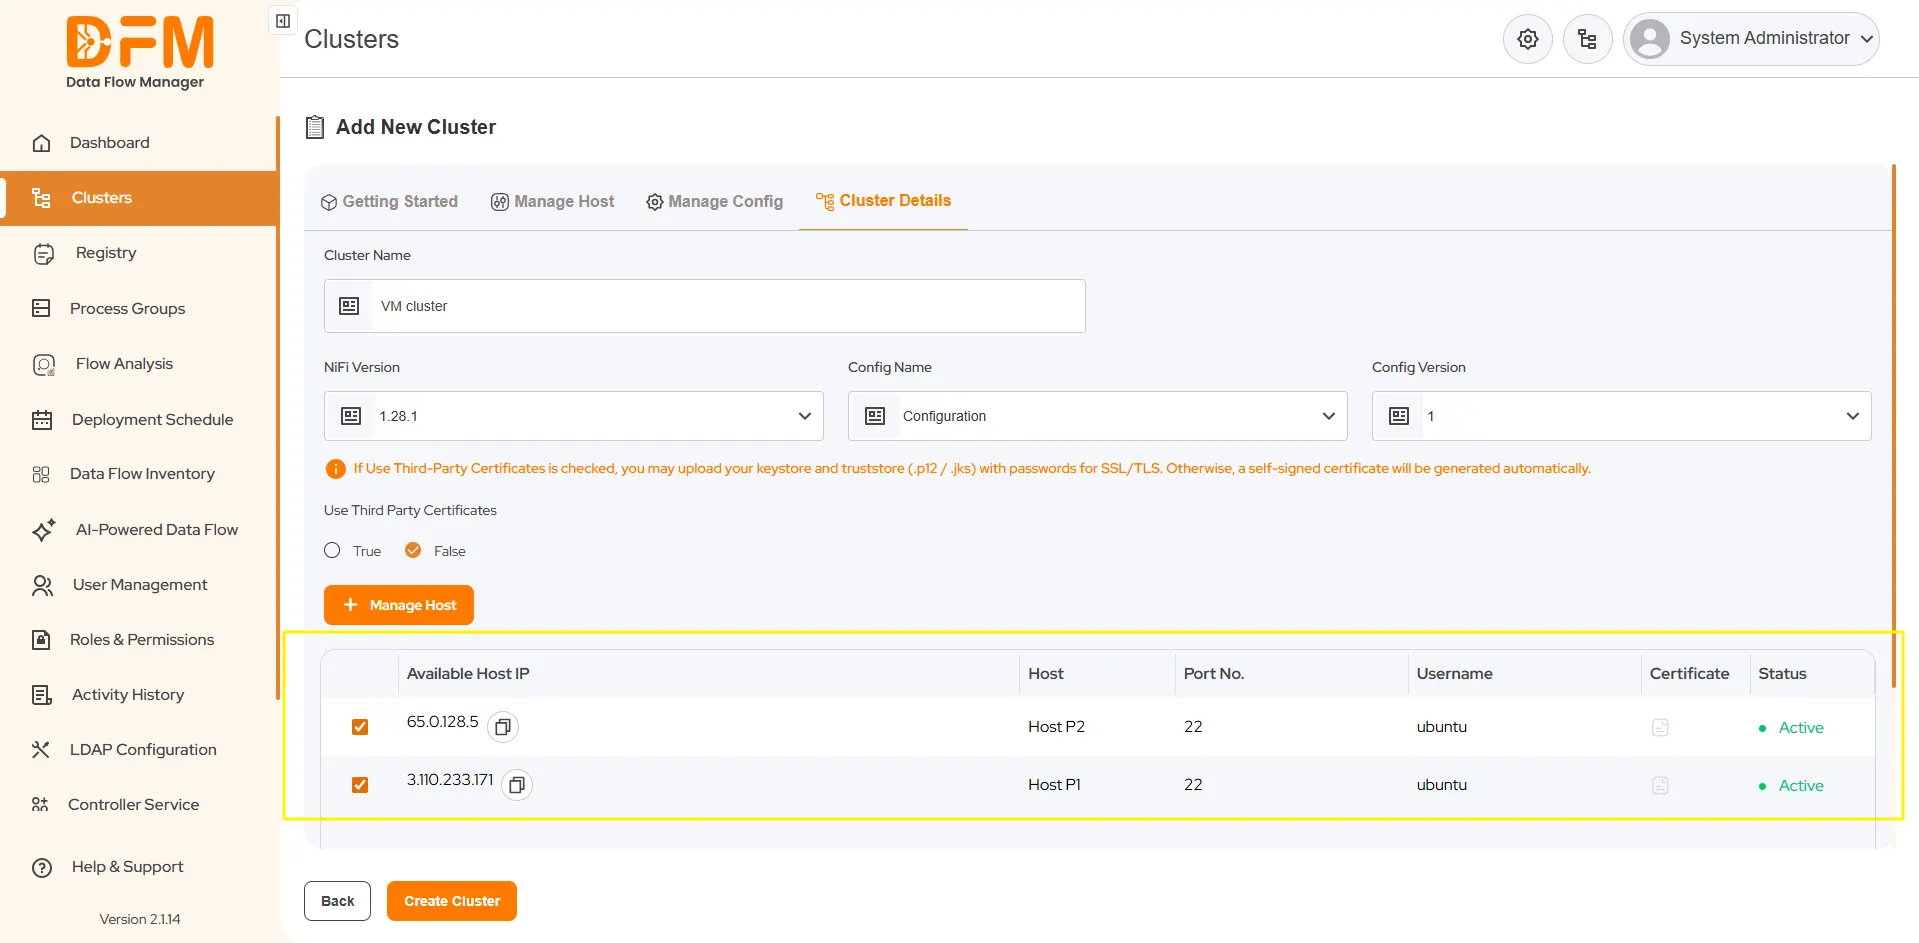
5. Create the Cluster:
- Click Create Cluster to begin the automated deployment process.
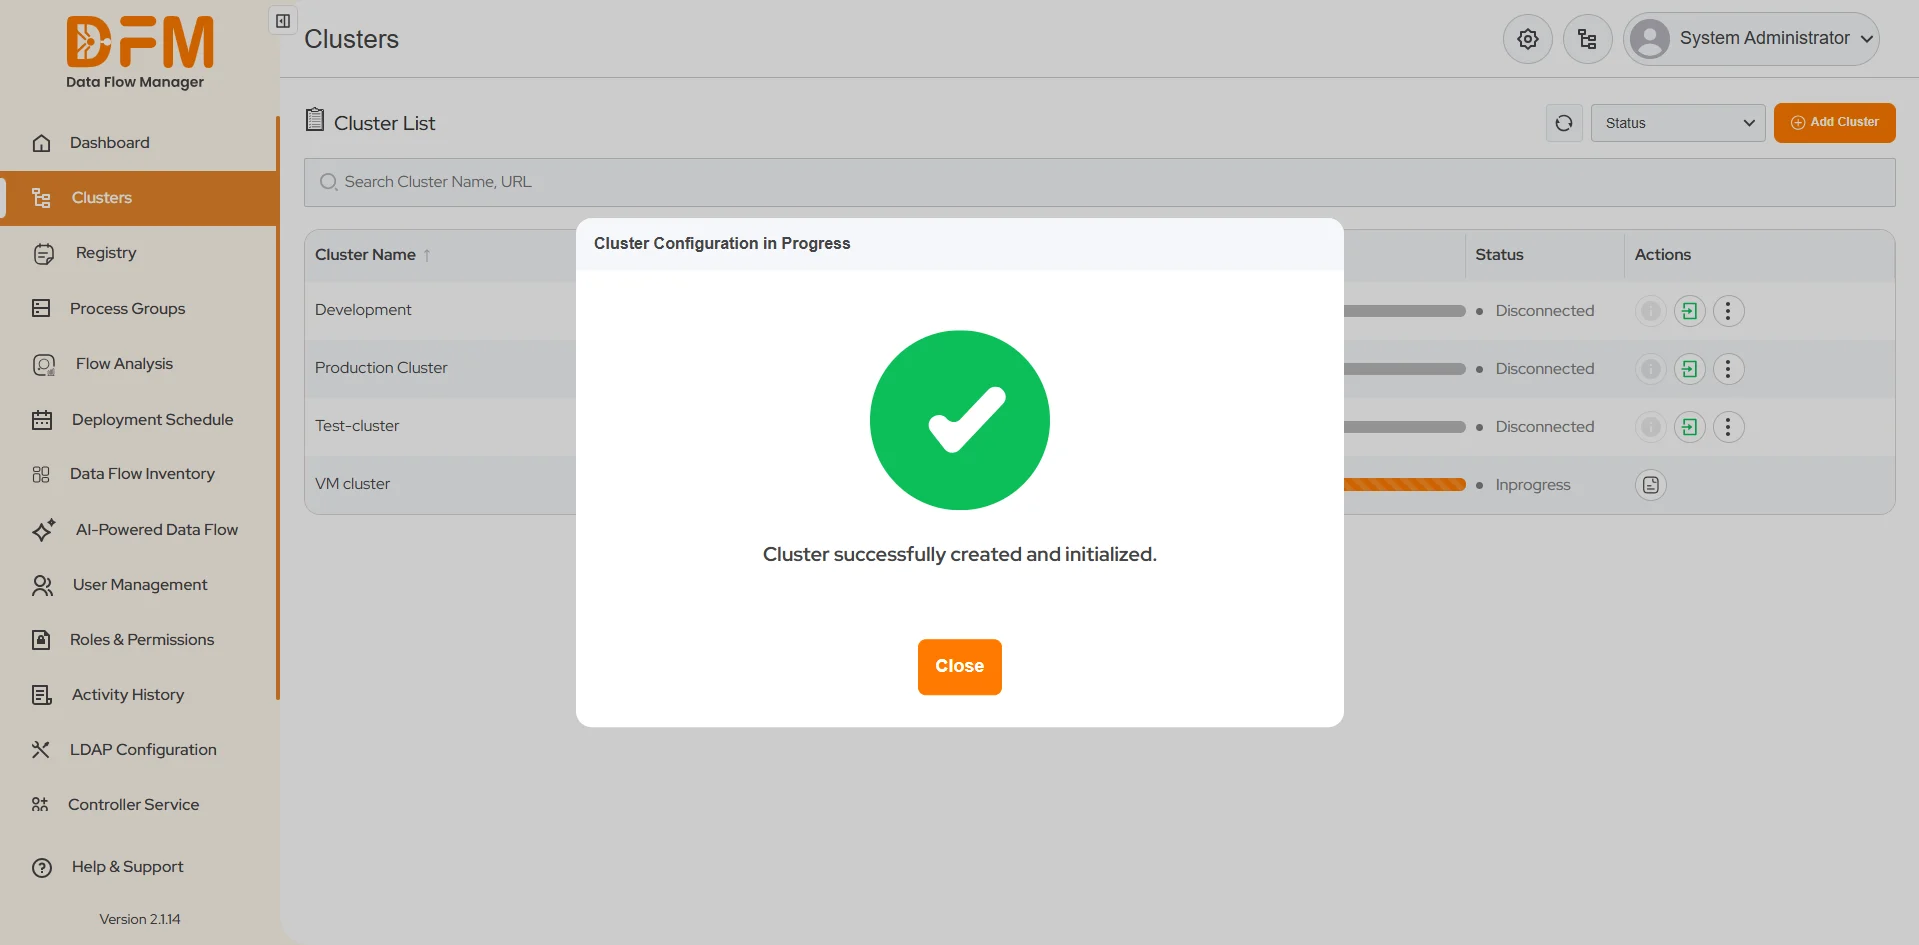
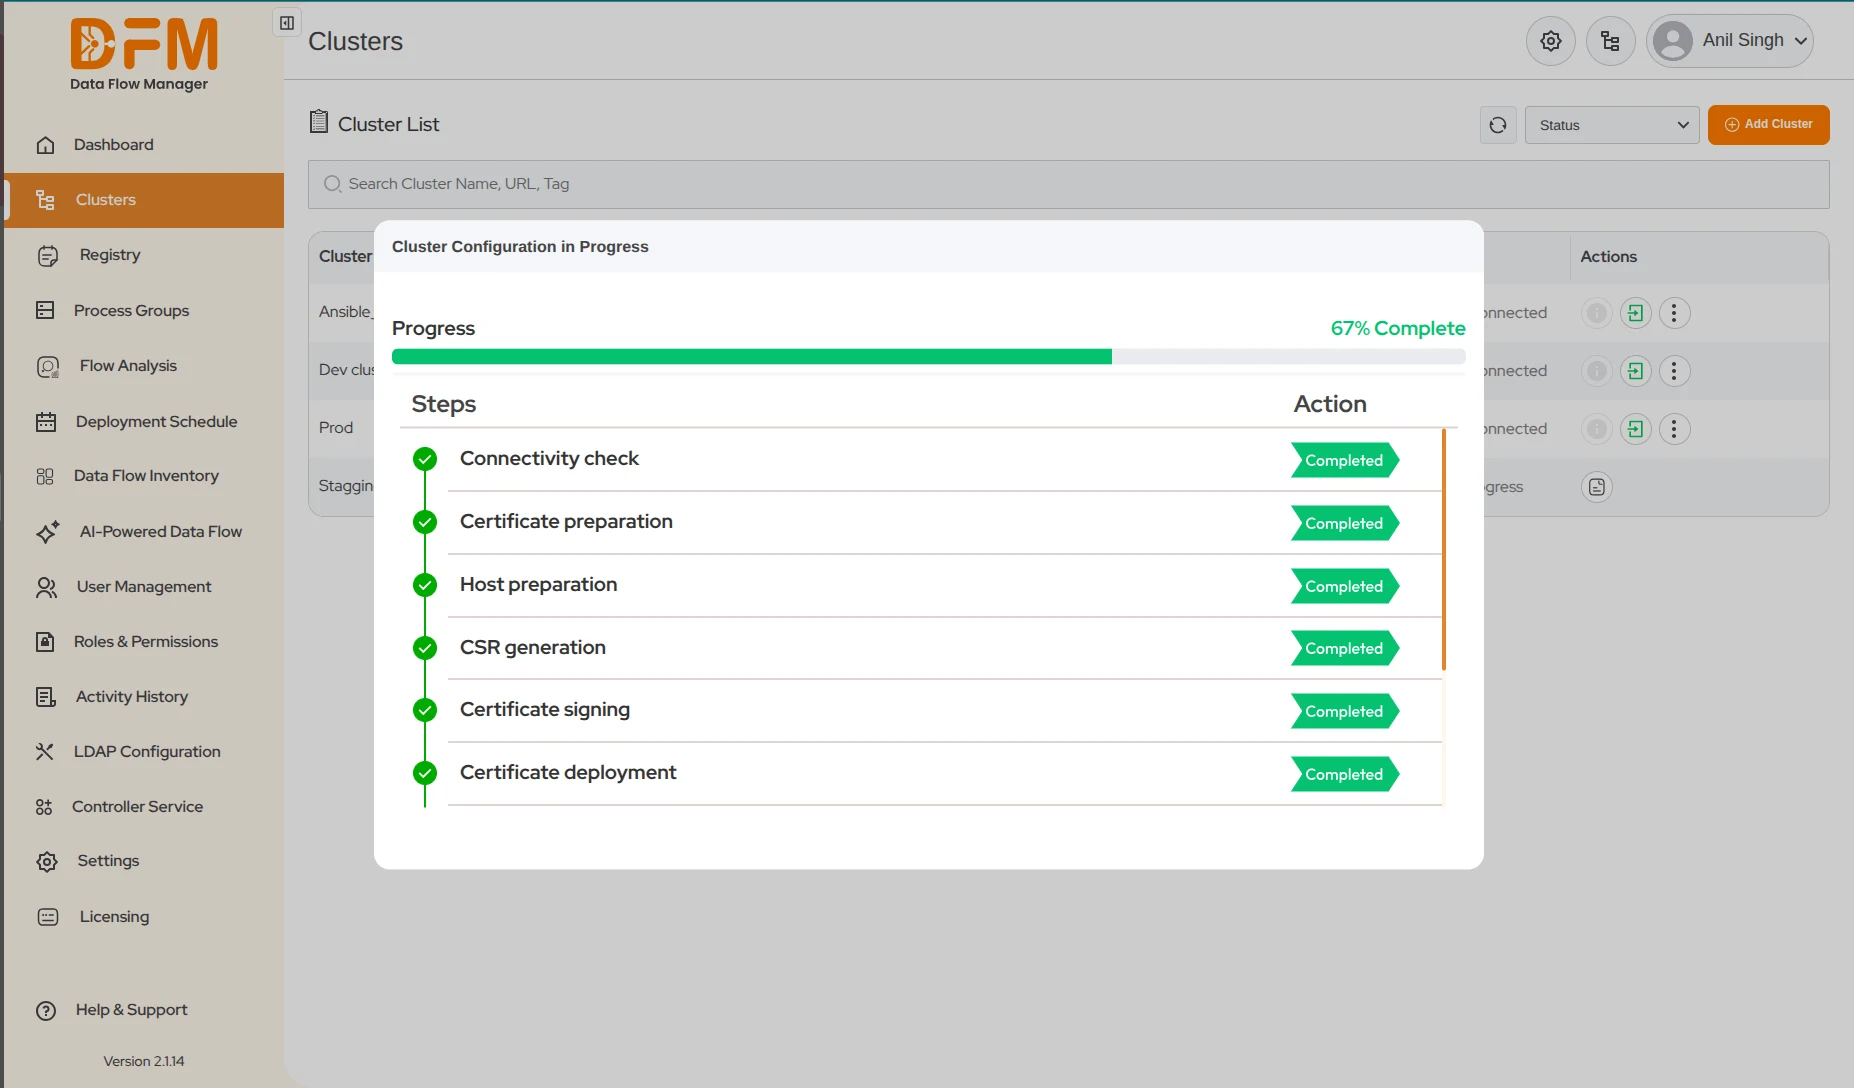
Monitor Creation
1. After submission, you will be redirected to the main Clusters page.
2. Your newly created cluster will appear in the list with a progress bar, showing the real-time completion percentage.
3. The system will display the status of each major step (e.g., "Installing NiFi," "Configuring Nodes") as Completed, Failed, or In Progress.
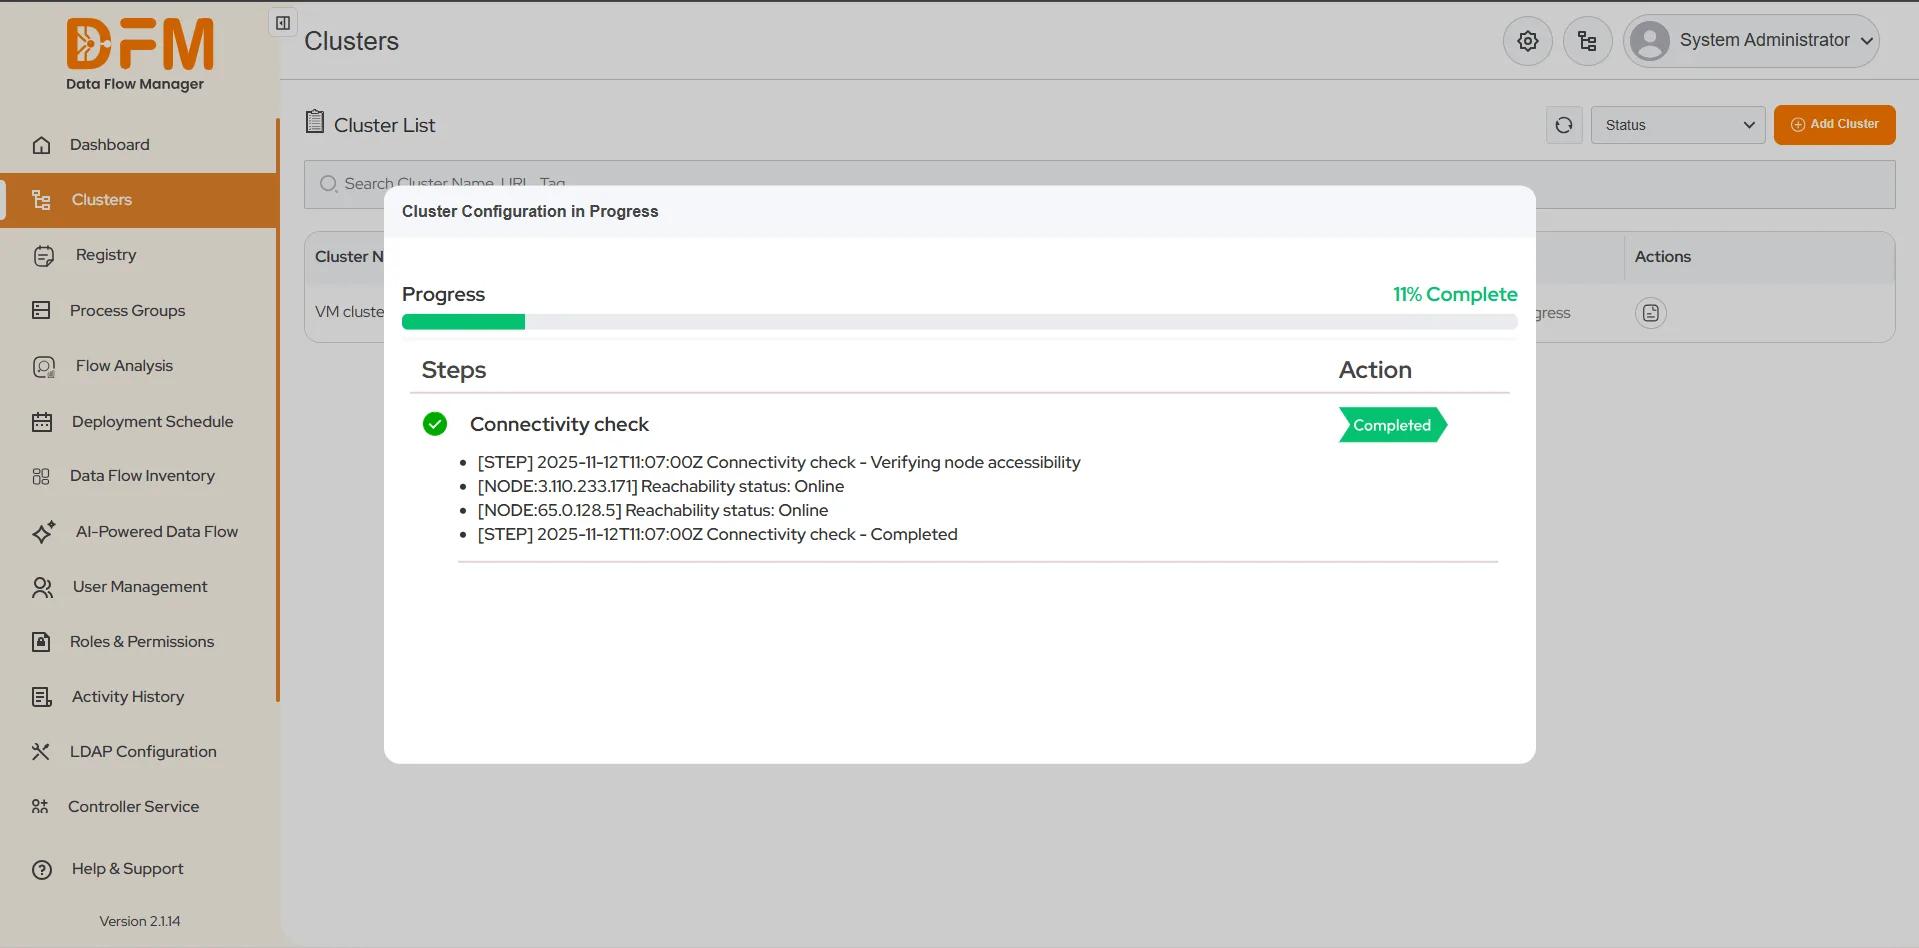
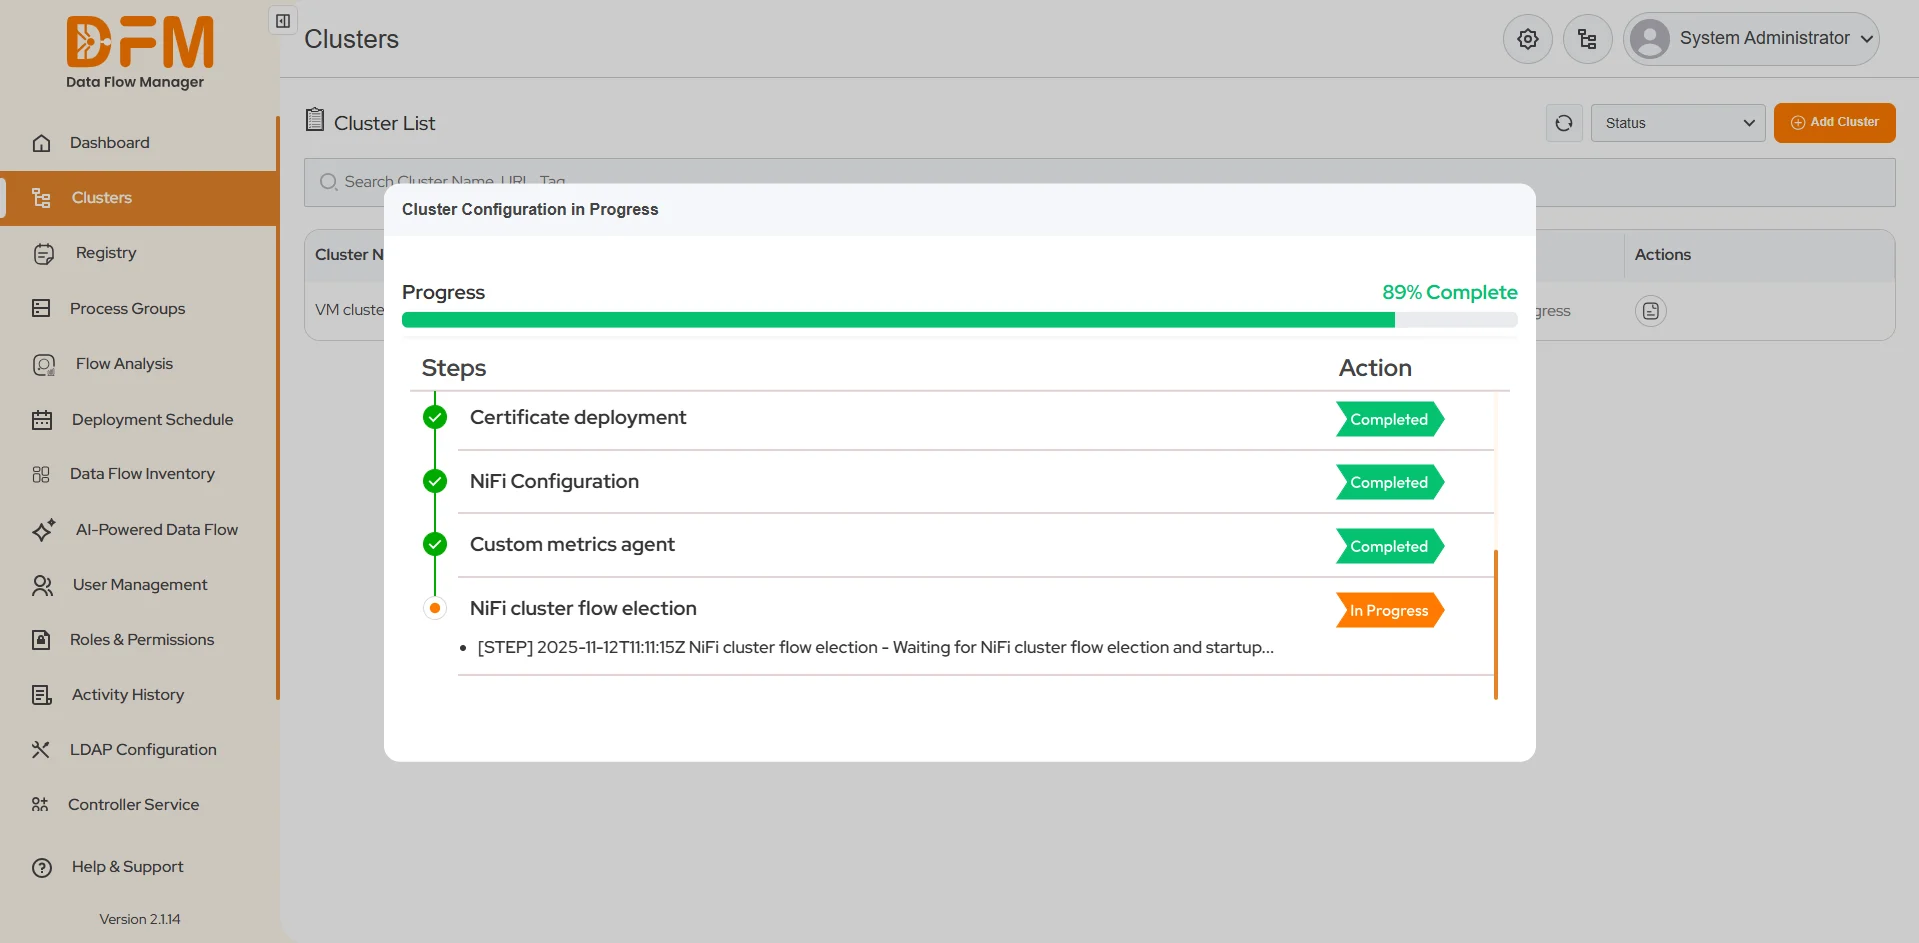
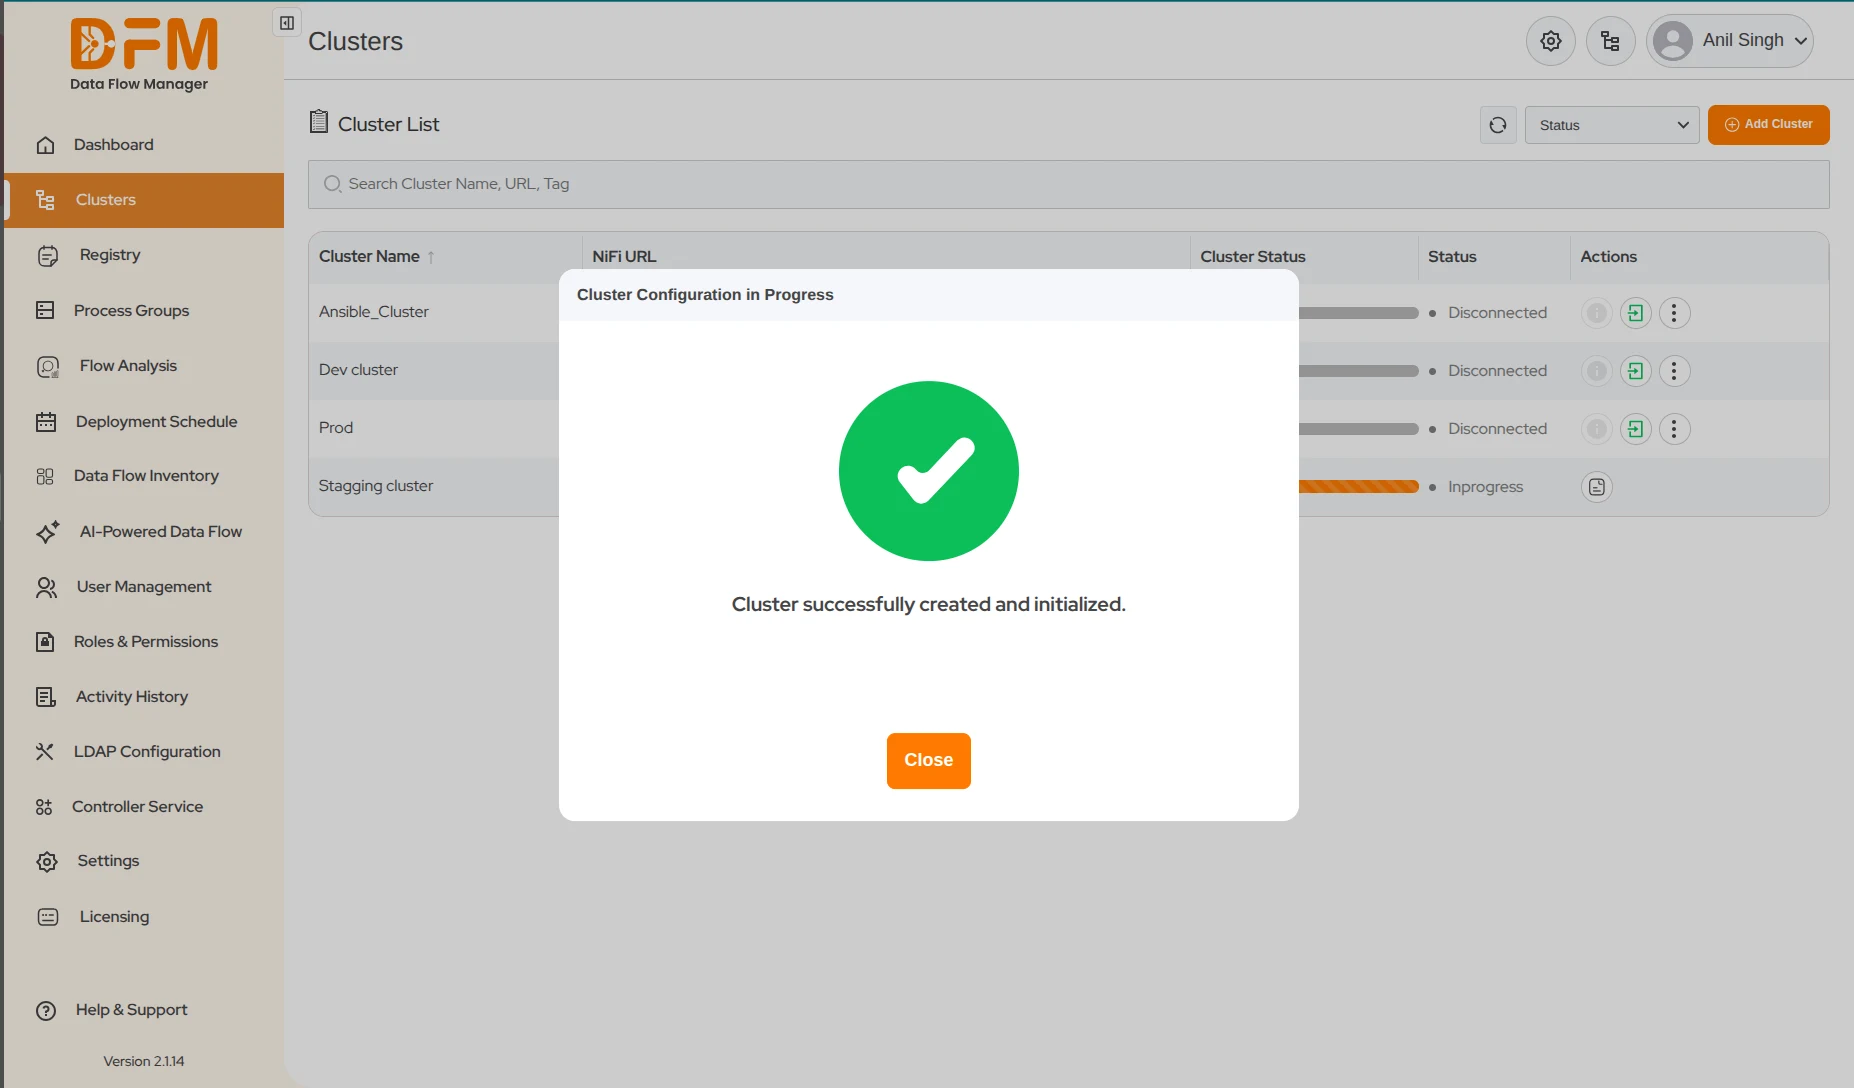
4. Once the process is finished, a "Cluster successfully created and initialized" message will be displayed, and the cluster status will update to "Running" or "Stopped," ready for use.
Create Cluster on Kubernetes
Select Kubernetes and click Continue to proceed with deployment in a containerized environment.
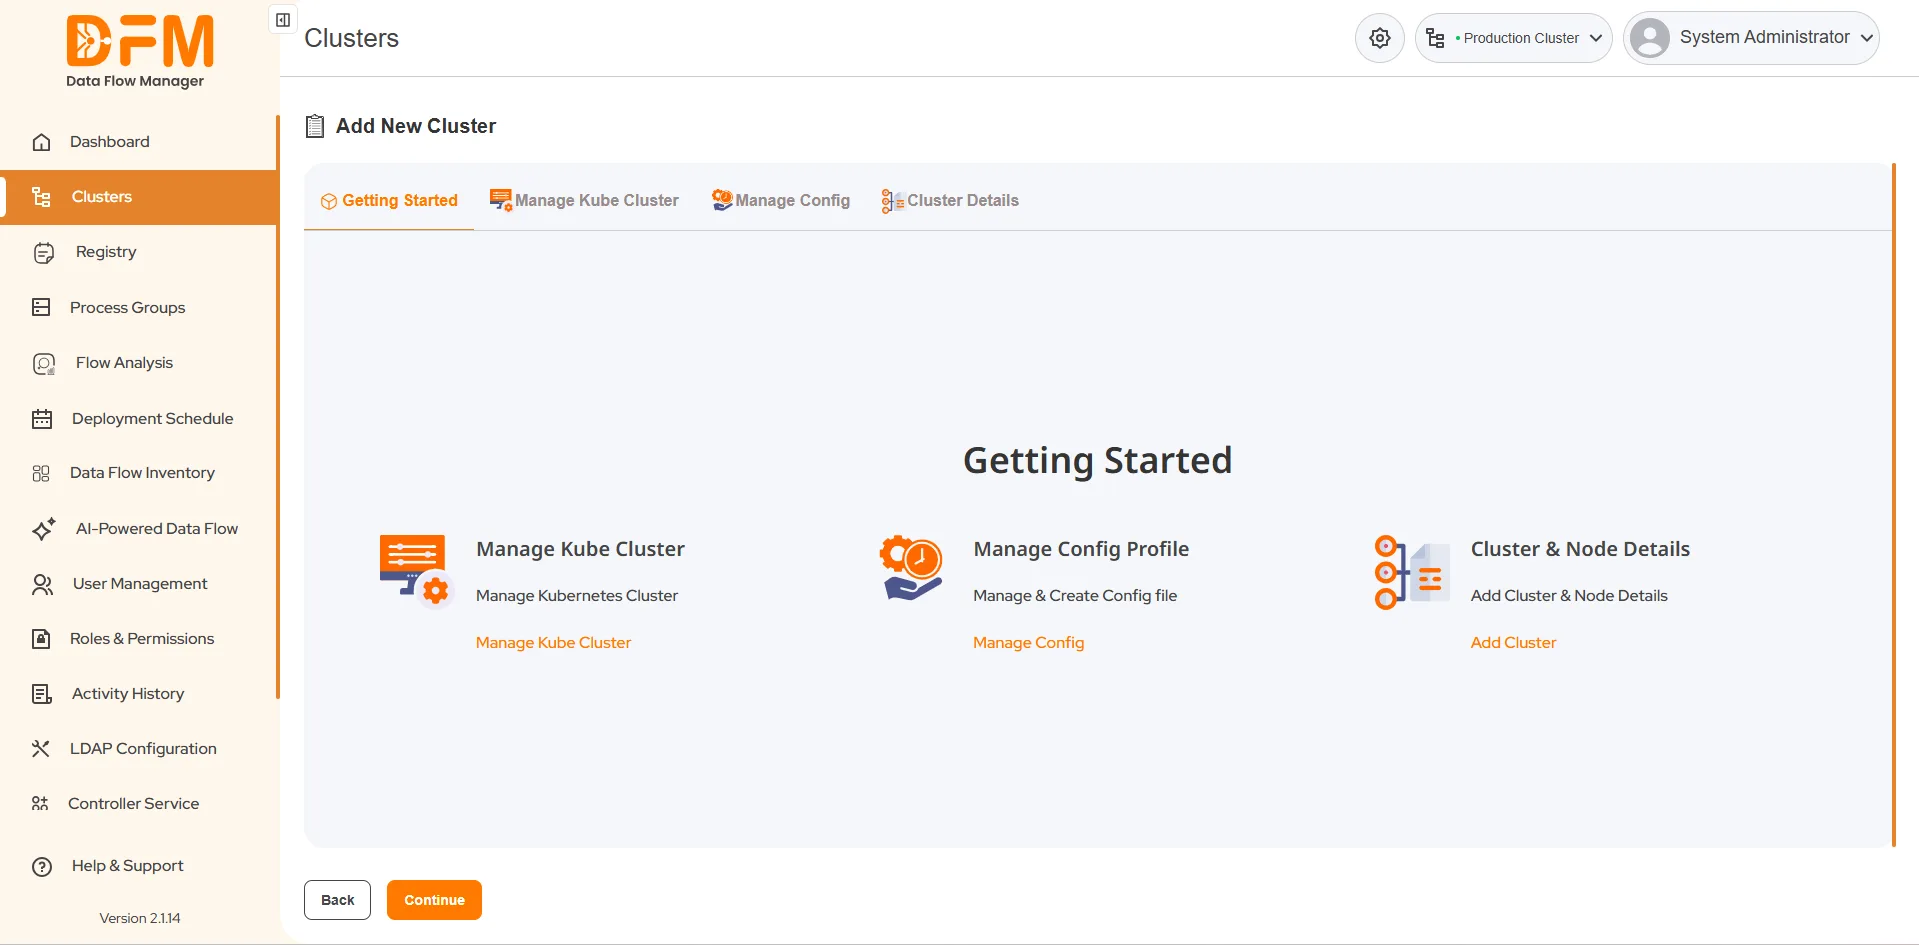
You will be directed to a "Getting Started" page that outlines the three main steps for creating a new Kubernetes-based cluster:
1. Manage Kube Cluster:Connect and configure the target Kubernetes environment.
2. Manage Config:Define and manage configurations specific to the Kubernetes deployment
3. Cluster Details:Provide NiFi cluster-specific details and finalize the setup before deployment.
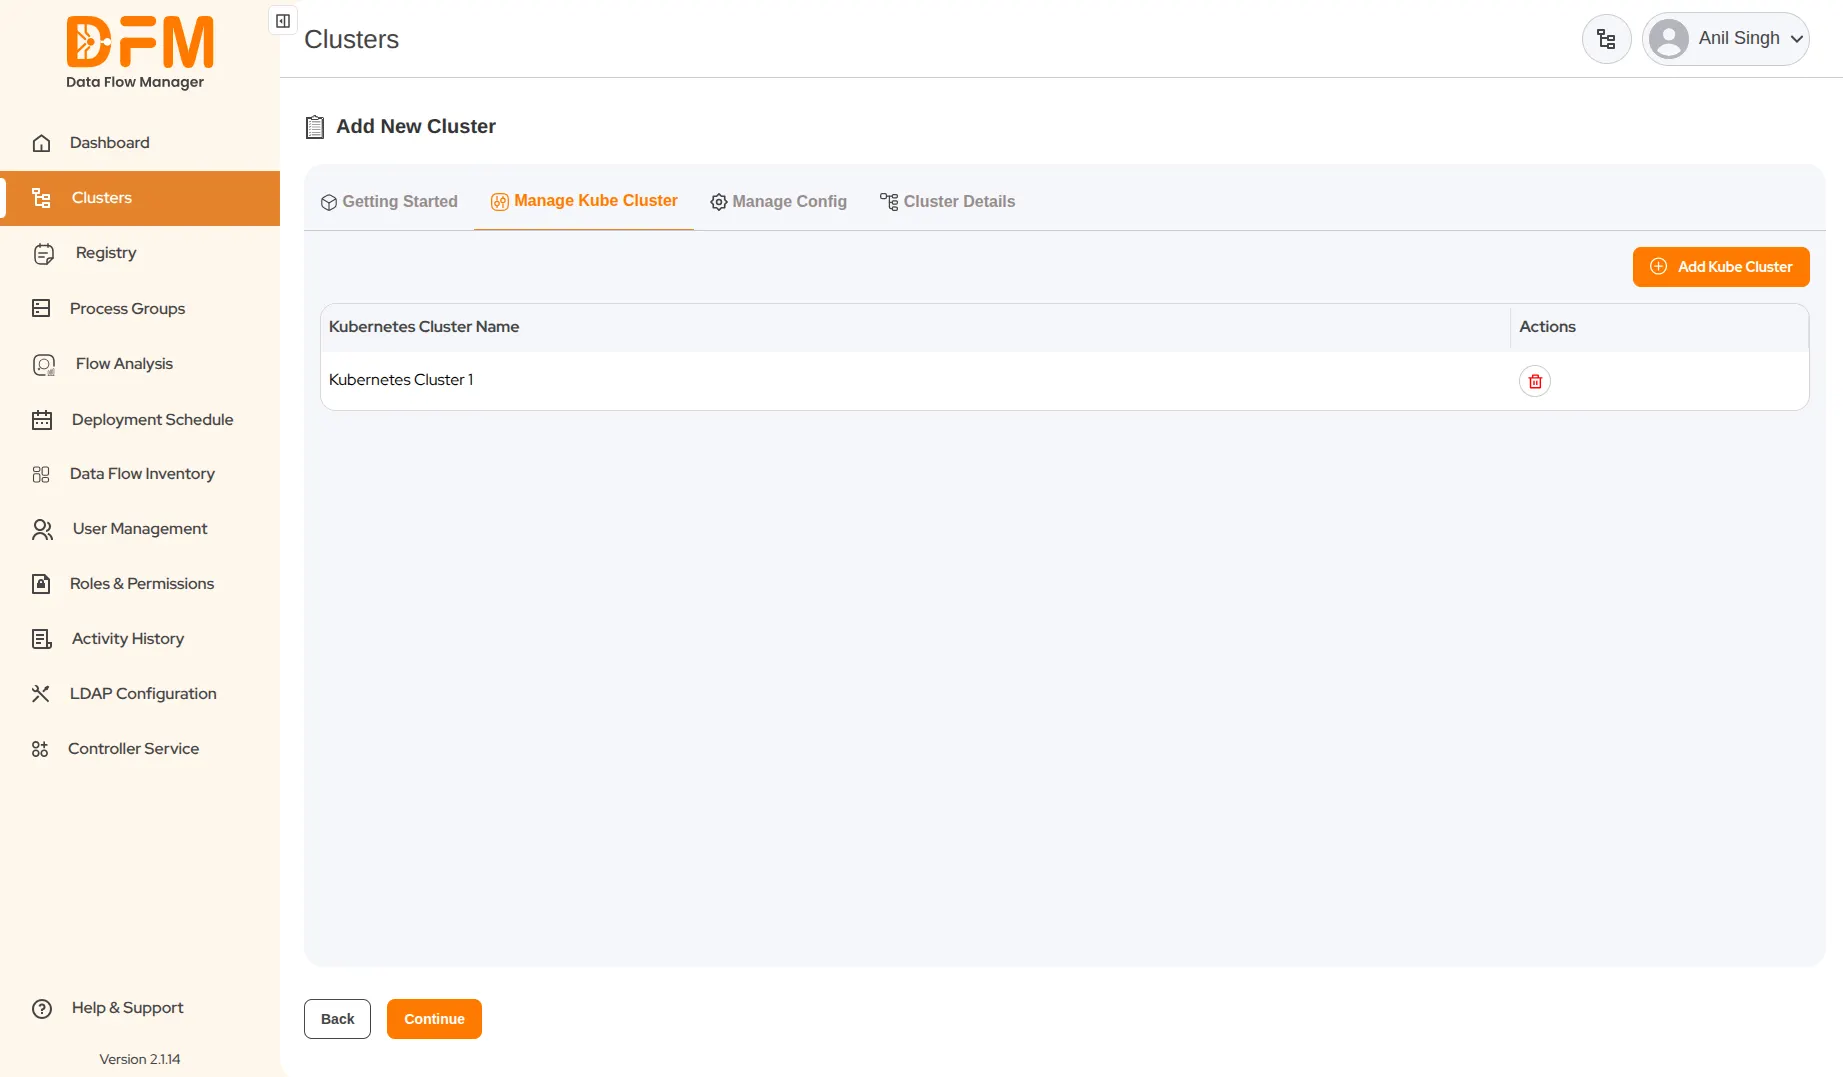
Step 1: Manage Kube Cluster
This tab is used to connect and manage your Kubernetes clusters within DFM.
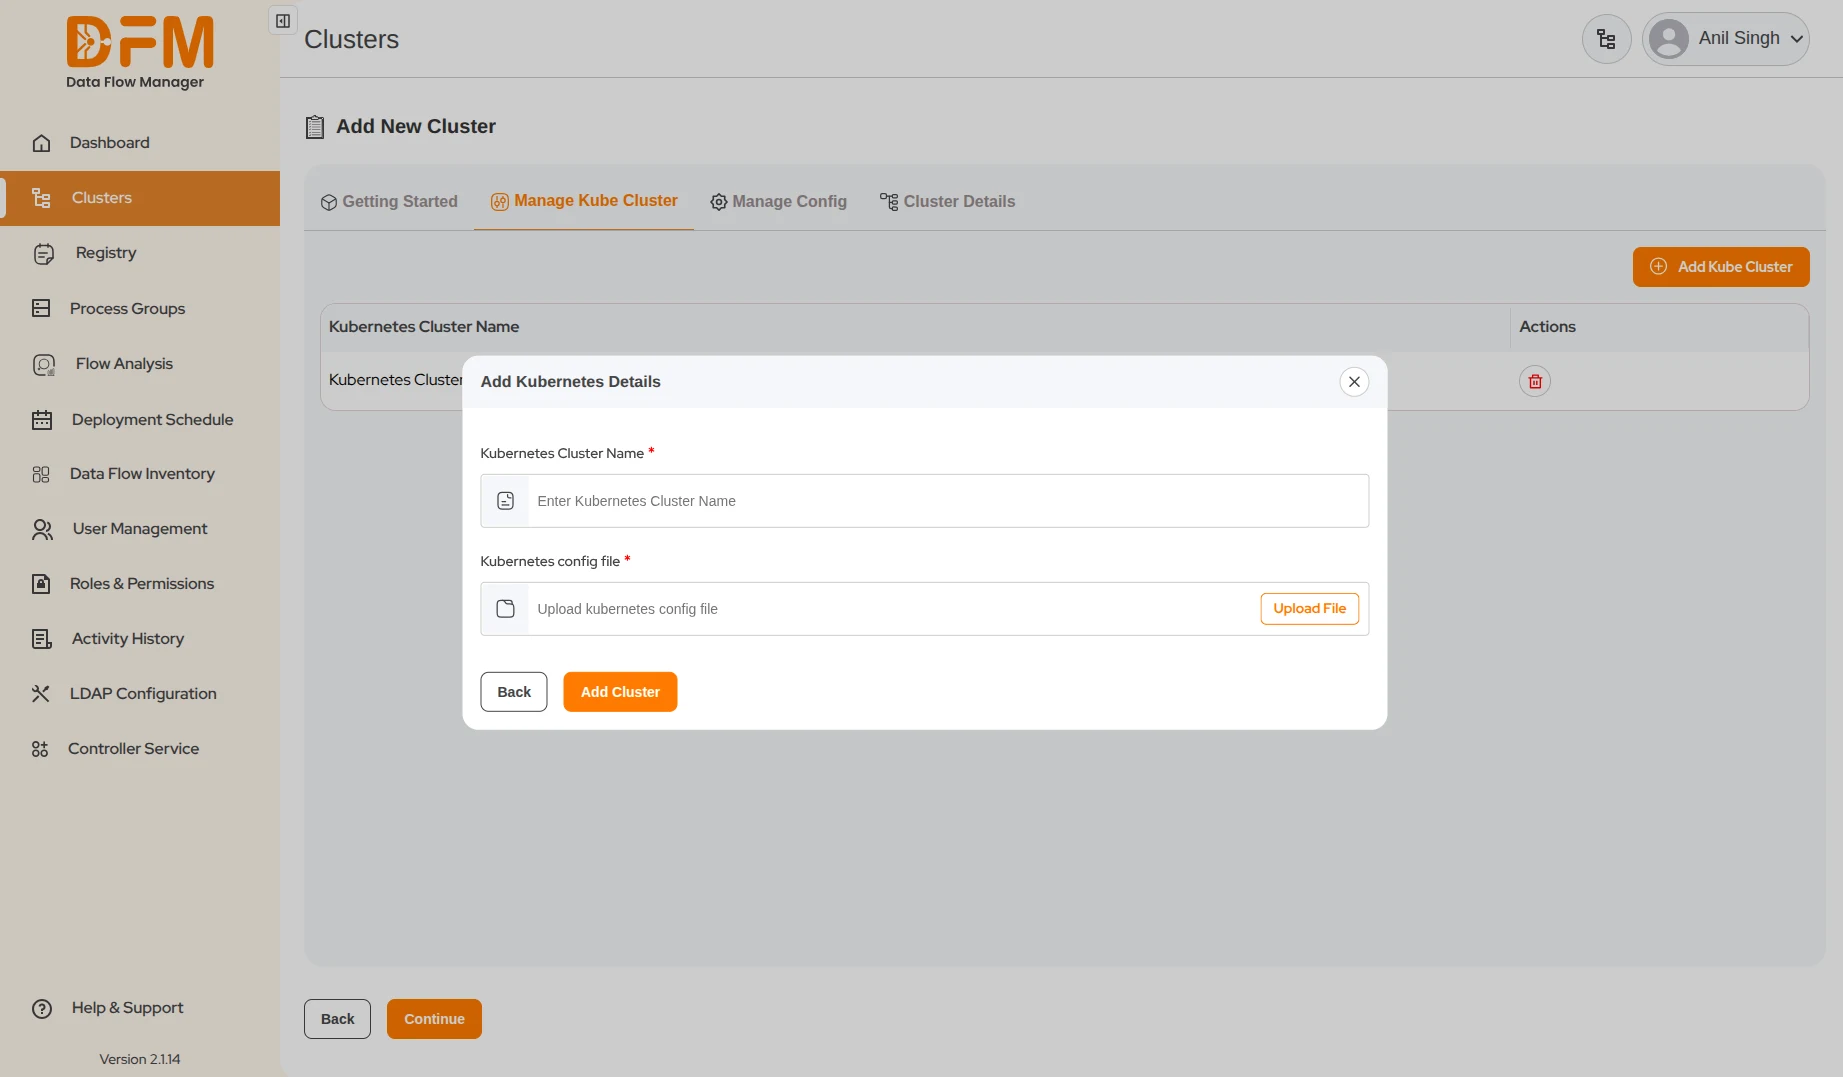
1. Add a New Cluster:
- Navigate to the Manage Kube Cluster tab.
- Click the Add Kube Cluster button located in the top-right corner.
- In the pop-up window, provide the following details:
- Cluster Name: Enter a unique name for your Kubernetes cluster.
- Kube Config File: Upload the configuration file (typically a YAML file) for your Kubernetes cluster to establish the connection.
- Click Add Cluster.
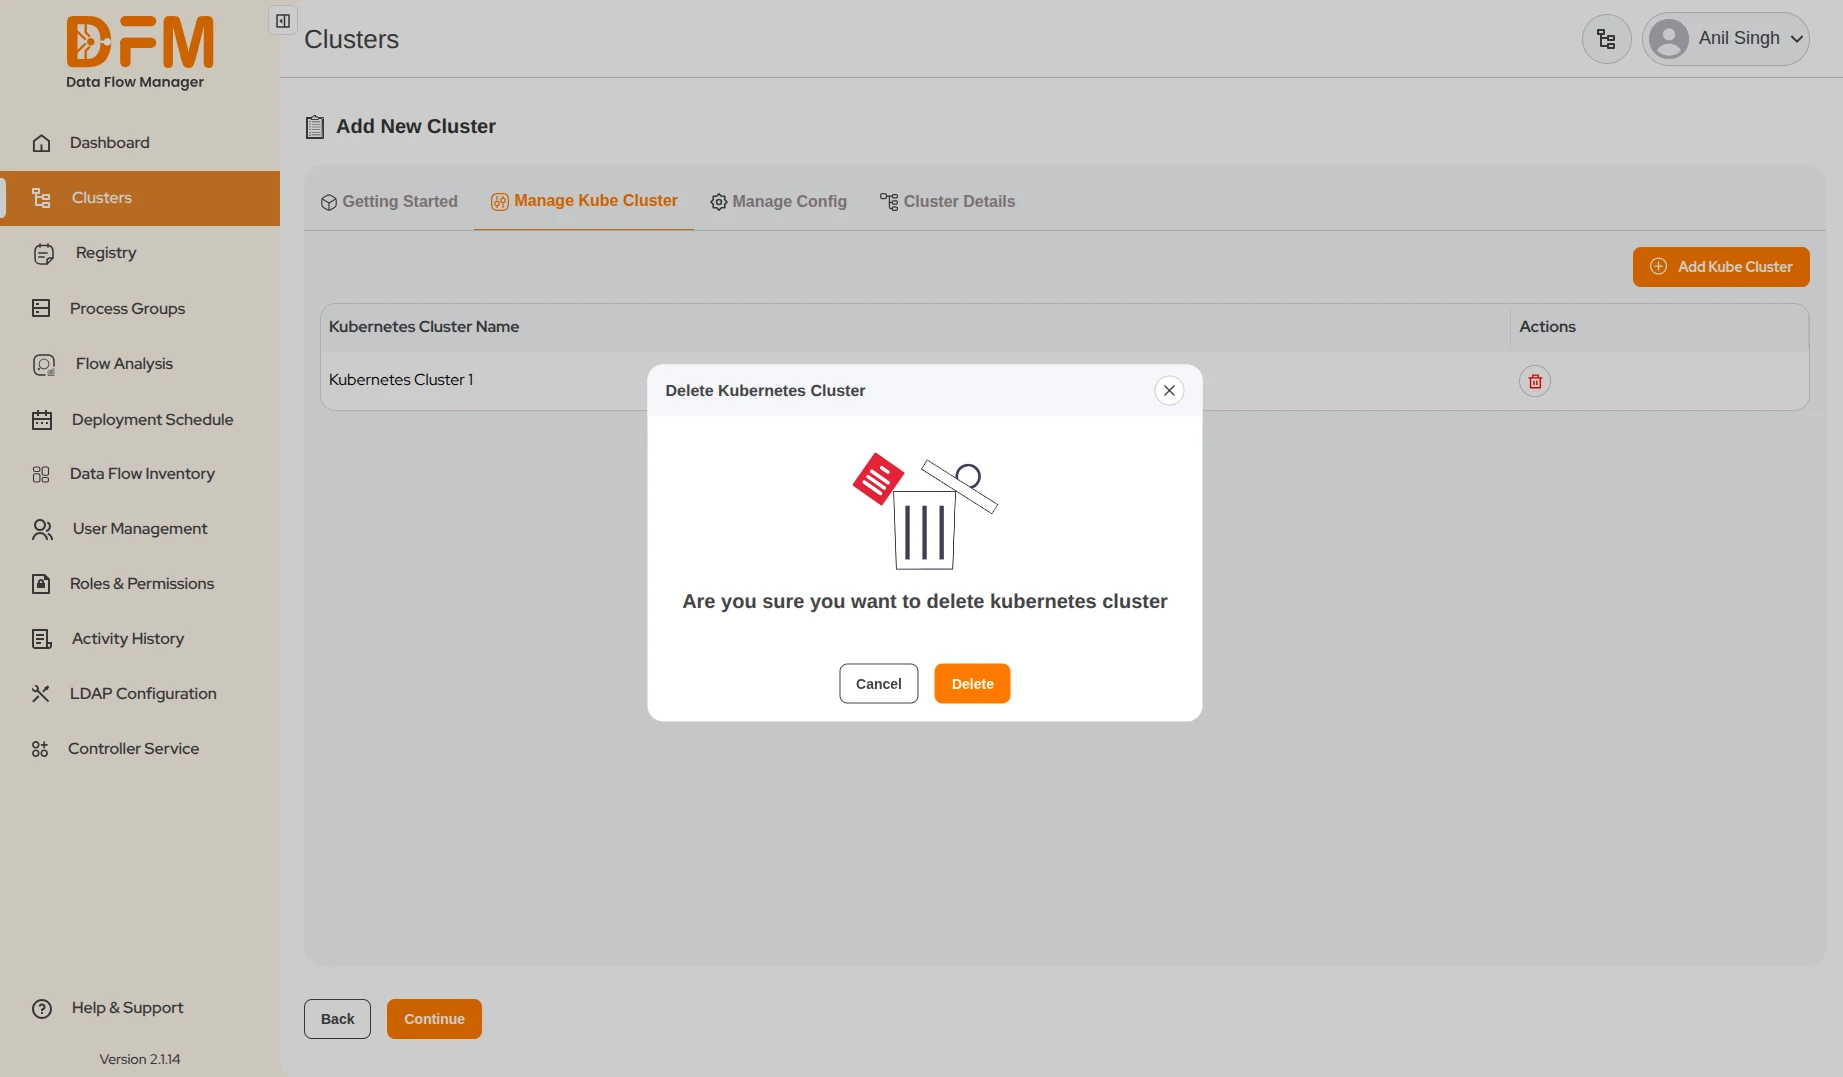
2. Delete a Cluster:
- Locate the cluster in the Manage Kube Cluster list.
- Click the Delete icon on the right-hand side of the entry.
- Confirm the deletion when prompted.
Step 2: Manage Config
In this step, you will define and manage the configuration settings for the cluster deployment. DFM provides a built-in YAML editor for easy configuration management.
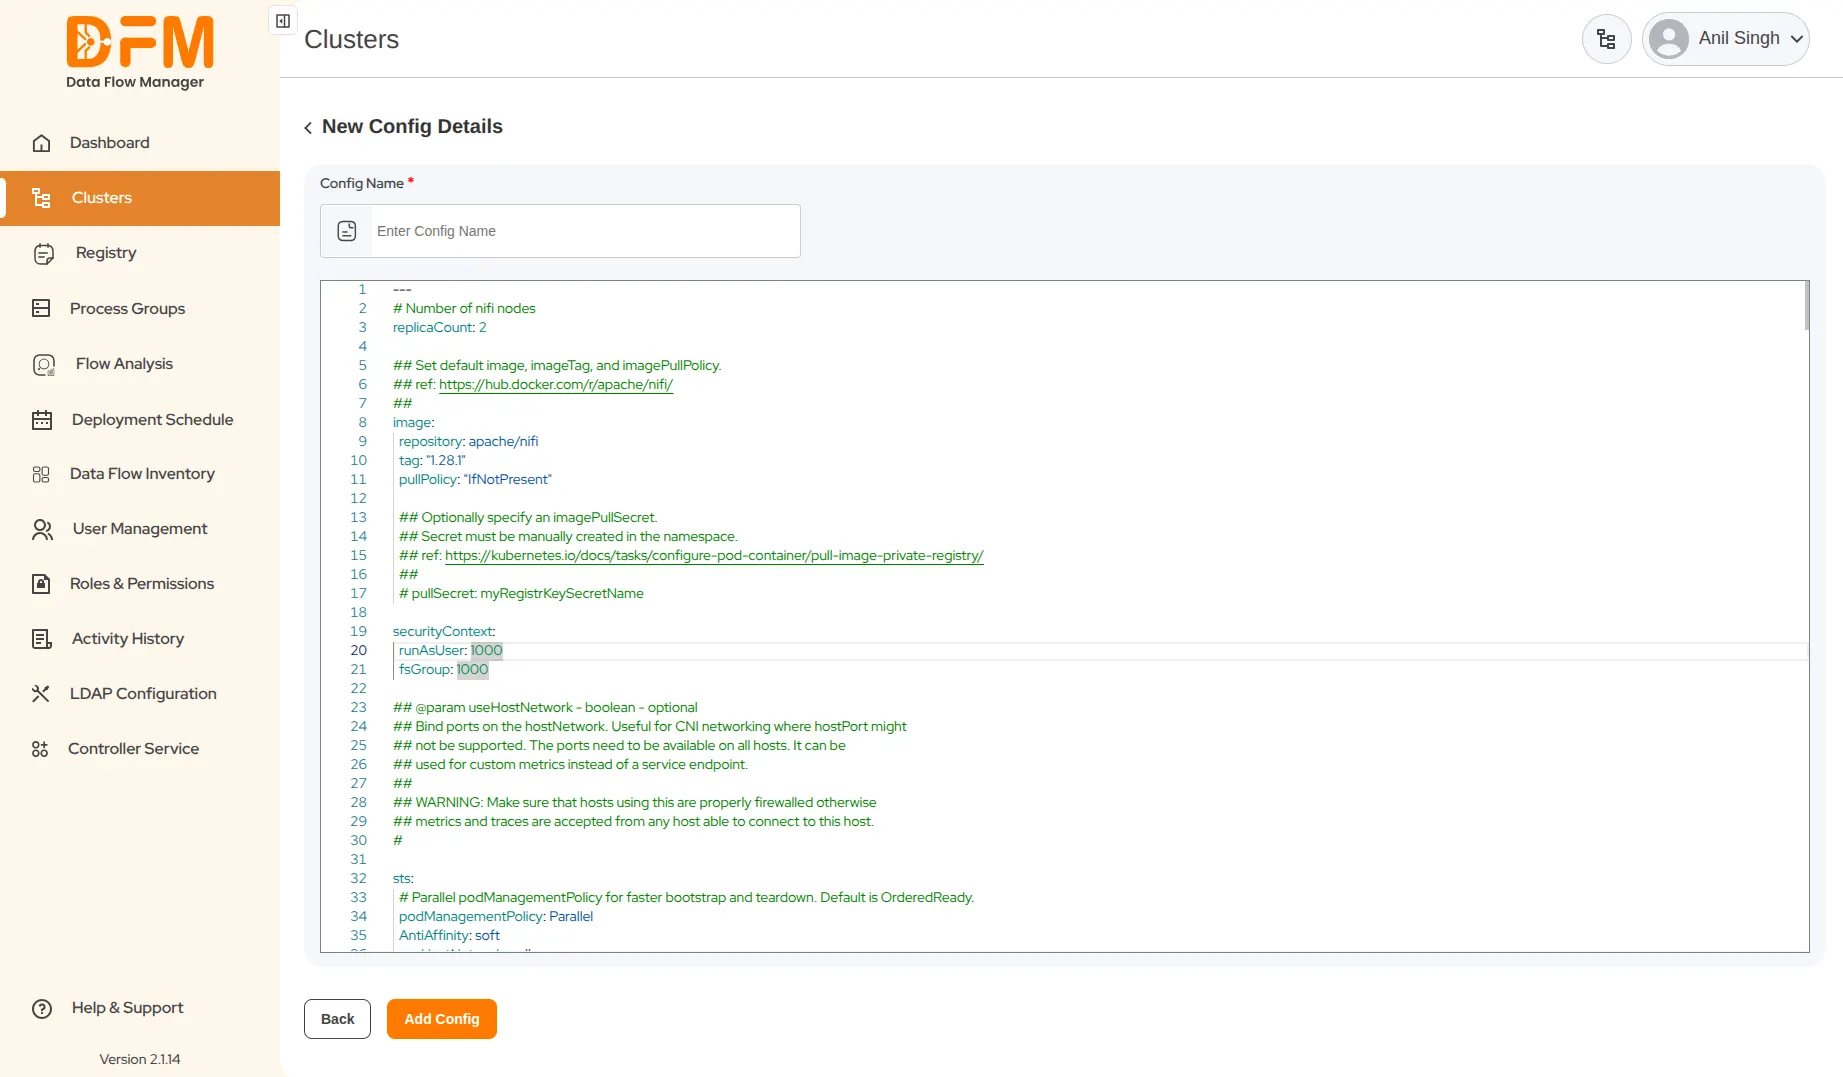
1. Create a New Configuration:
- Navigate to the Manage Config tab.
- Click the Add New Config button.
- A YAML editor will appear. Define or update the required configuration parameters directly within the editor according to your environment and deployment needs.
- Click Add Config to save the new configuration.
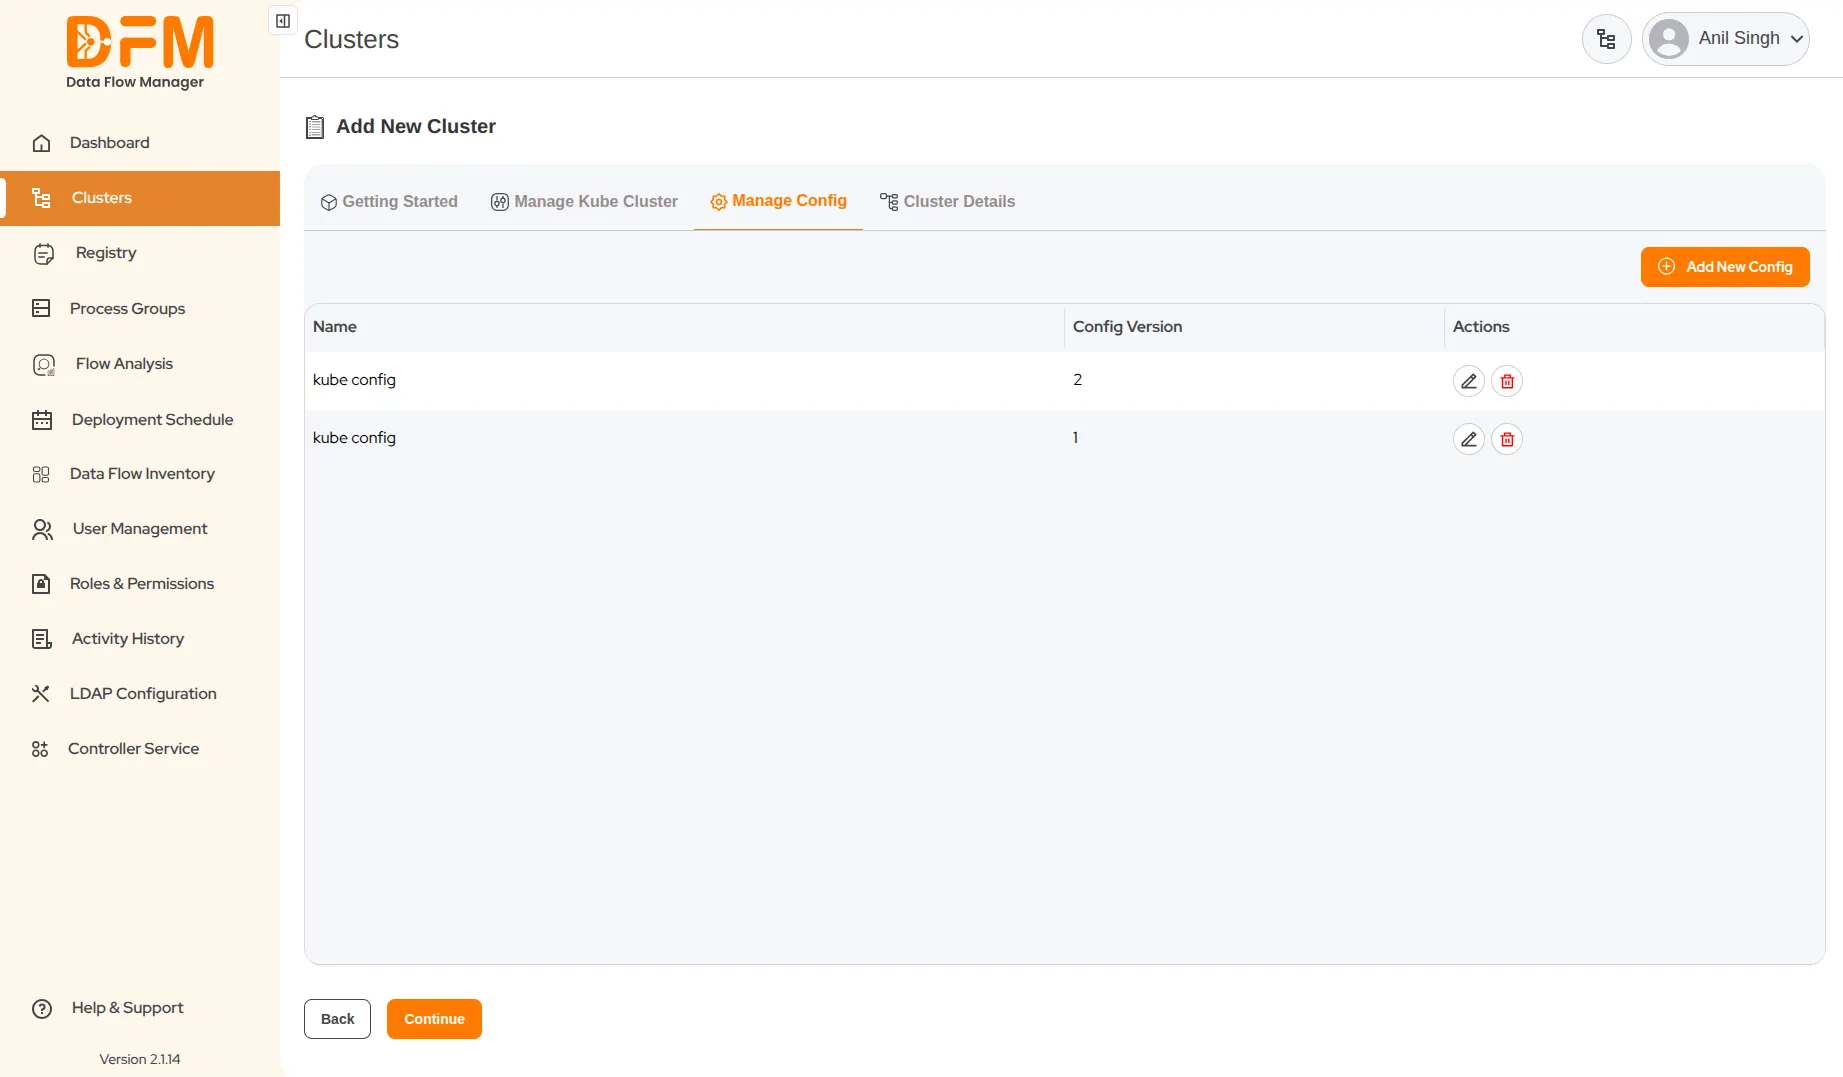
2. Manage Existing Configurations:
- To Edit: Click the Edit icon next to the configuration entry. Make required updates in the YAML editor, then click Save.
- Configuration Versioning: DFM automatically creates a new version each time a configuration is edited and saved. This feature supports tracking changes and rolling back to previous versions.
- To Delete: Click the Delete icon and confirm the deletion when prompted.

Step 3: Add Cluster Details
This is the final step to define the cluster specifications and initiate deployment.
1. Navigate to the Cluster Details Tab.
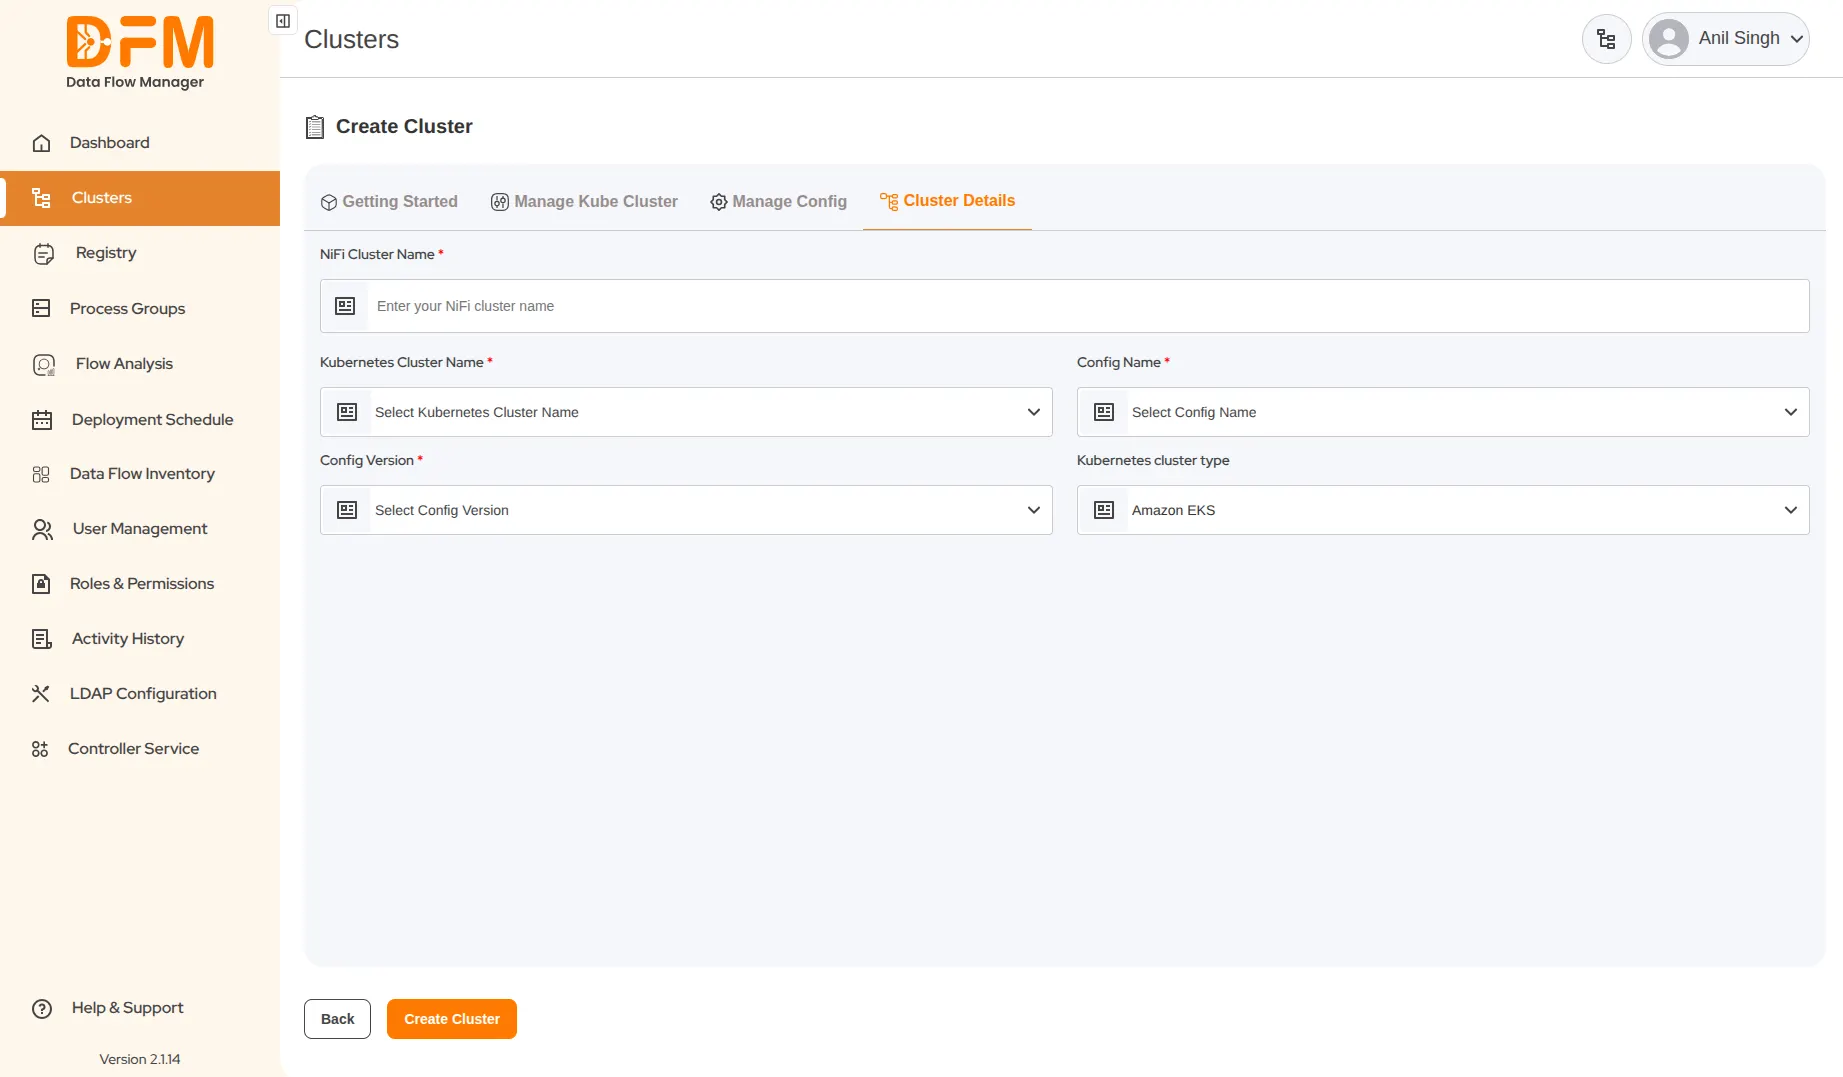
2. Fill in Cluster Details:
- NiFi Cluster Name: Enter a unique name for your NiFi cluster instance.
- Kubernetes Cluster Name: Select the Kubernetes cluster you connected in Step 1: Manage Kube Cluster.
- Config Name: Choose the configuration profile defined in Step 2: Manage Config.
- Config Version: Select the desired version of the configuration file.
- Kubernetes Cluster Type: Specify the type of Kubernetes environment you are using:
- Amazon EKS
- Self-Managed Kubernetes

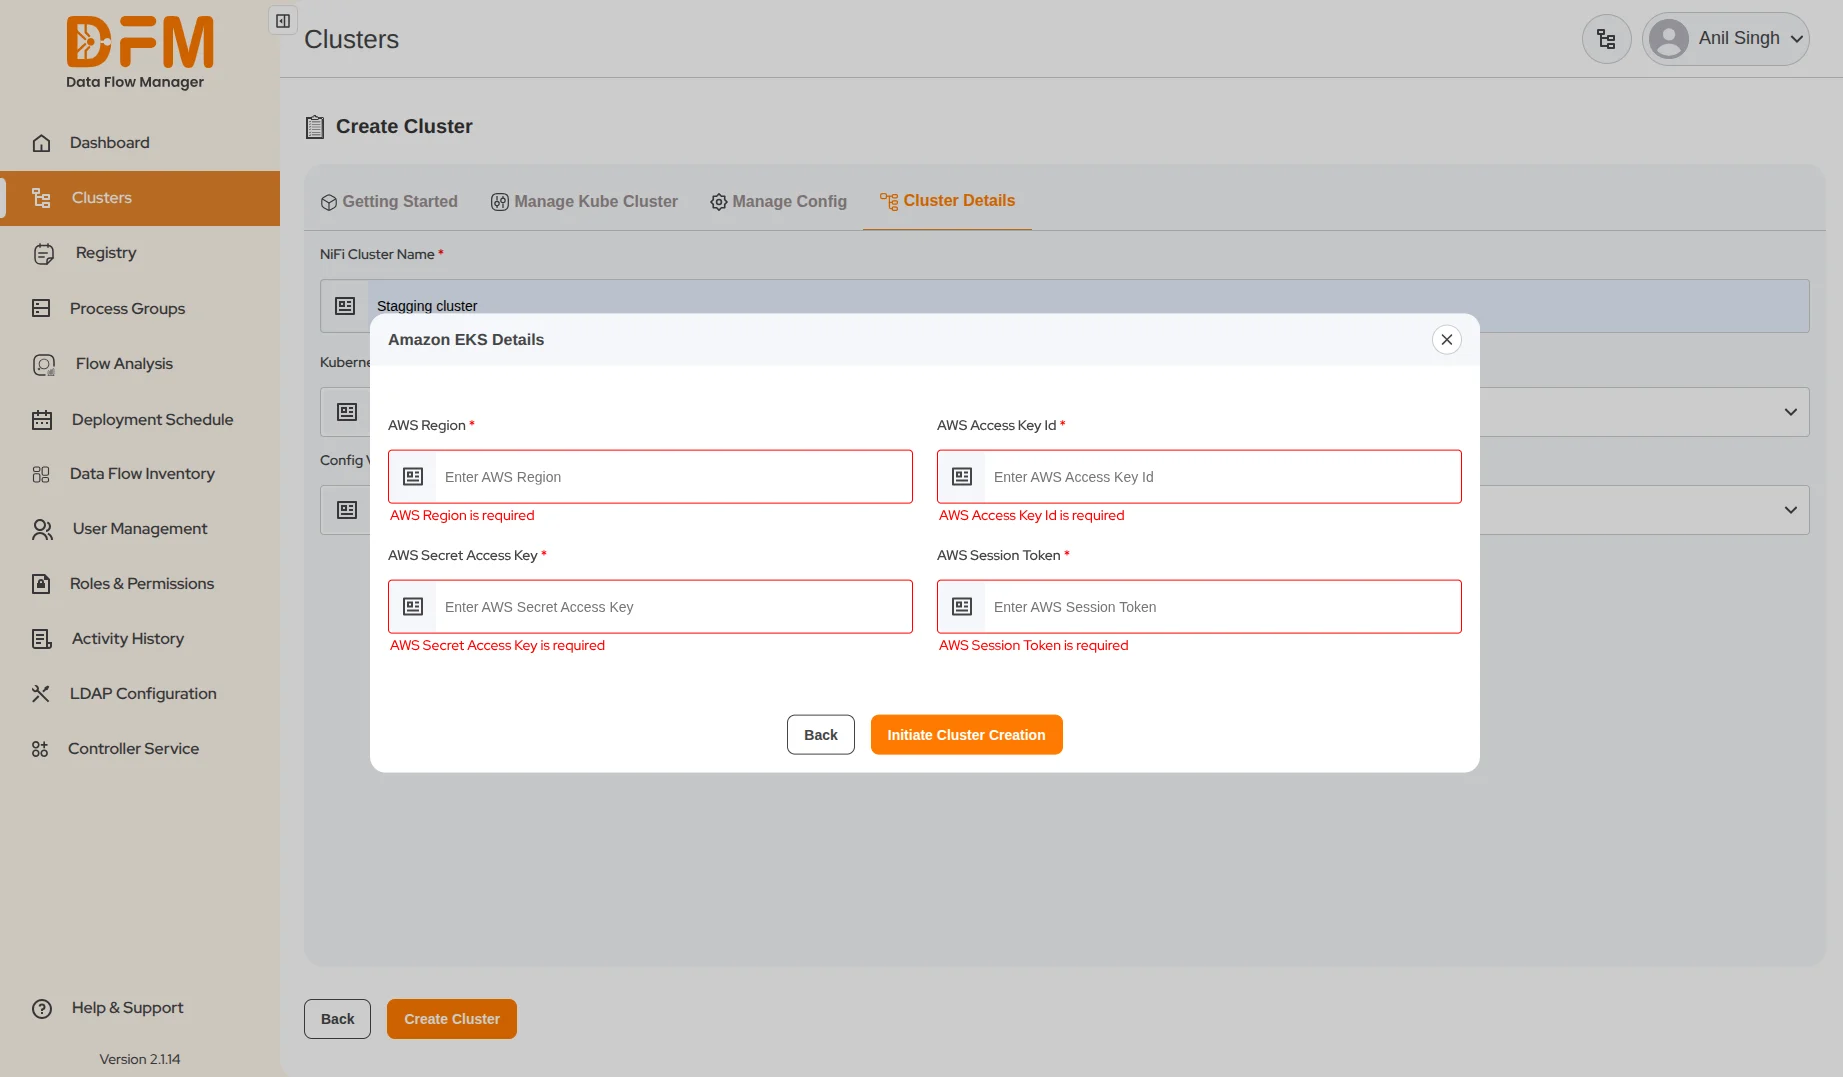
3. Specify Cluster Type Details: Based on your selection, a pop-up window will appear:
- If Amazon EKS is selected:
- Enter the AWS Region, AWS Access Key ID, AWS Secret Access Key, and AWS Session Tokens.
- Click Initiate Cluster Creation.
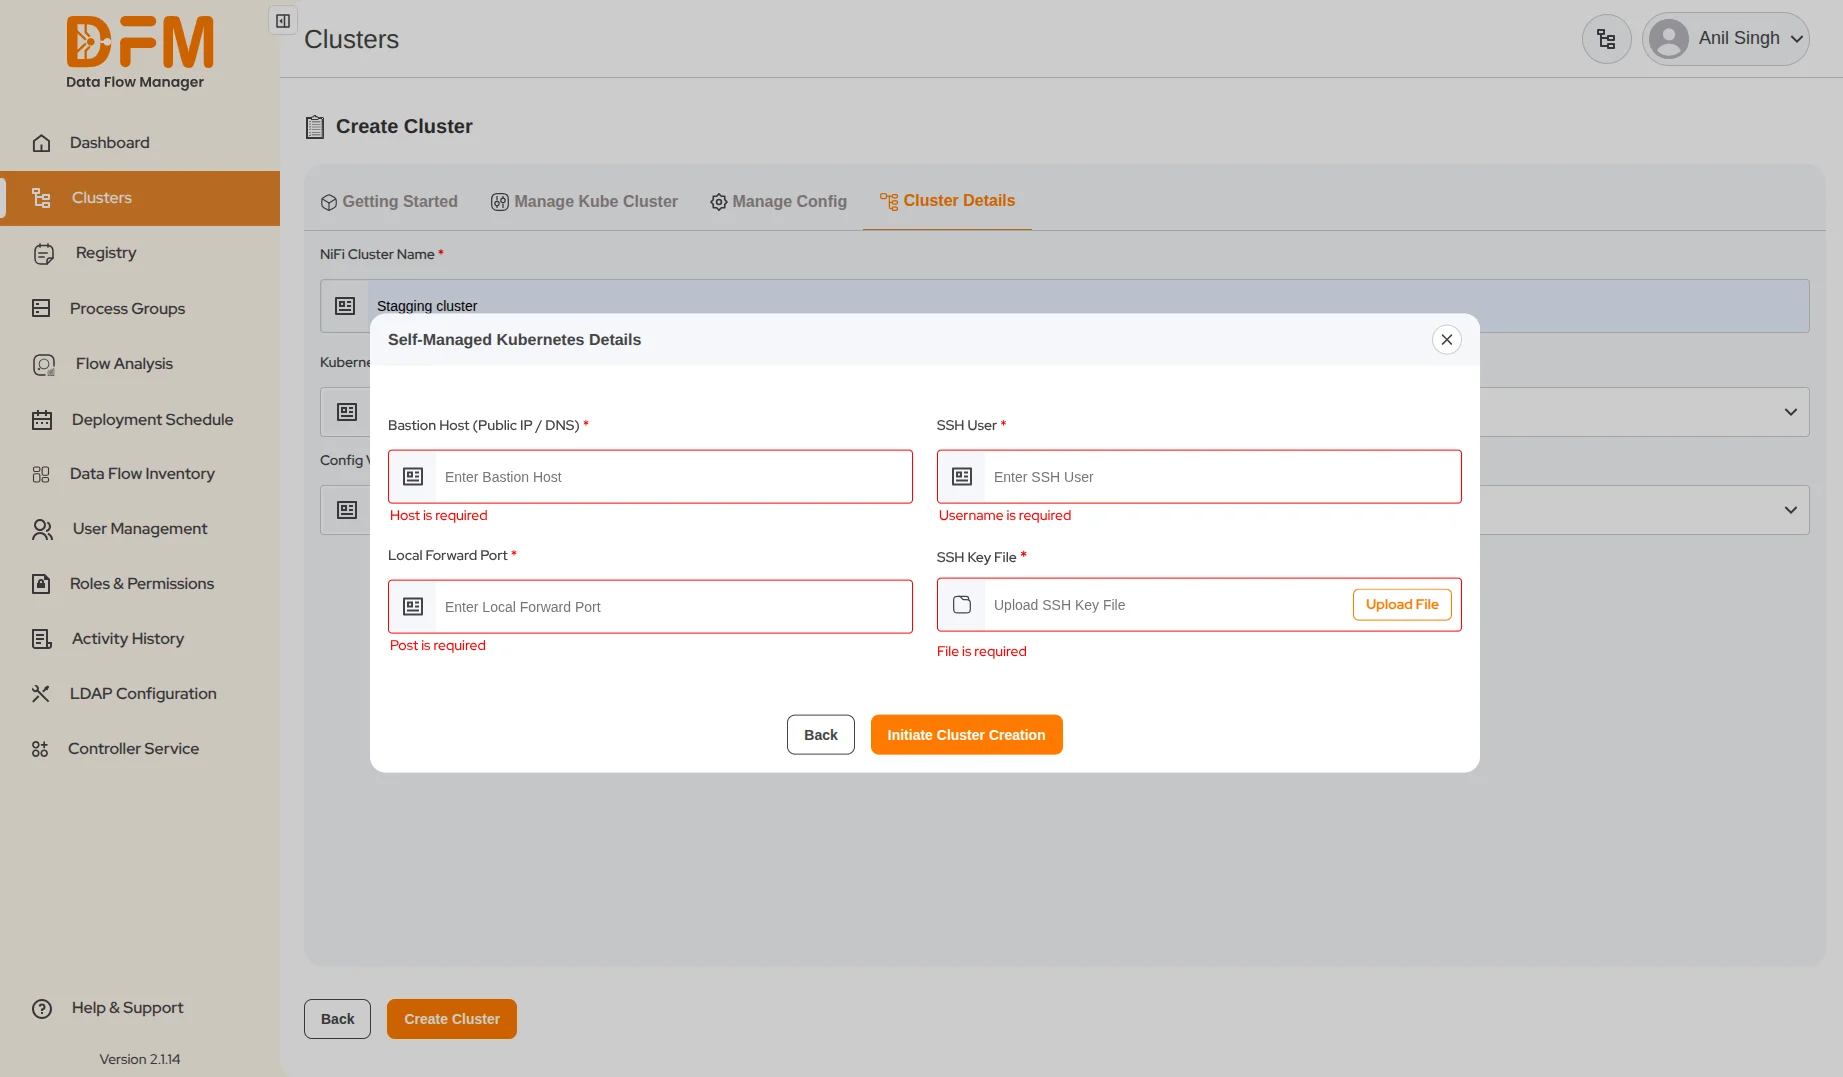
- If Self-Managed Kubernetes is selected:
- Provide the Bastion Host (Public IP/DNS), SSH User, Local Forward Port, and upload the SSH Key File.
- Click Initiate Cluster Creation.
4. Create the Cluster:
- After all details are selected, click the Create Cluster button.
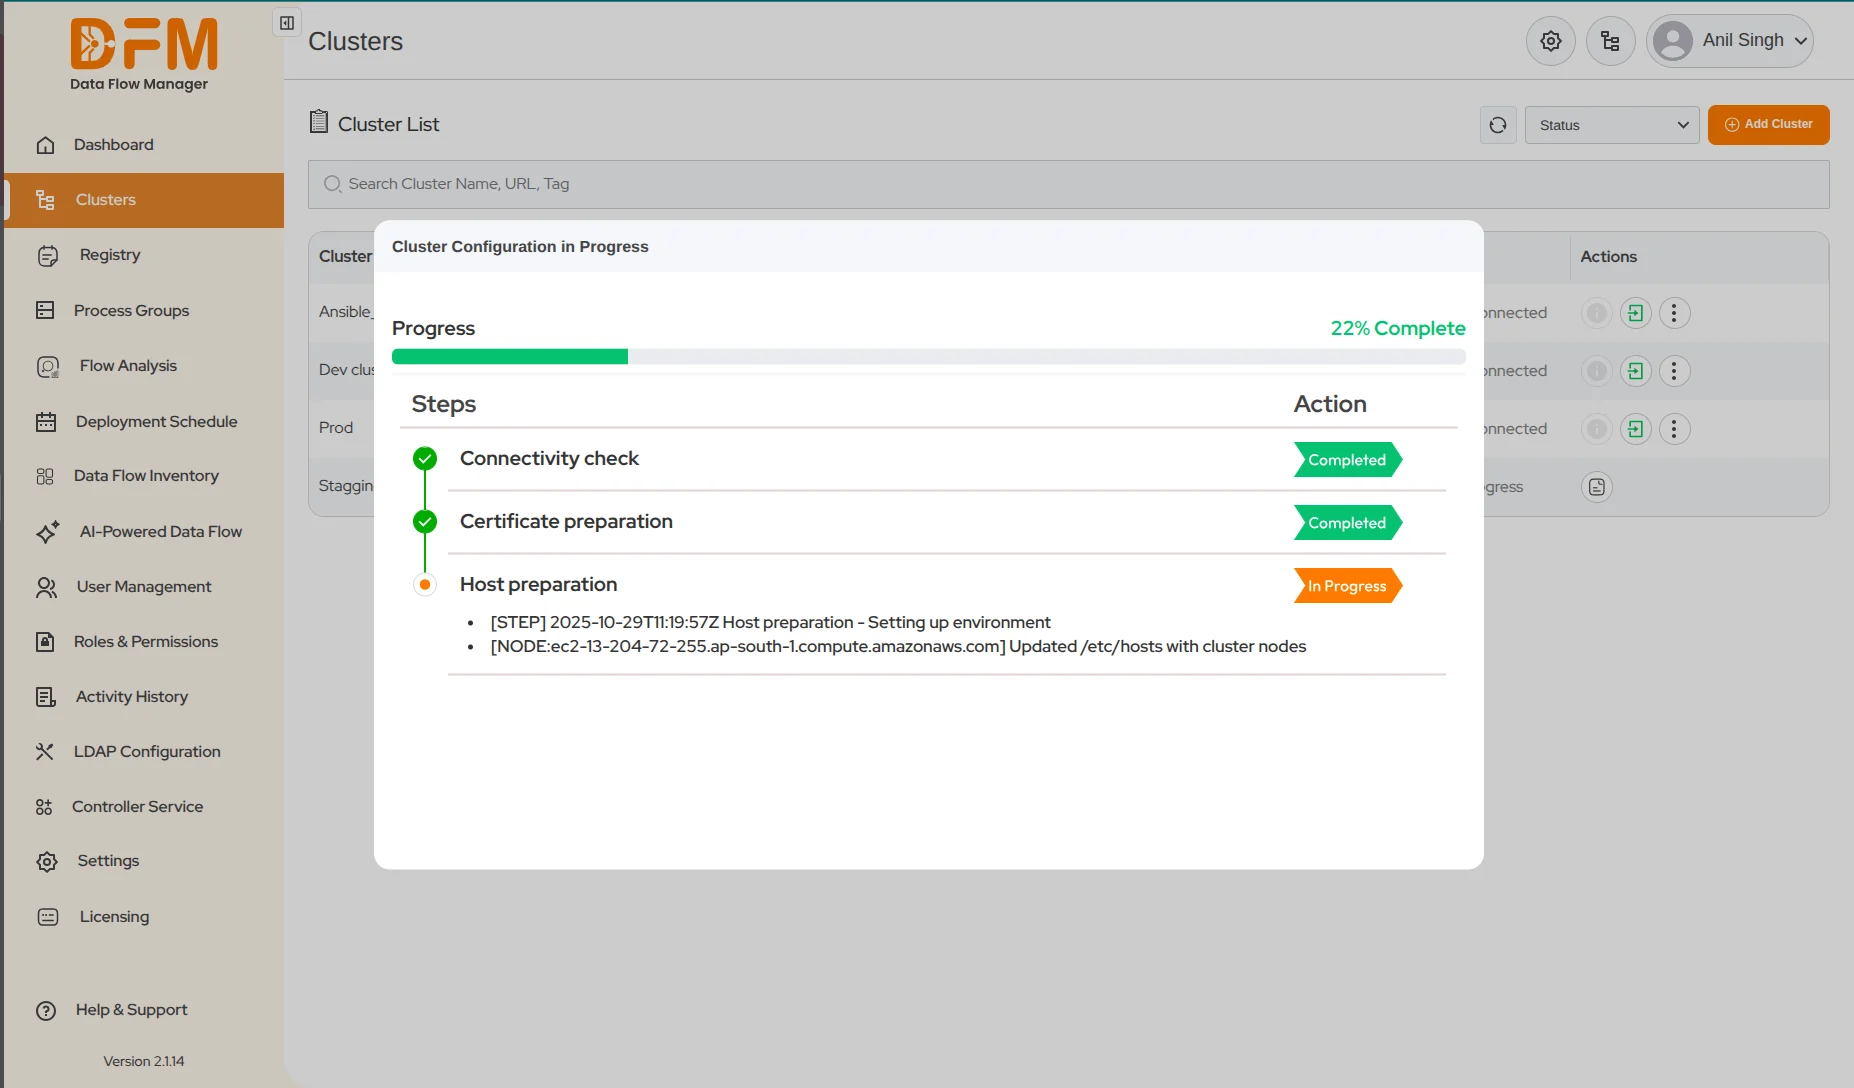
Monitor Cluster Creation
Once the process begins, a dynamic progress bar will appear on the main Clusters page, visually tracking the real-time setup. The status of each step will be displayed as In Progress, Completed, or Failed. A final confirmation message will appear once your cluster is successfully created and ready for use.
Cluster Maintenance and Scaling
These features allow administrators to modify existing clusters after initial deployment, ensuring optimal performance and resource allocation.
Manage Cluster Hosts After Creation
You can scale your deployment by adding or removing hosts (nodes) from an operational cluster.
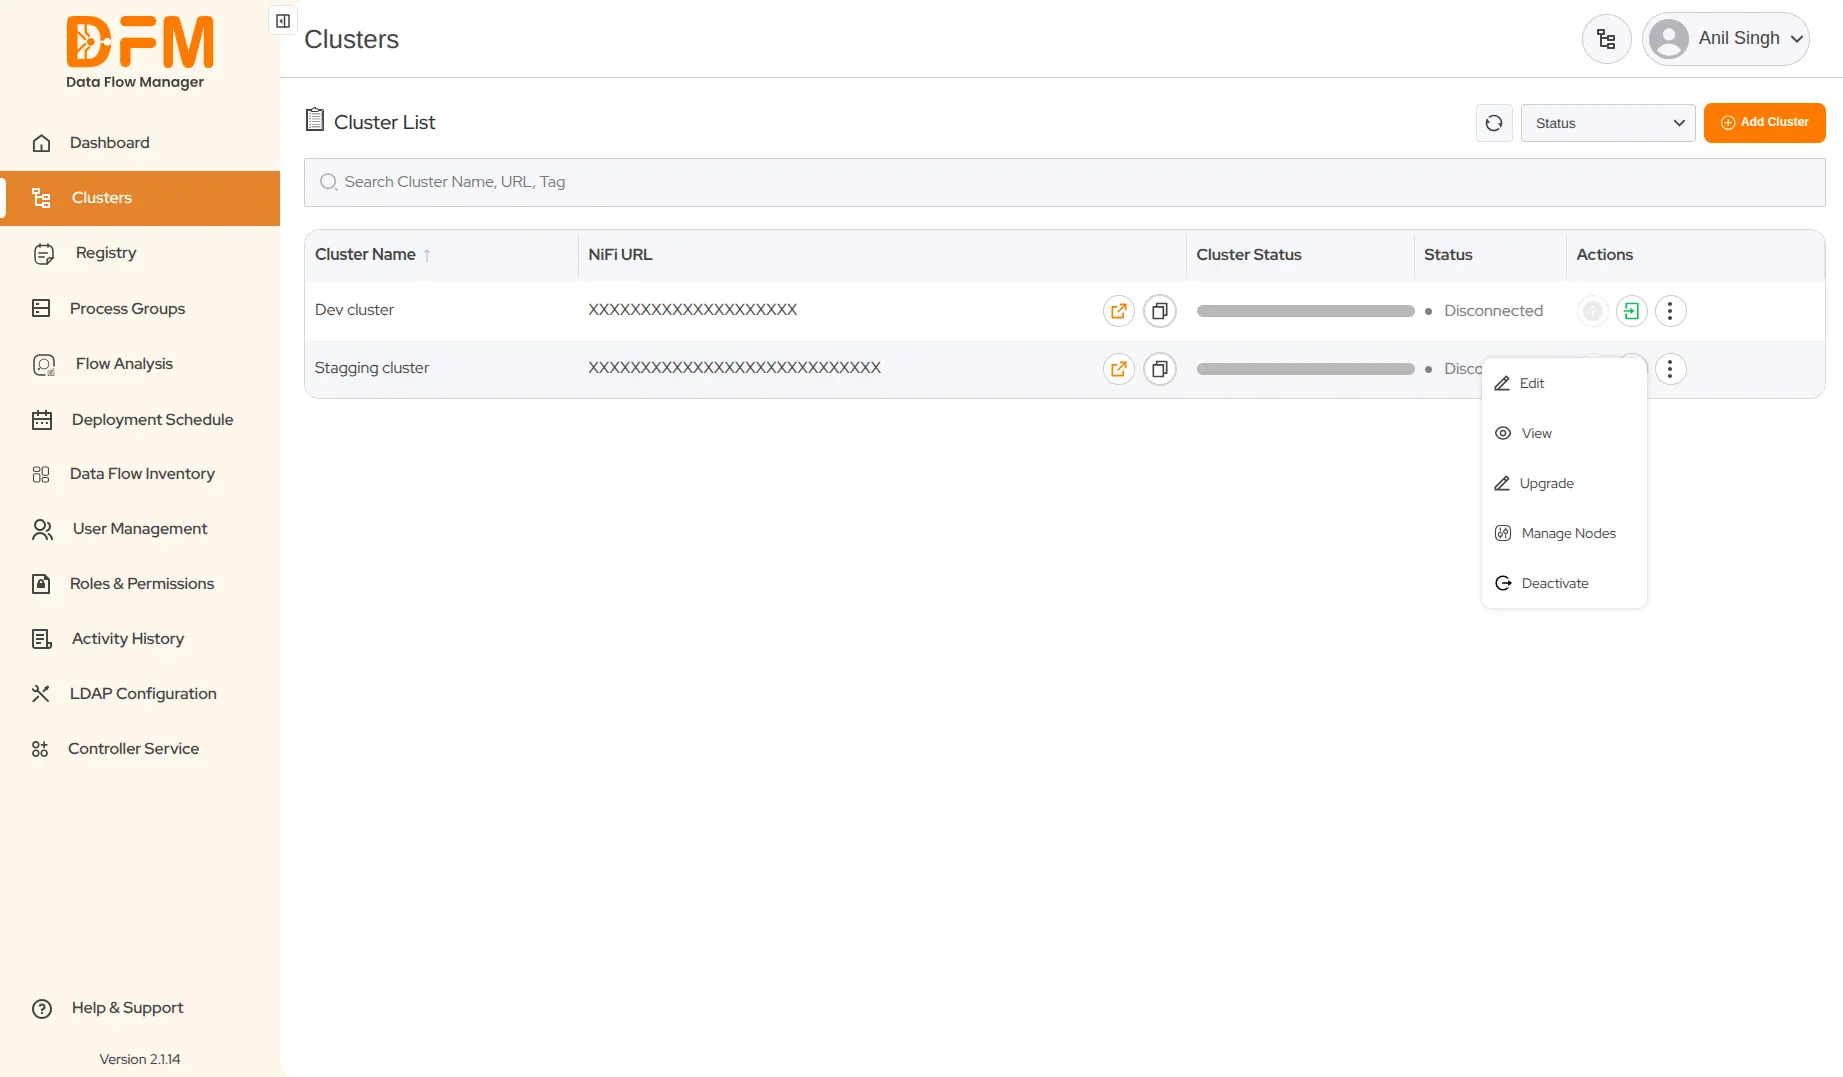
1. Access Host Management:
- Locate the target cluster on the main Clusters page.
- Click the vertical ellipsis (⋮) menu on the right side of the cluster entry.
- Select Manage Host from the dropdown options.
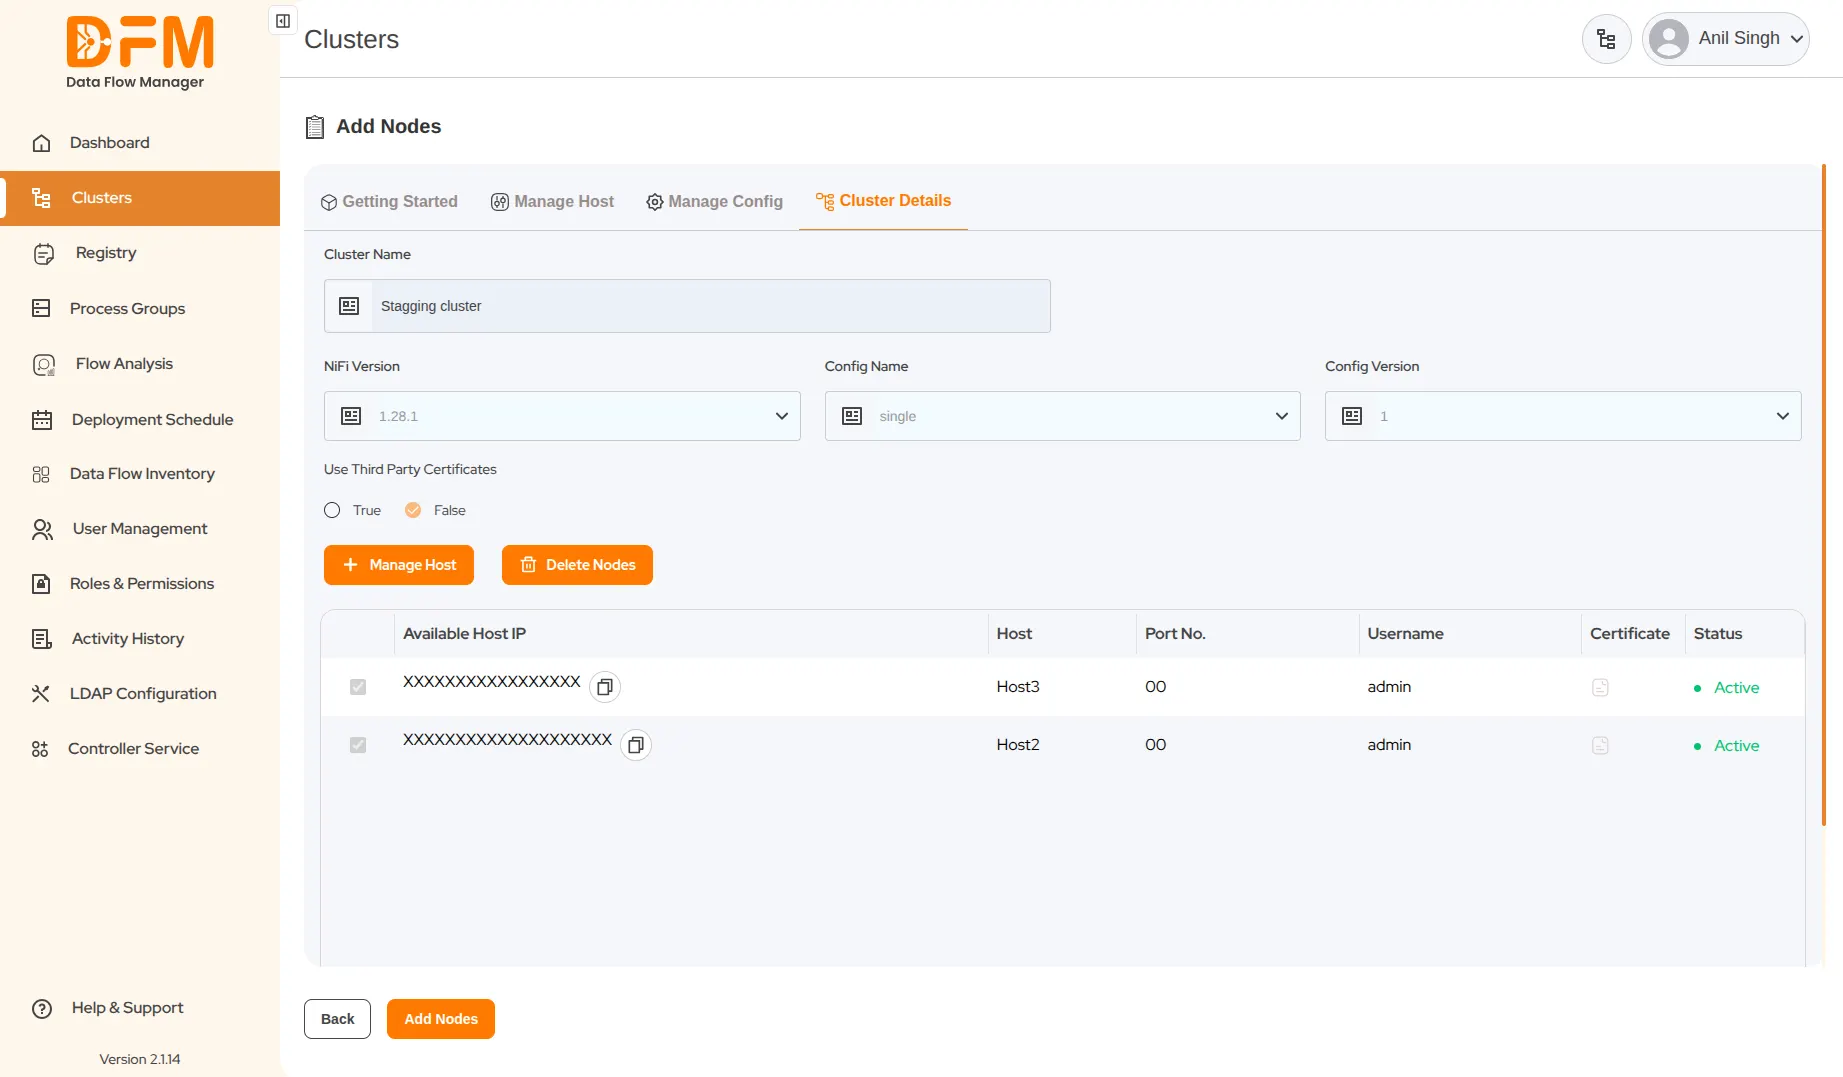
2. To Add Hosts:
- From the list of available hosts, select the ones you want to include in the cluster.
- Click Add Nodes to begin the scaling process.
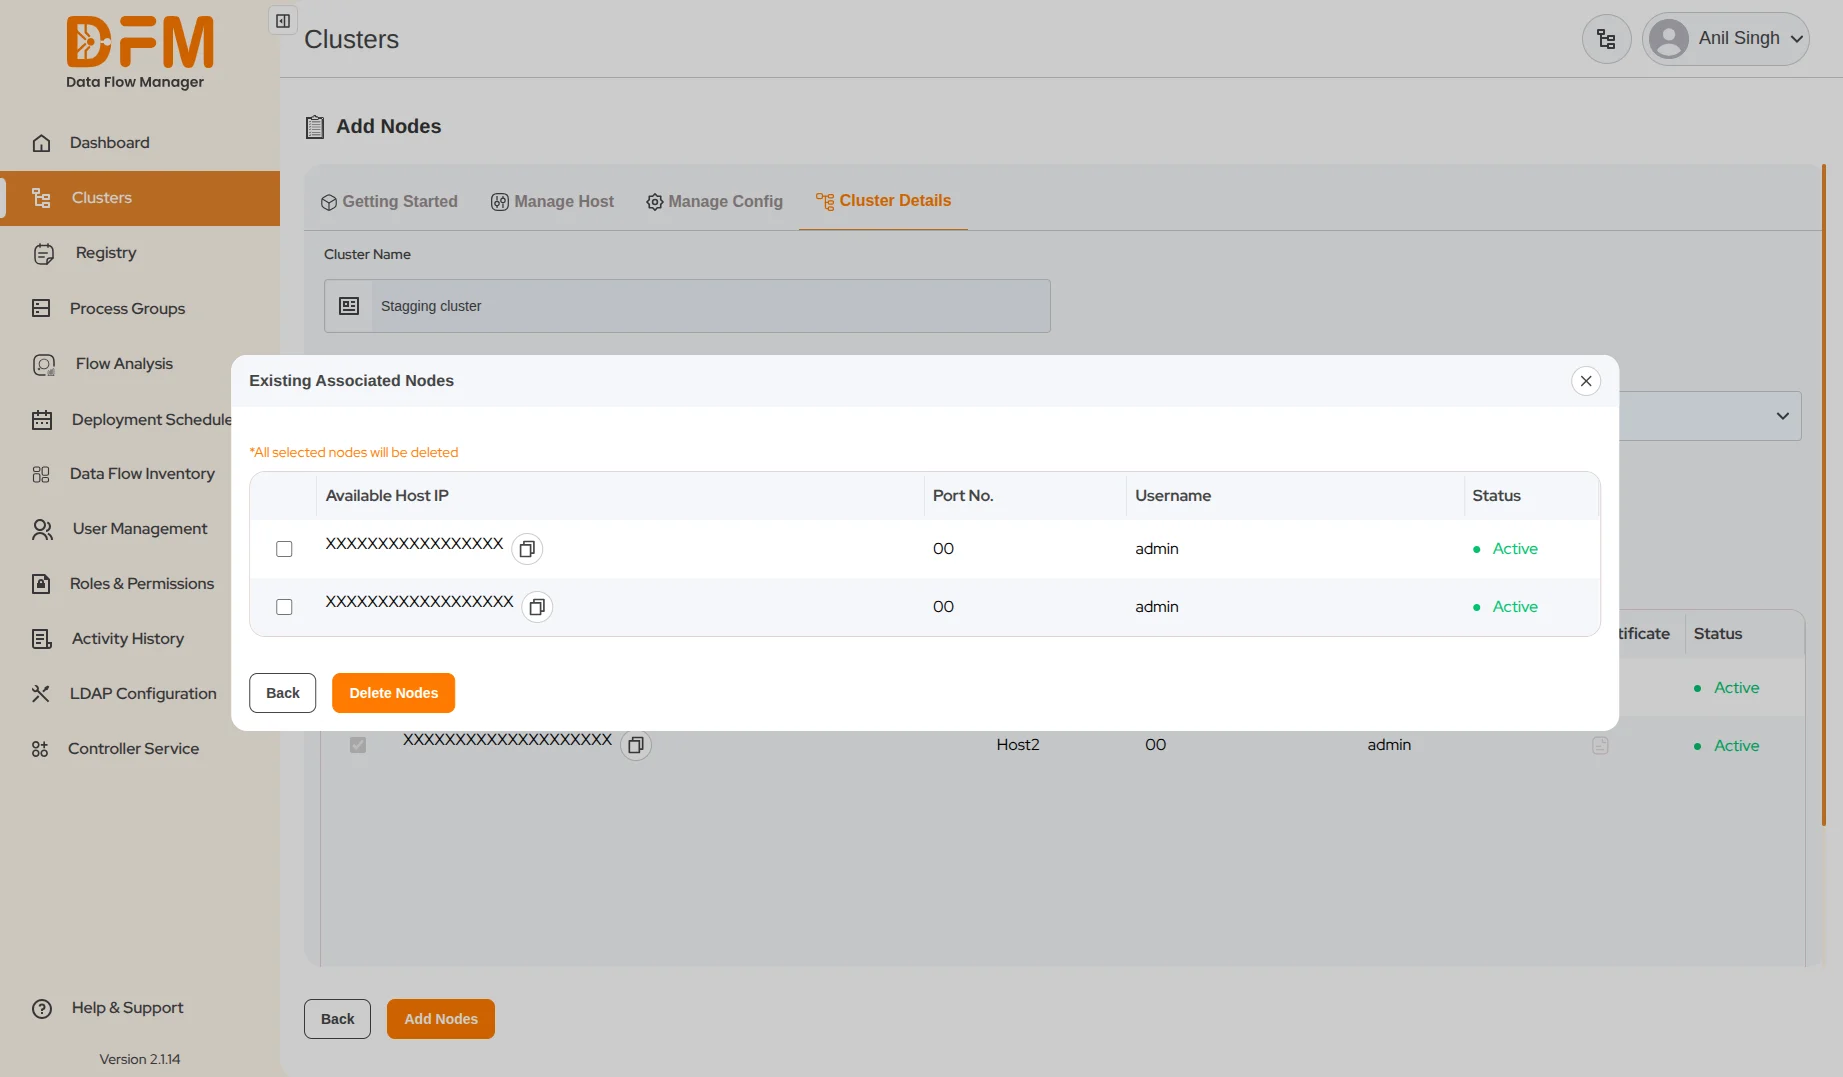
3. To Delete Hosts:
- In the Host Management window, locate the hosts you wish to remove.
- Click the Delete Host button.
- Choose the nodes you want to delete and click Delete Nodes.
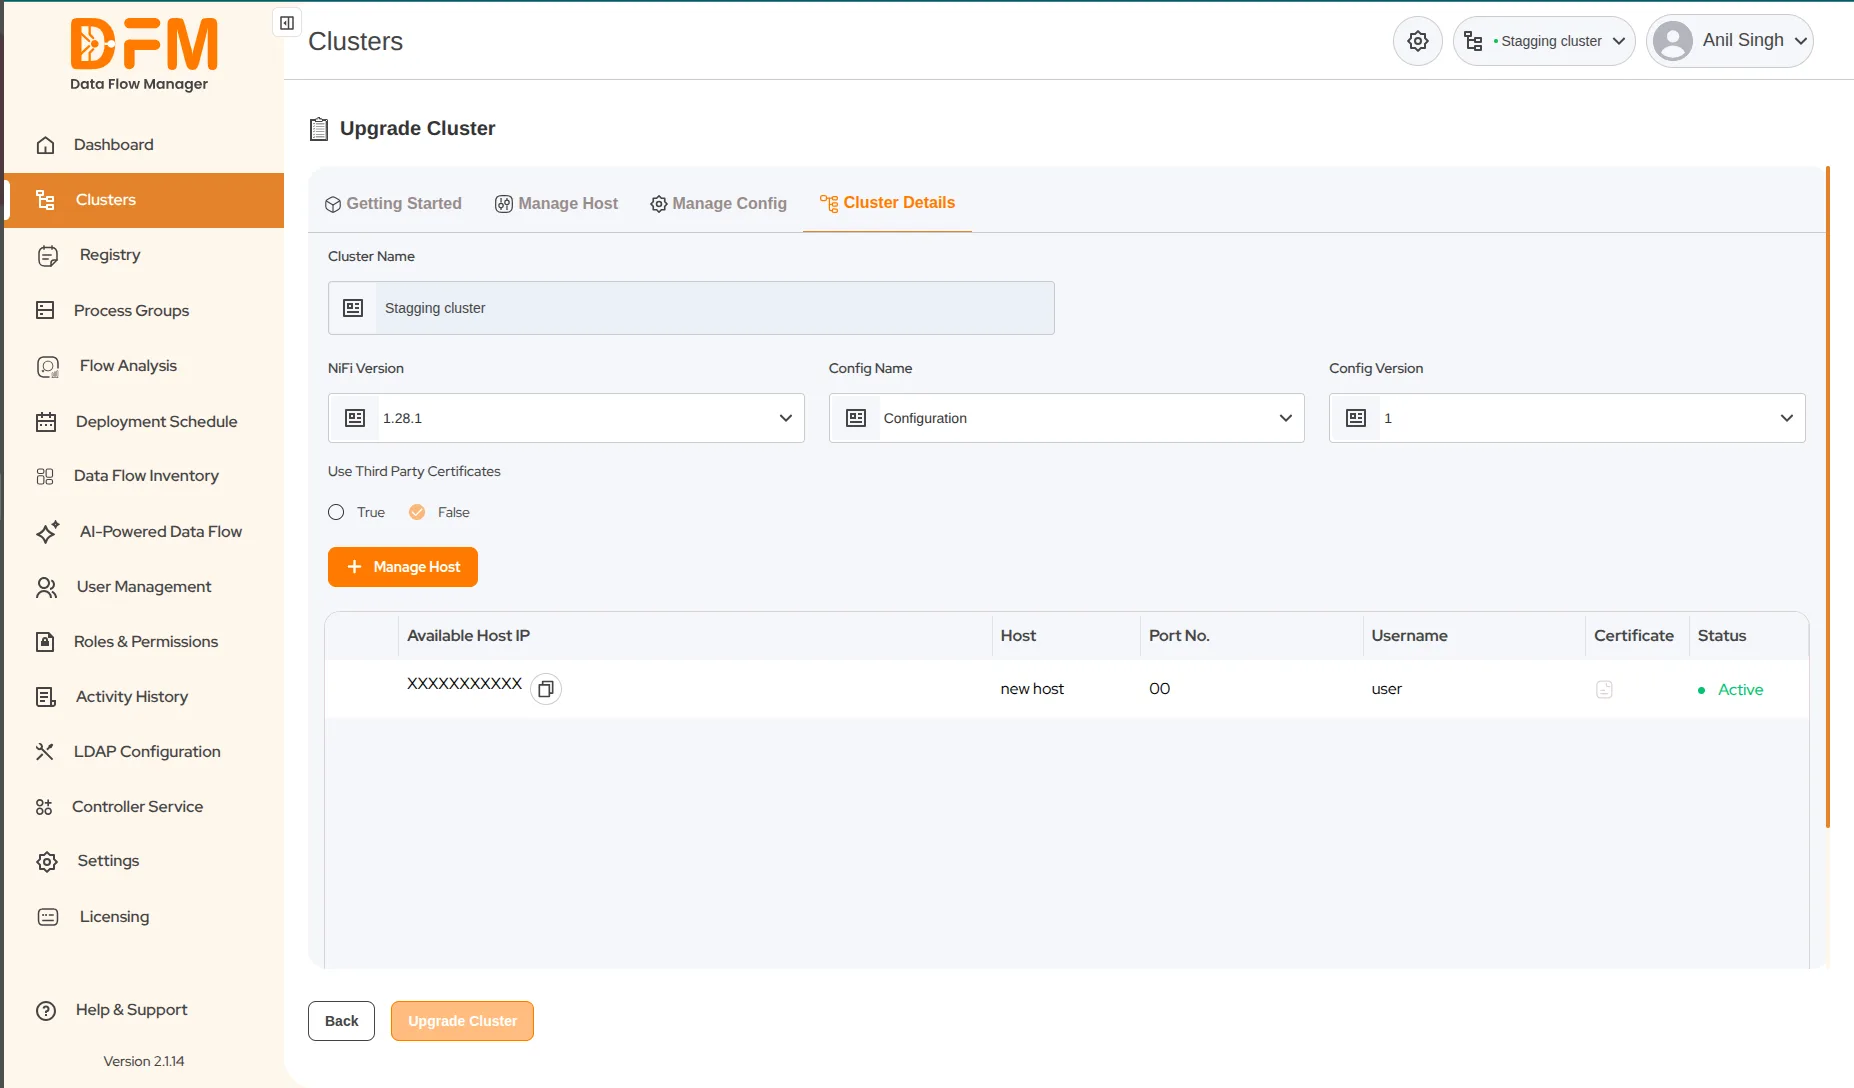
Upgrade a Cluster
The Upgrade Cluster feature allows you to update the cluster's configuration or modify the NiFi version without the need for full redeployment.
1. Access Upgrade Feature:
- Locate the target cluster and click the vertical ellipsis (⋮) menu.
- Select Upgrade from the dropdown options.
2. Modify Details: In the upgrade window, you can update the following:
- NiFi Version: Select a newer version from the dropdown to upgrade your NiFi instance.
- Configuration Name: Choose a different configuration profile to apply to the cluster.
- Configuration Version: Select the desired version of the configuration file.
3. Initiate Upgrade:
- Once the required changes are made, click Upgrade Cluster to begin the process.